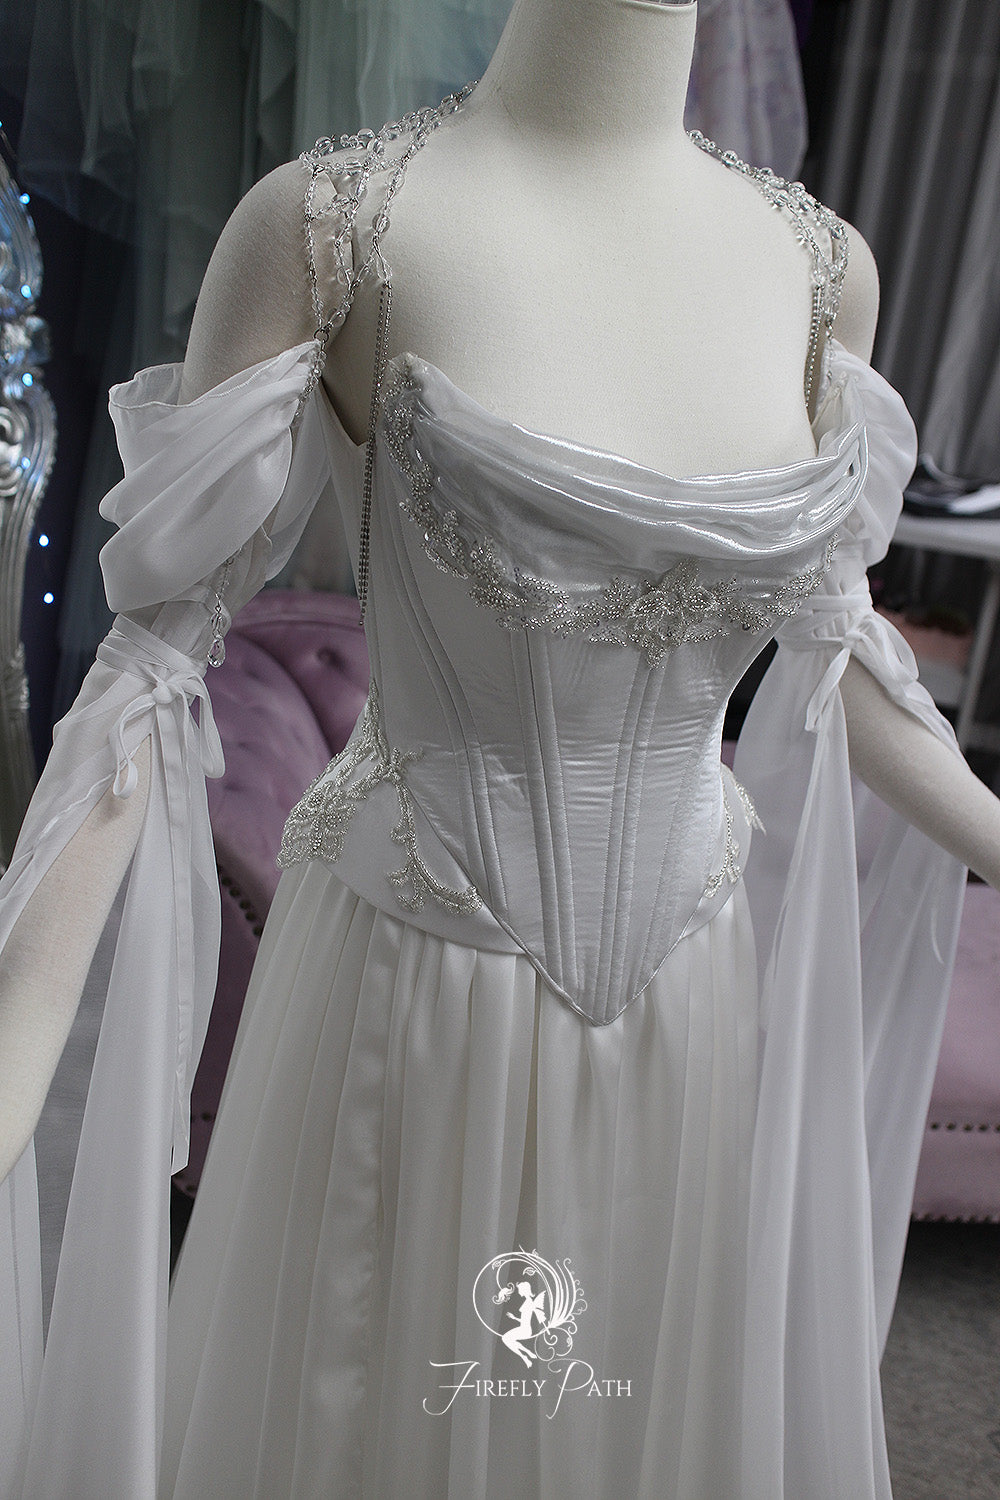
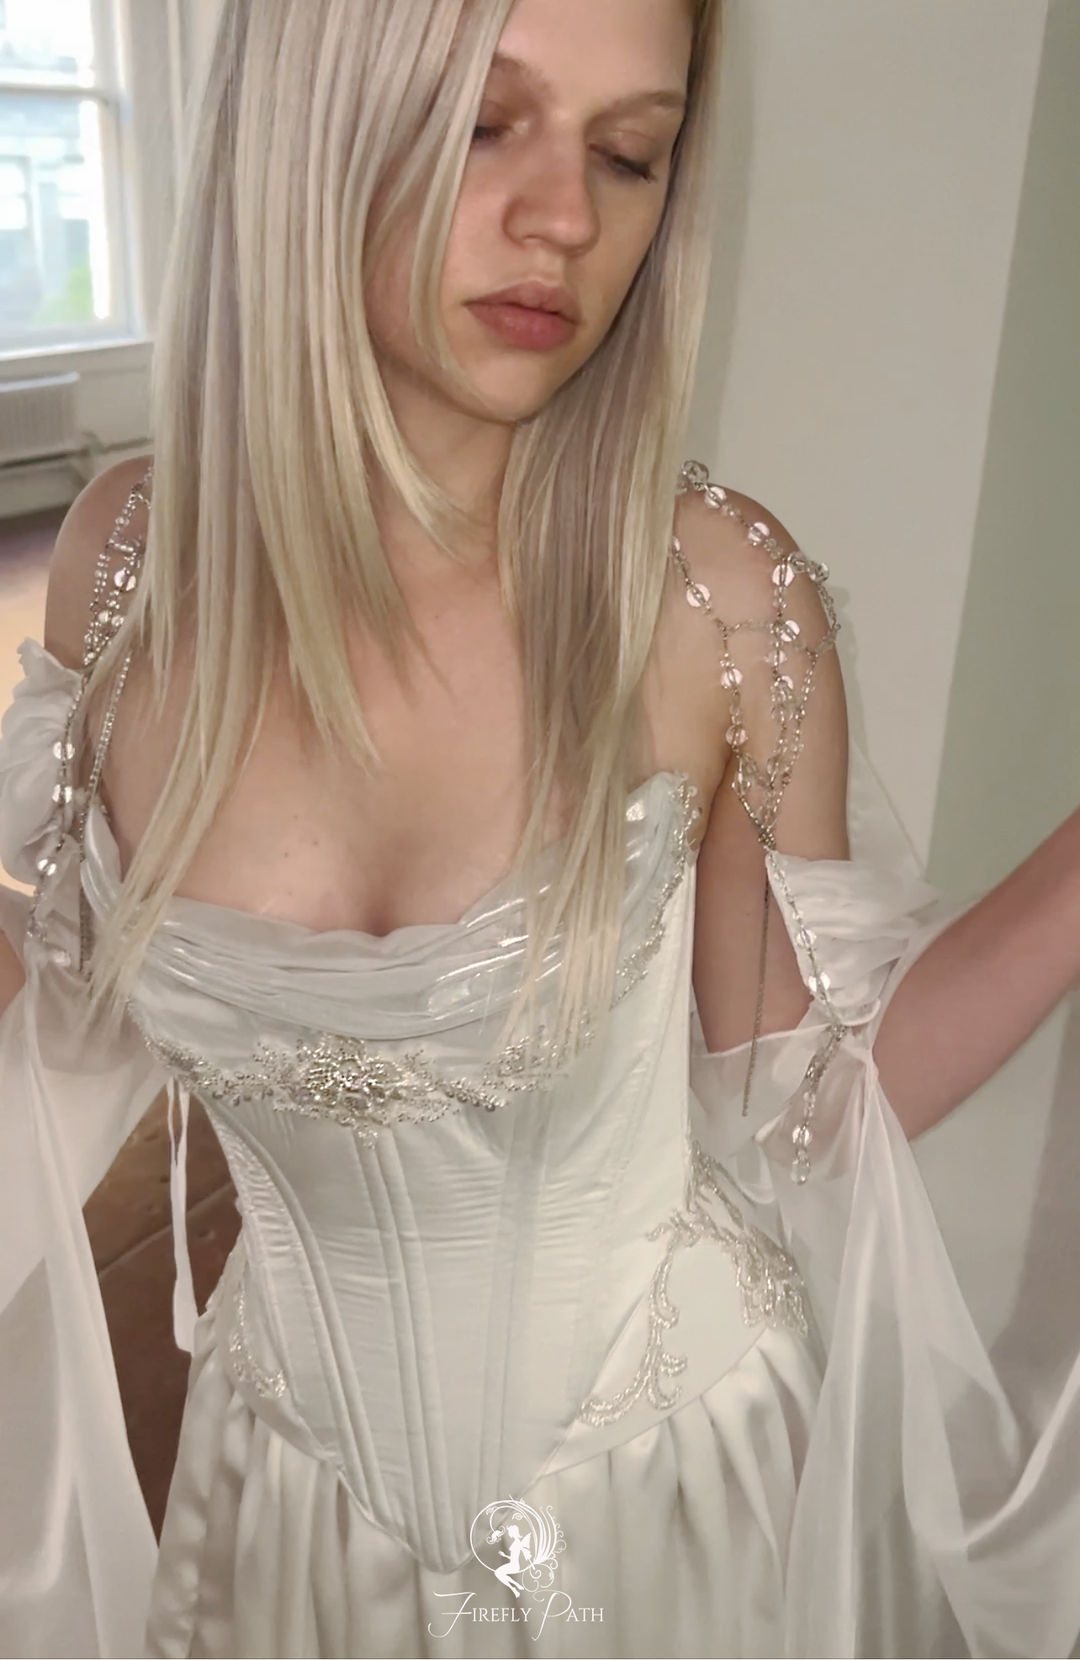
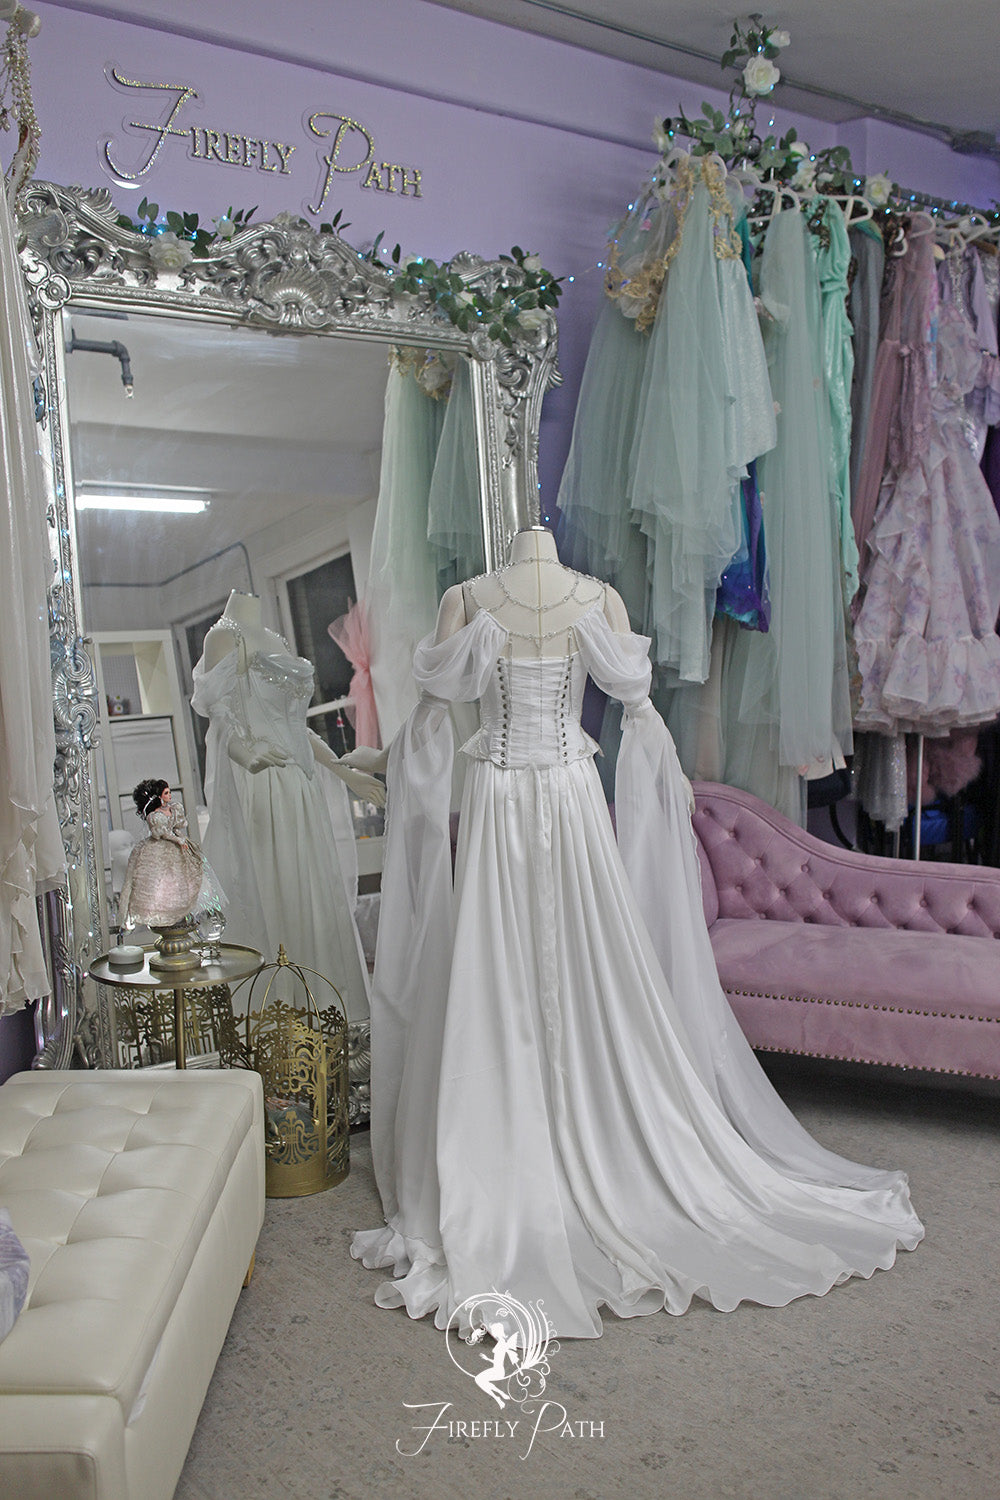
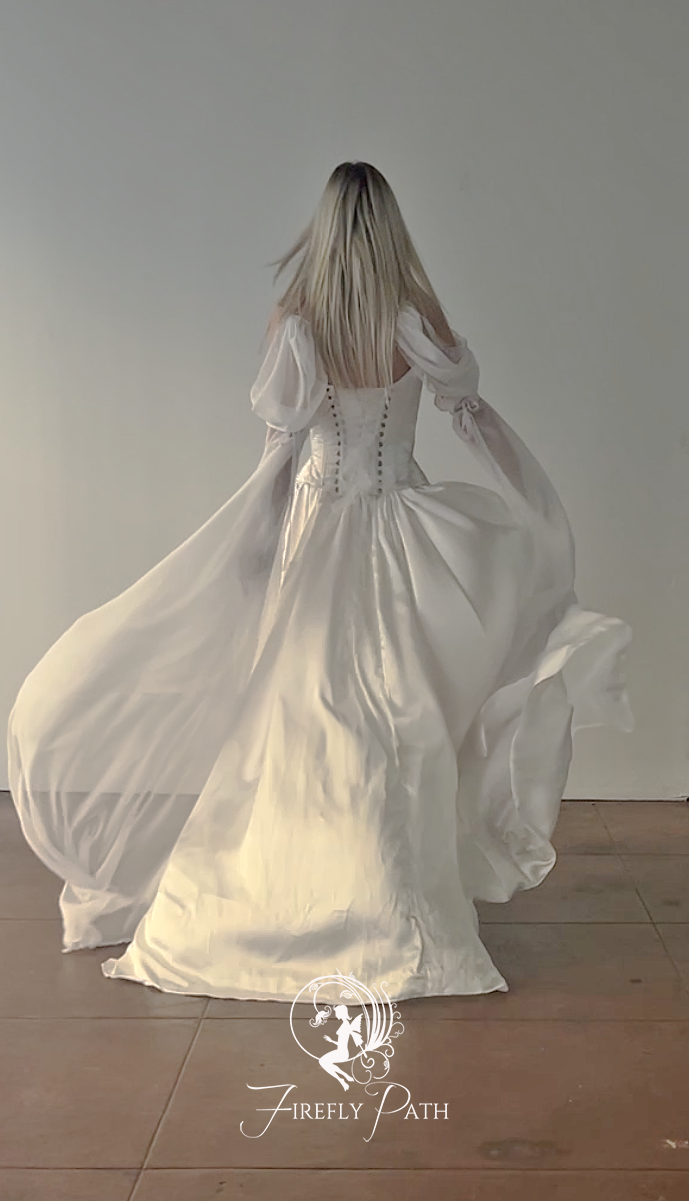
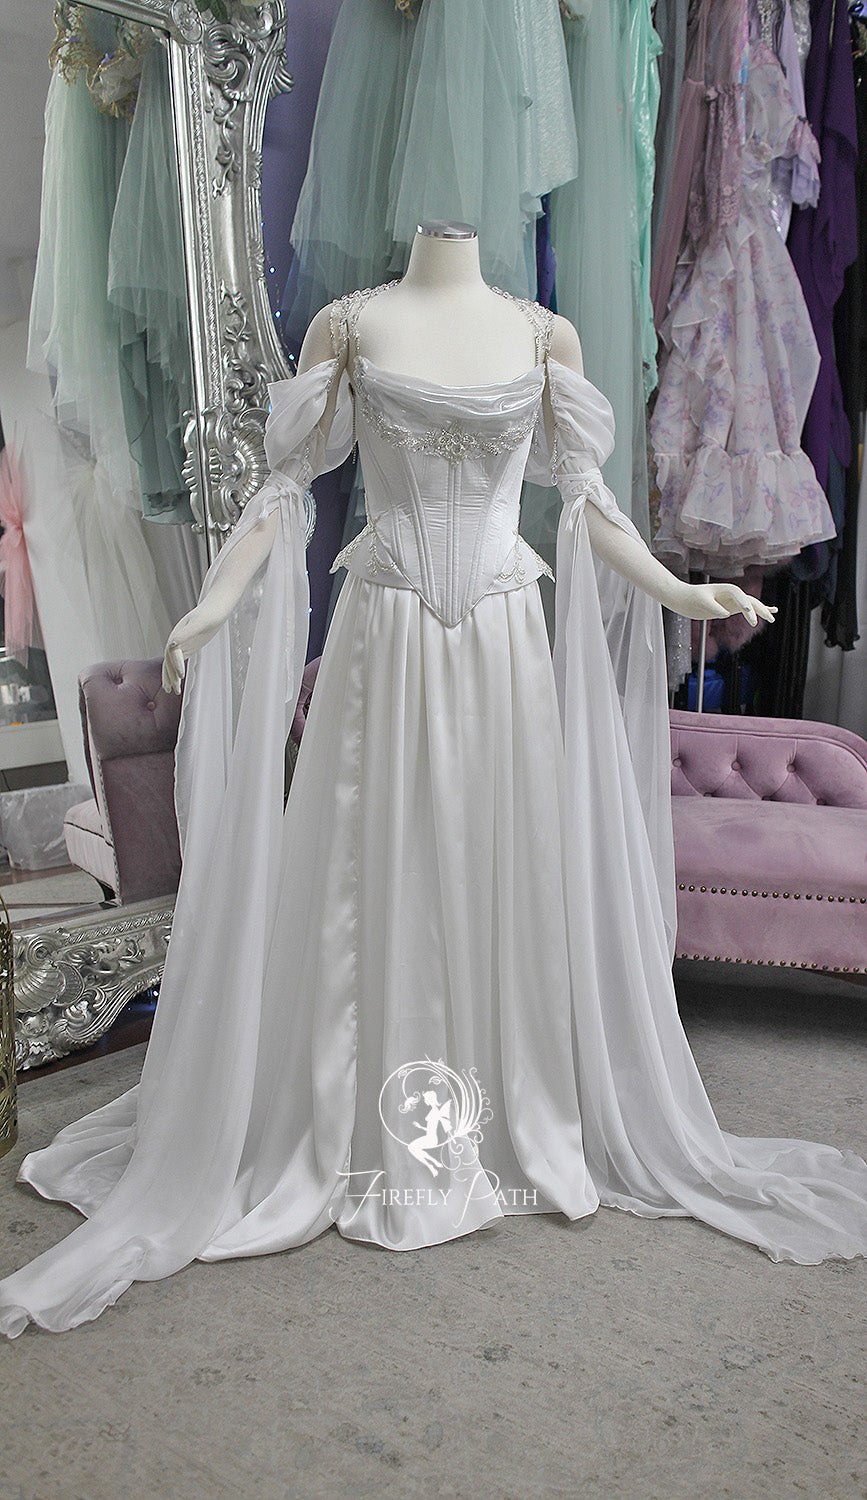
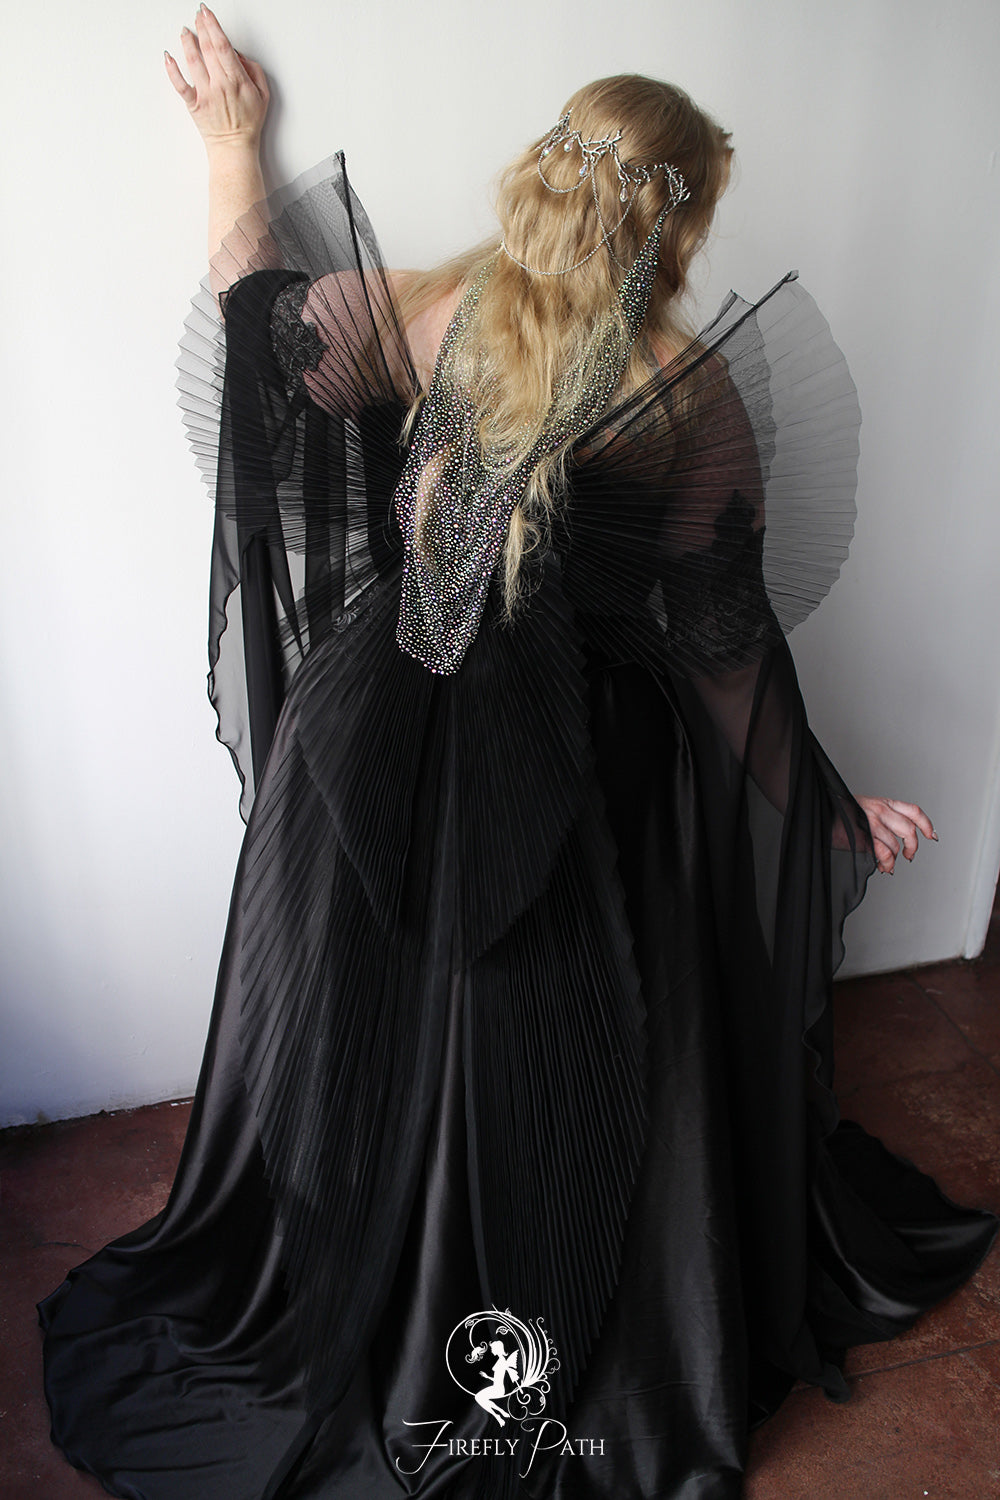
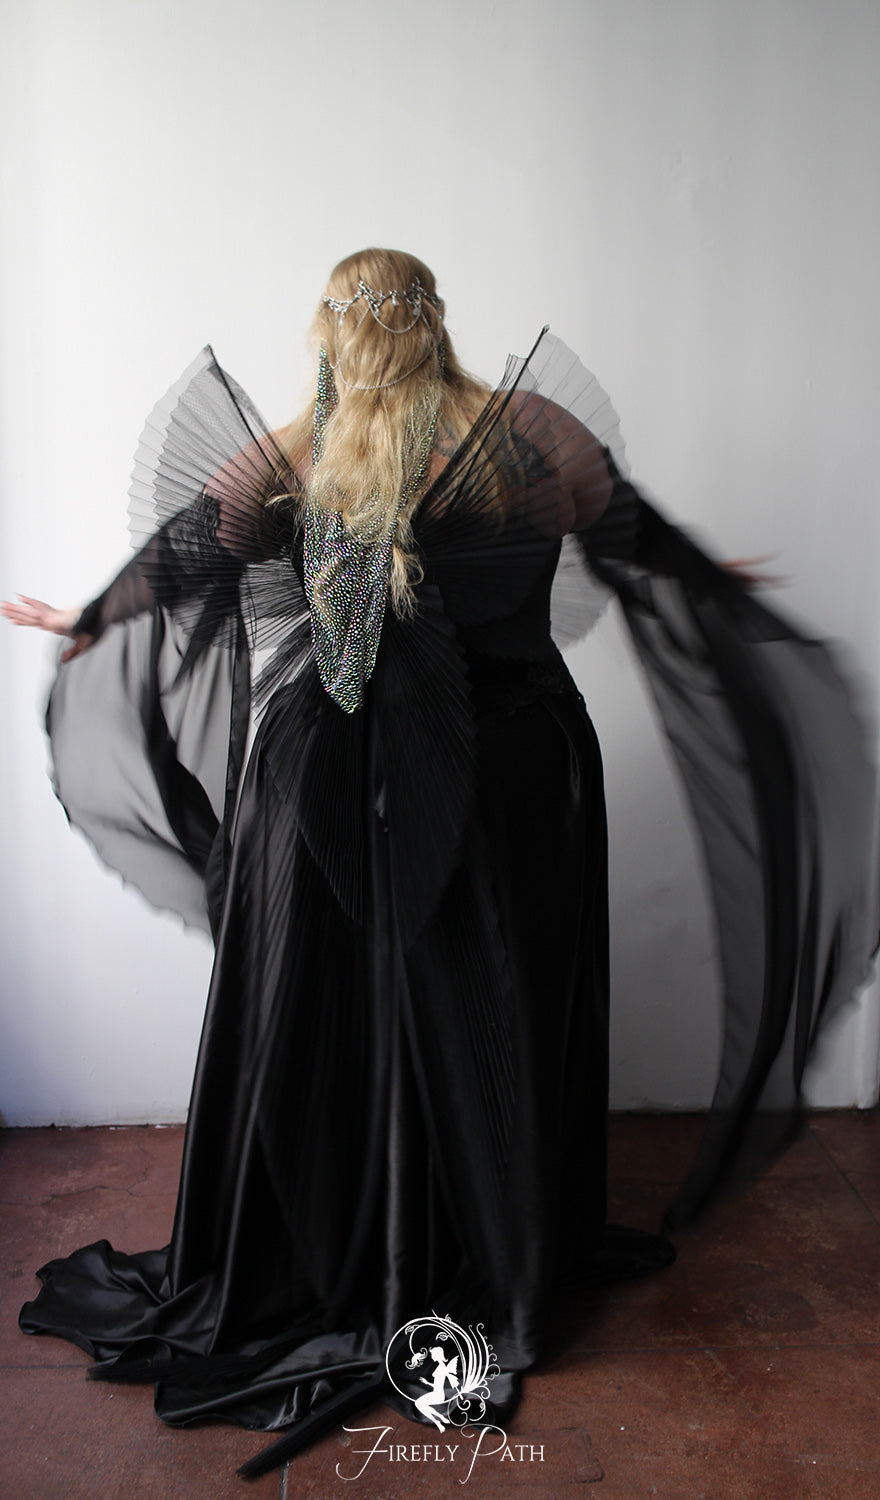
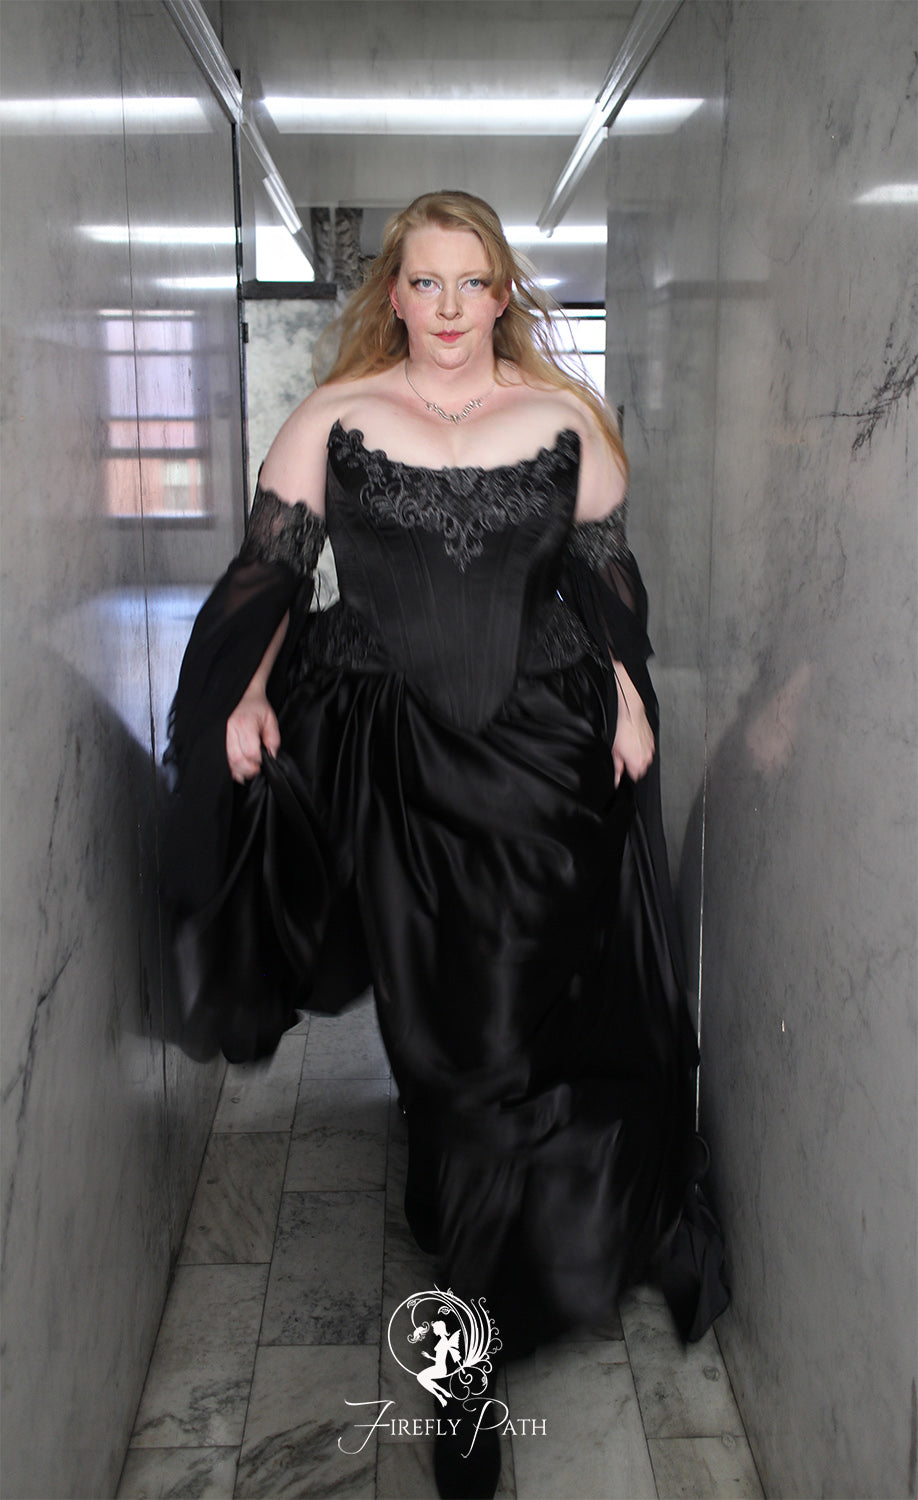
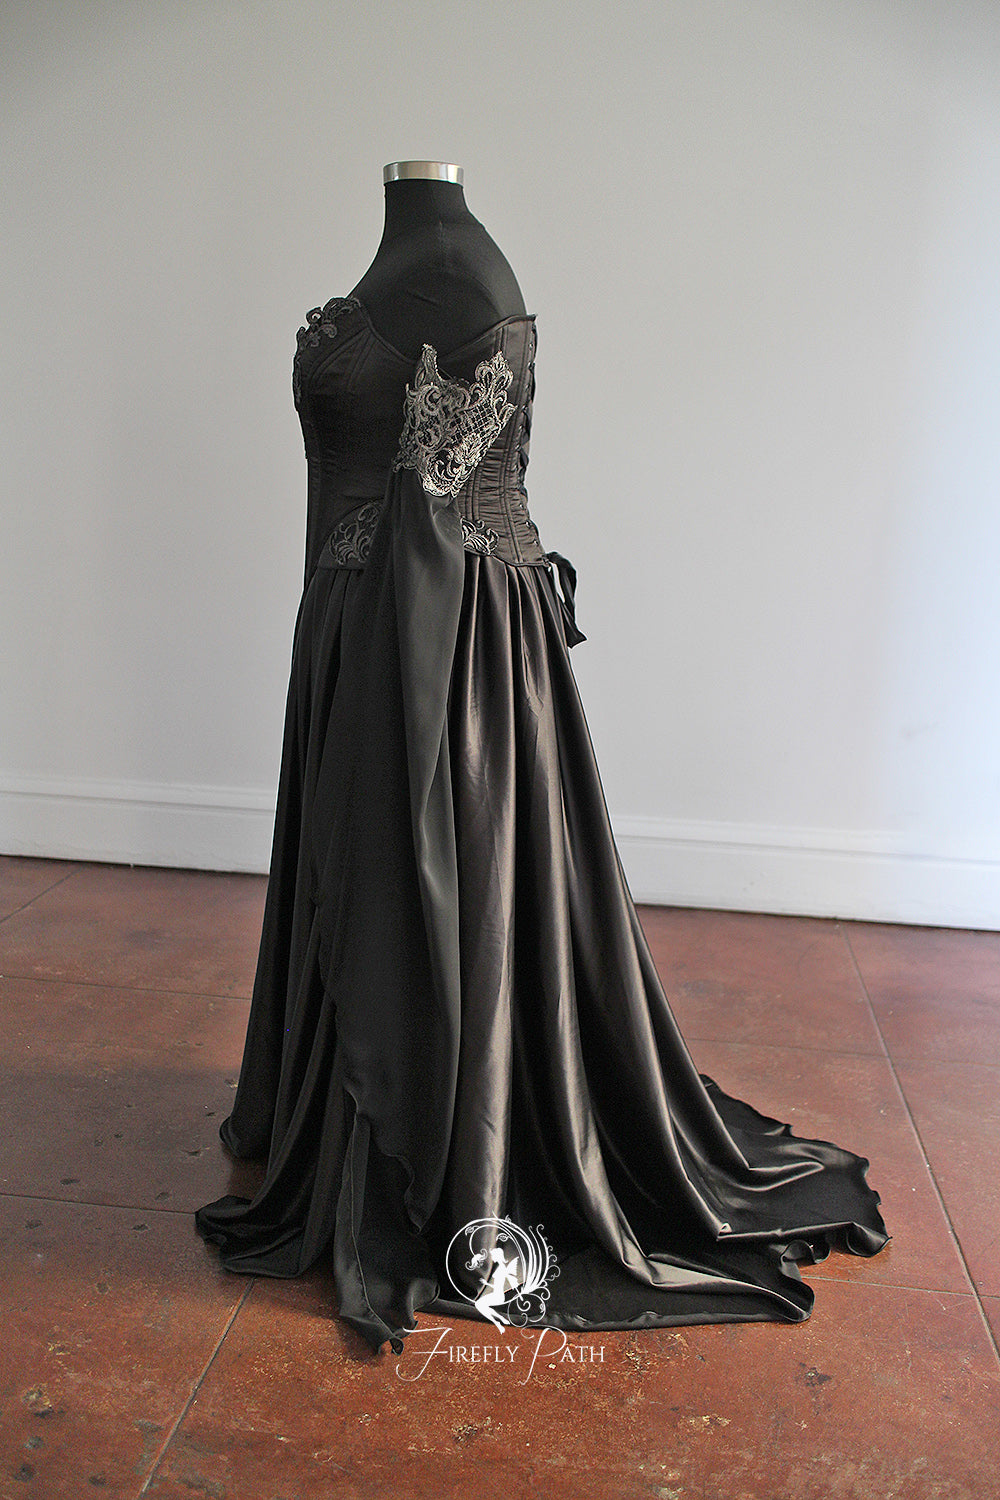
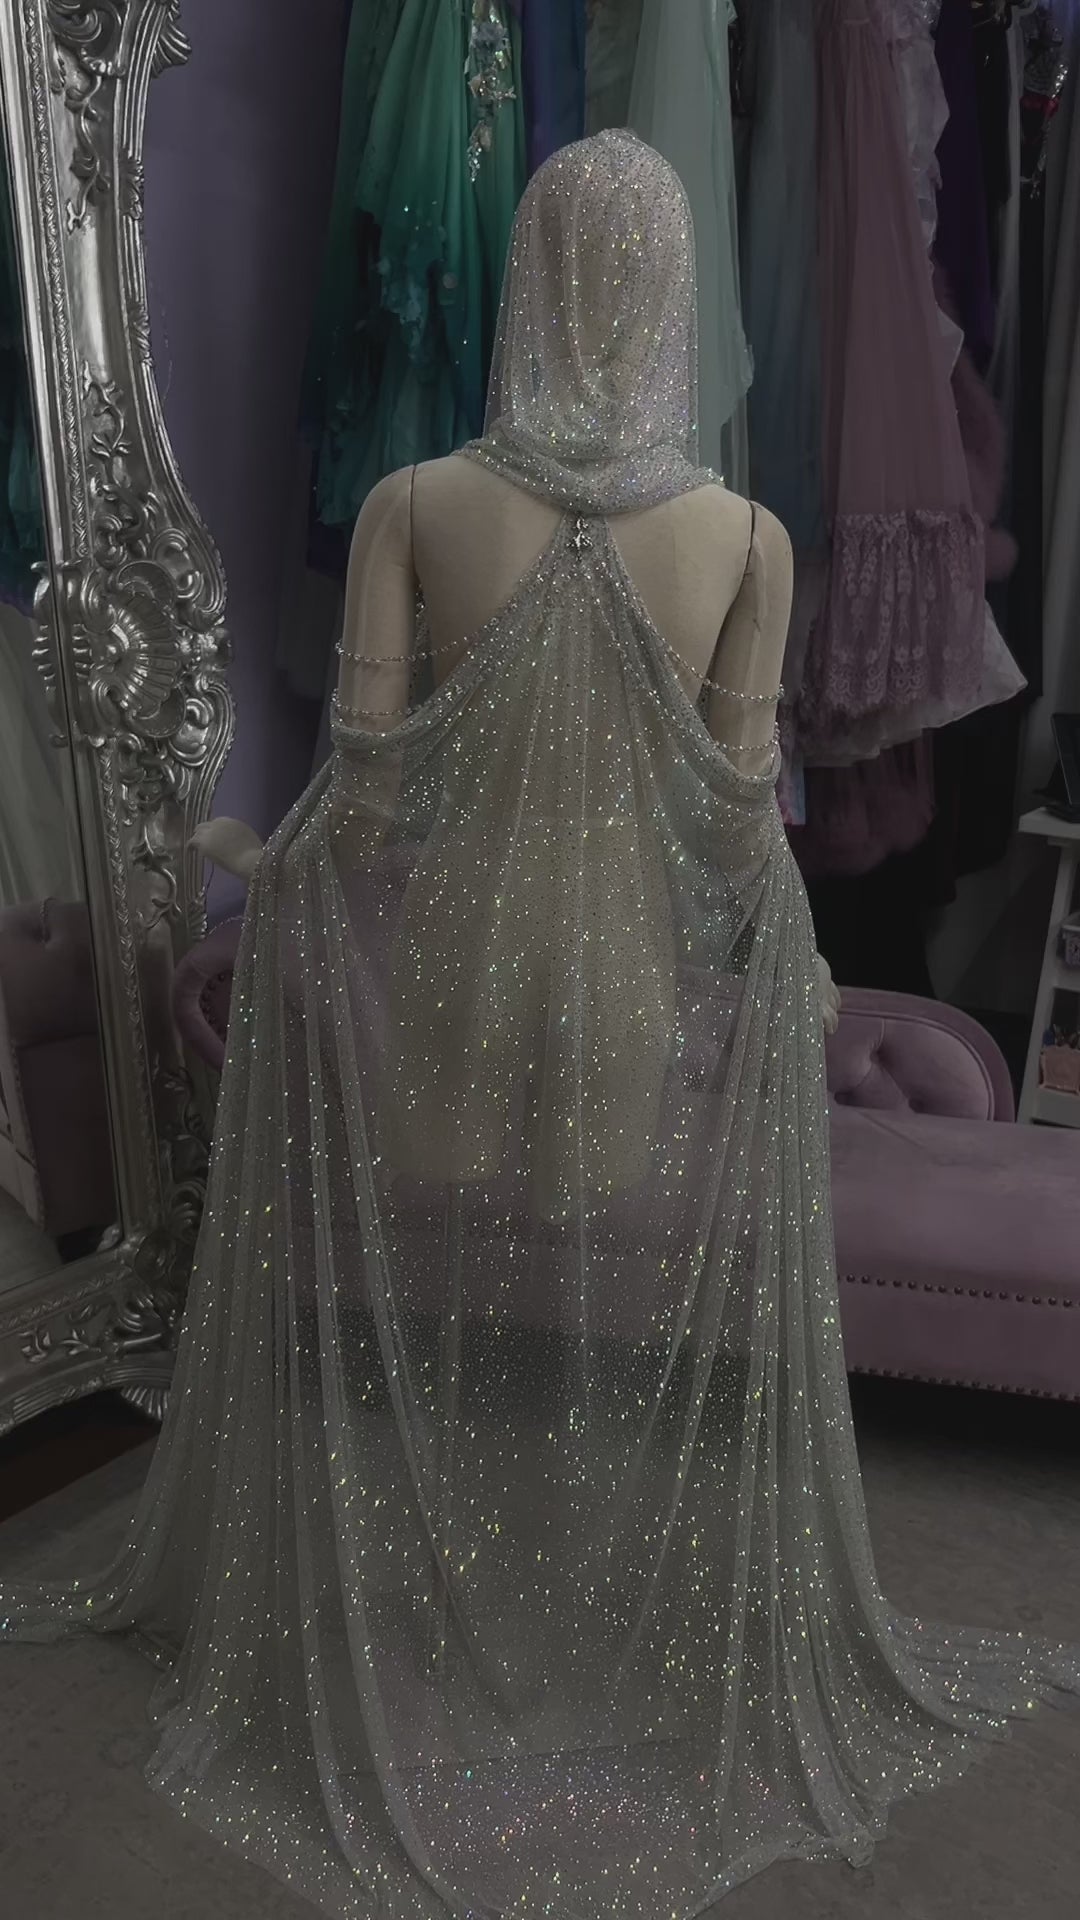
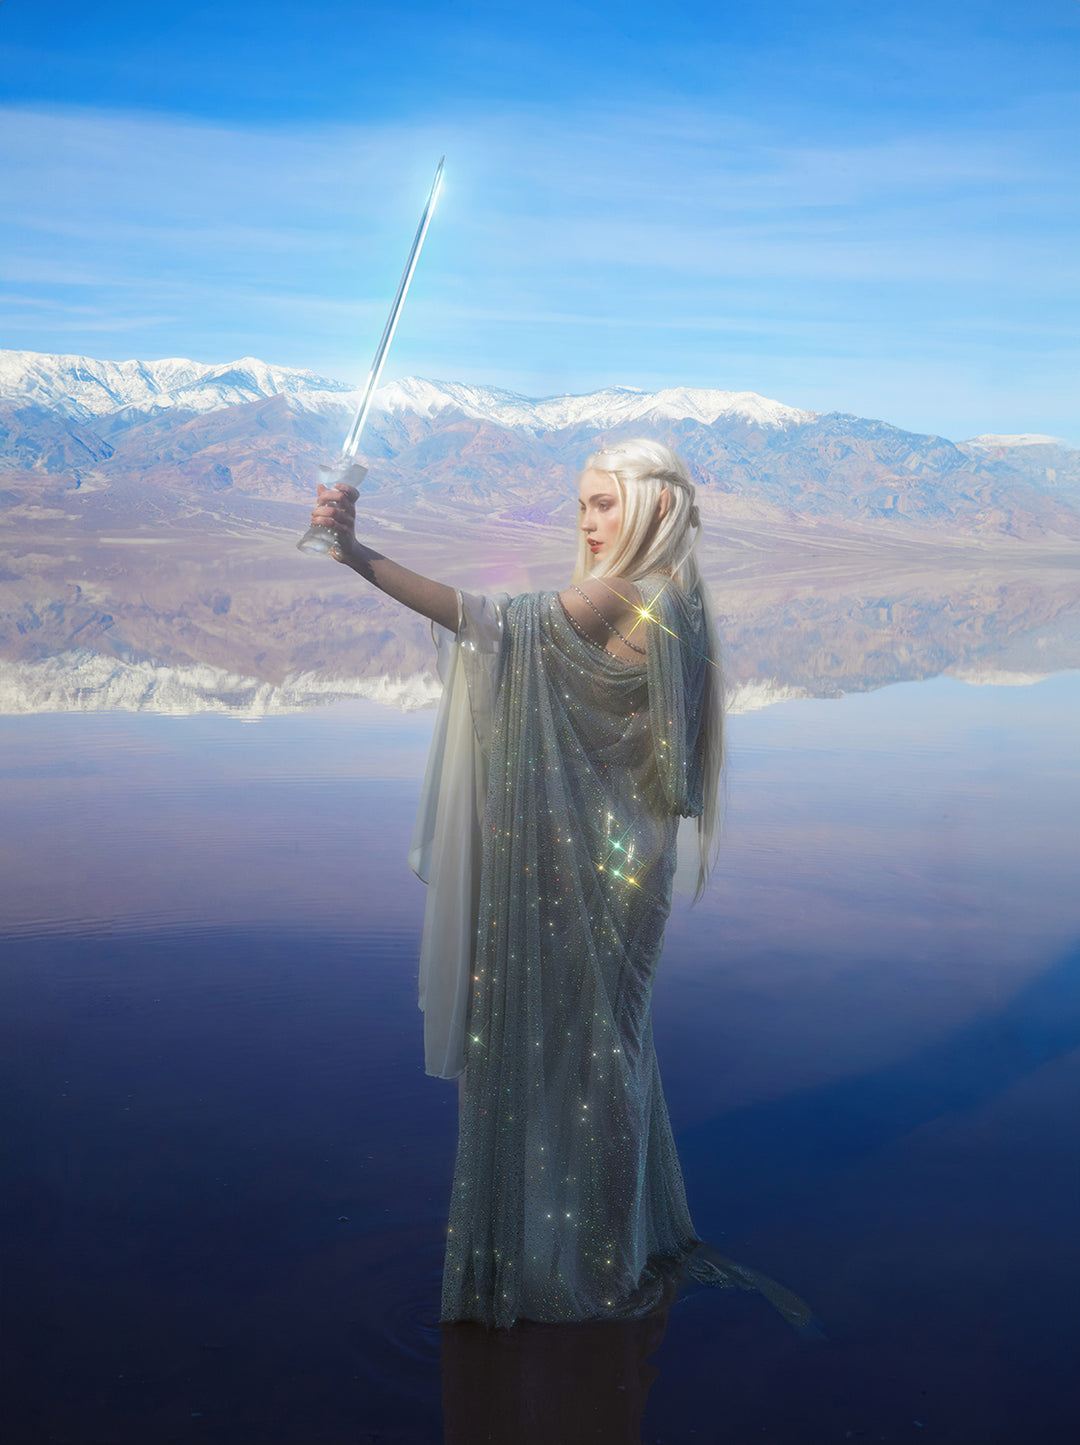
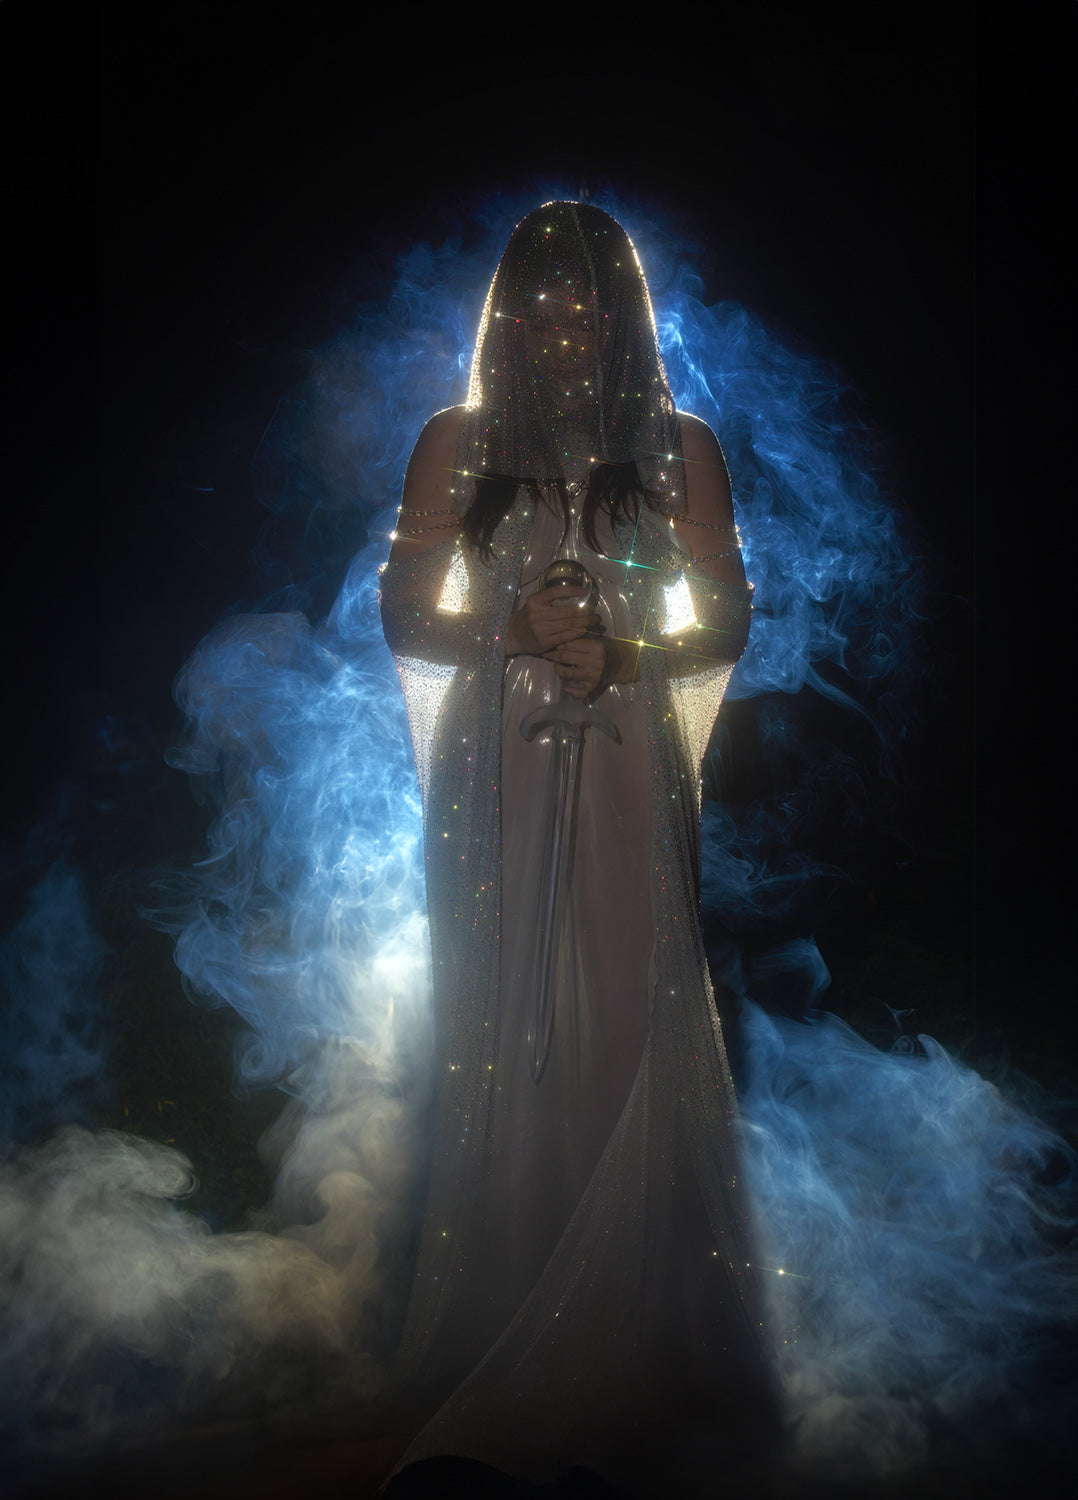
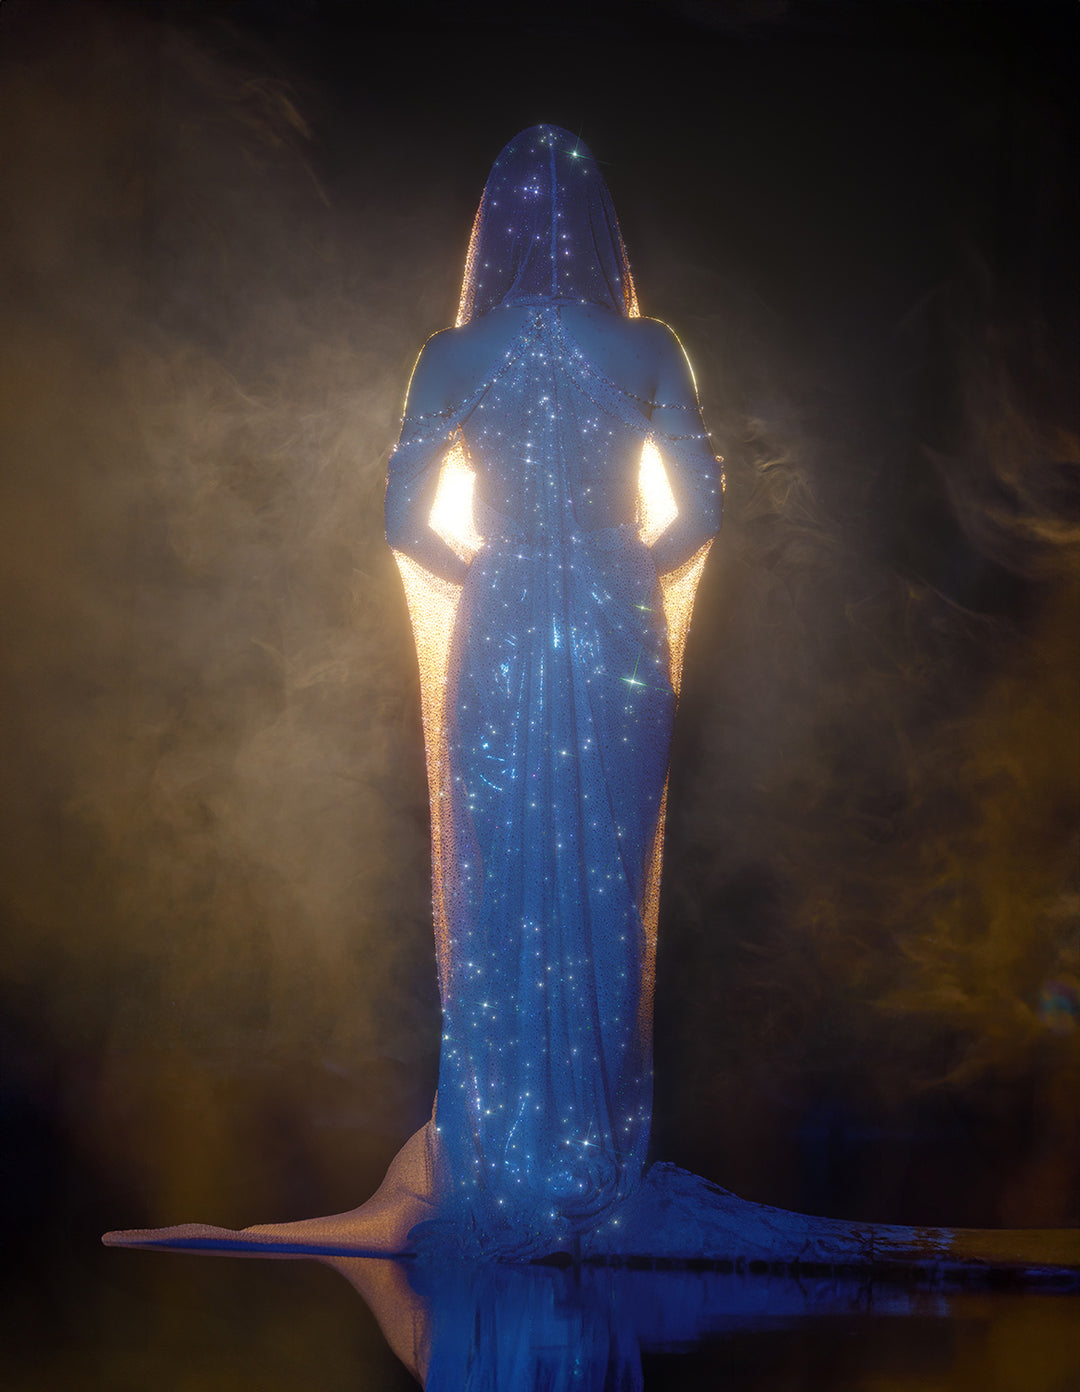
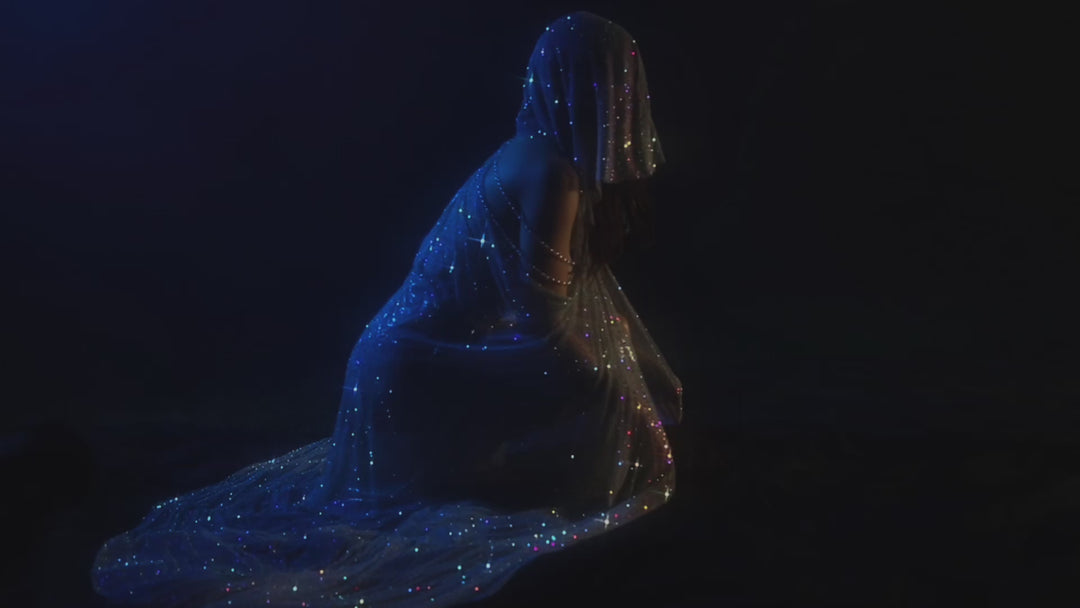
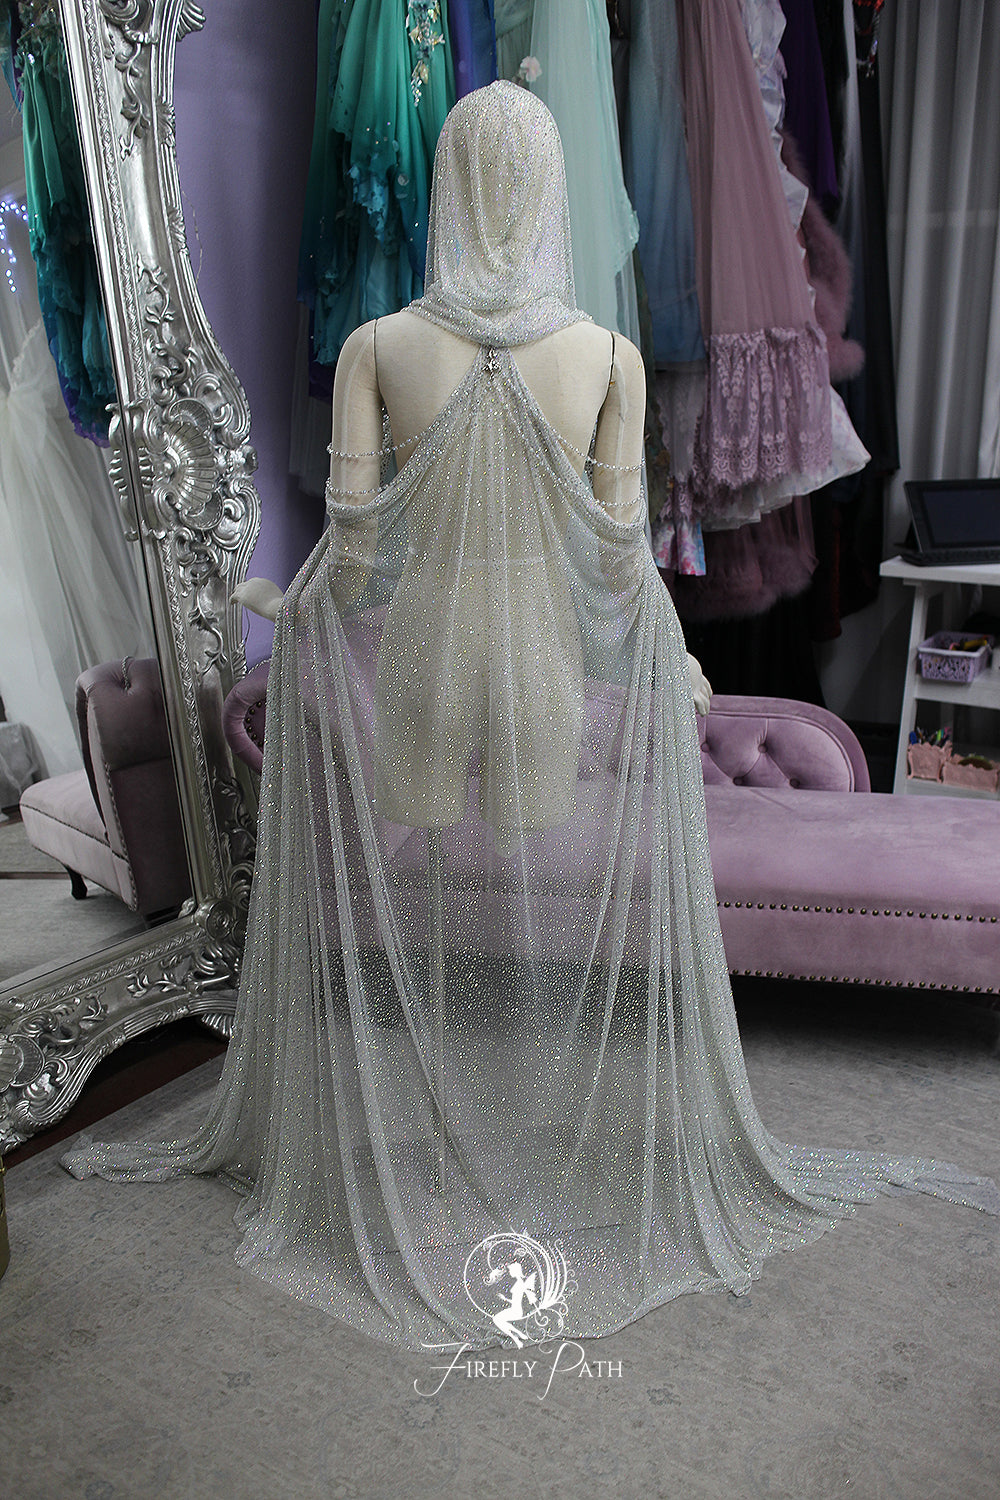
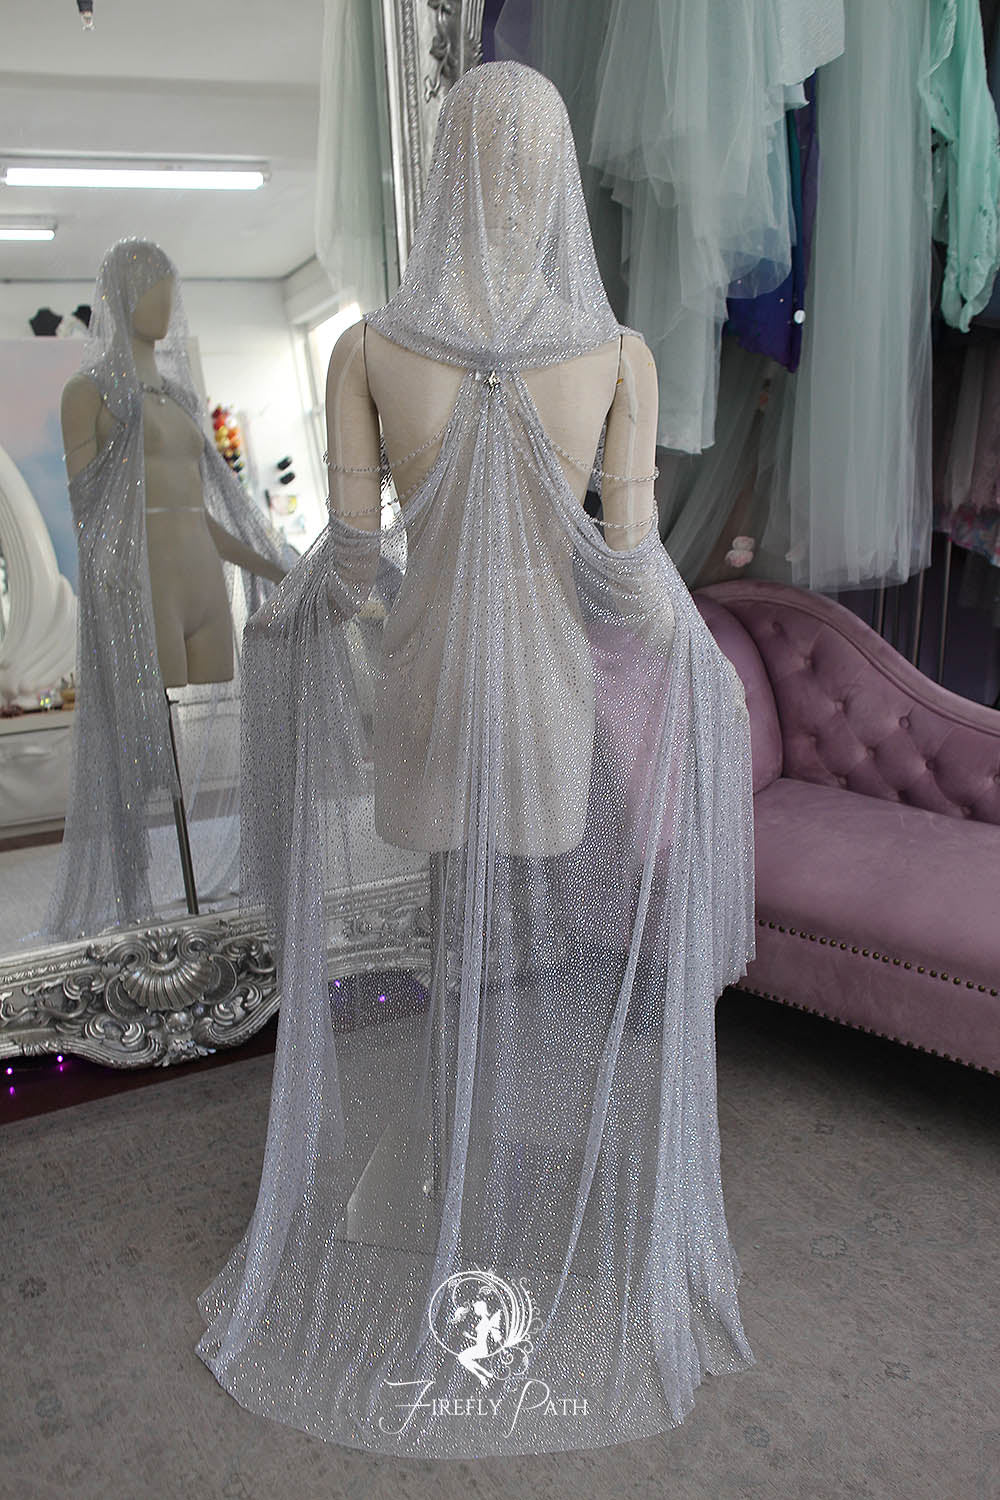
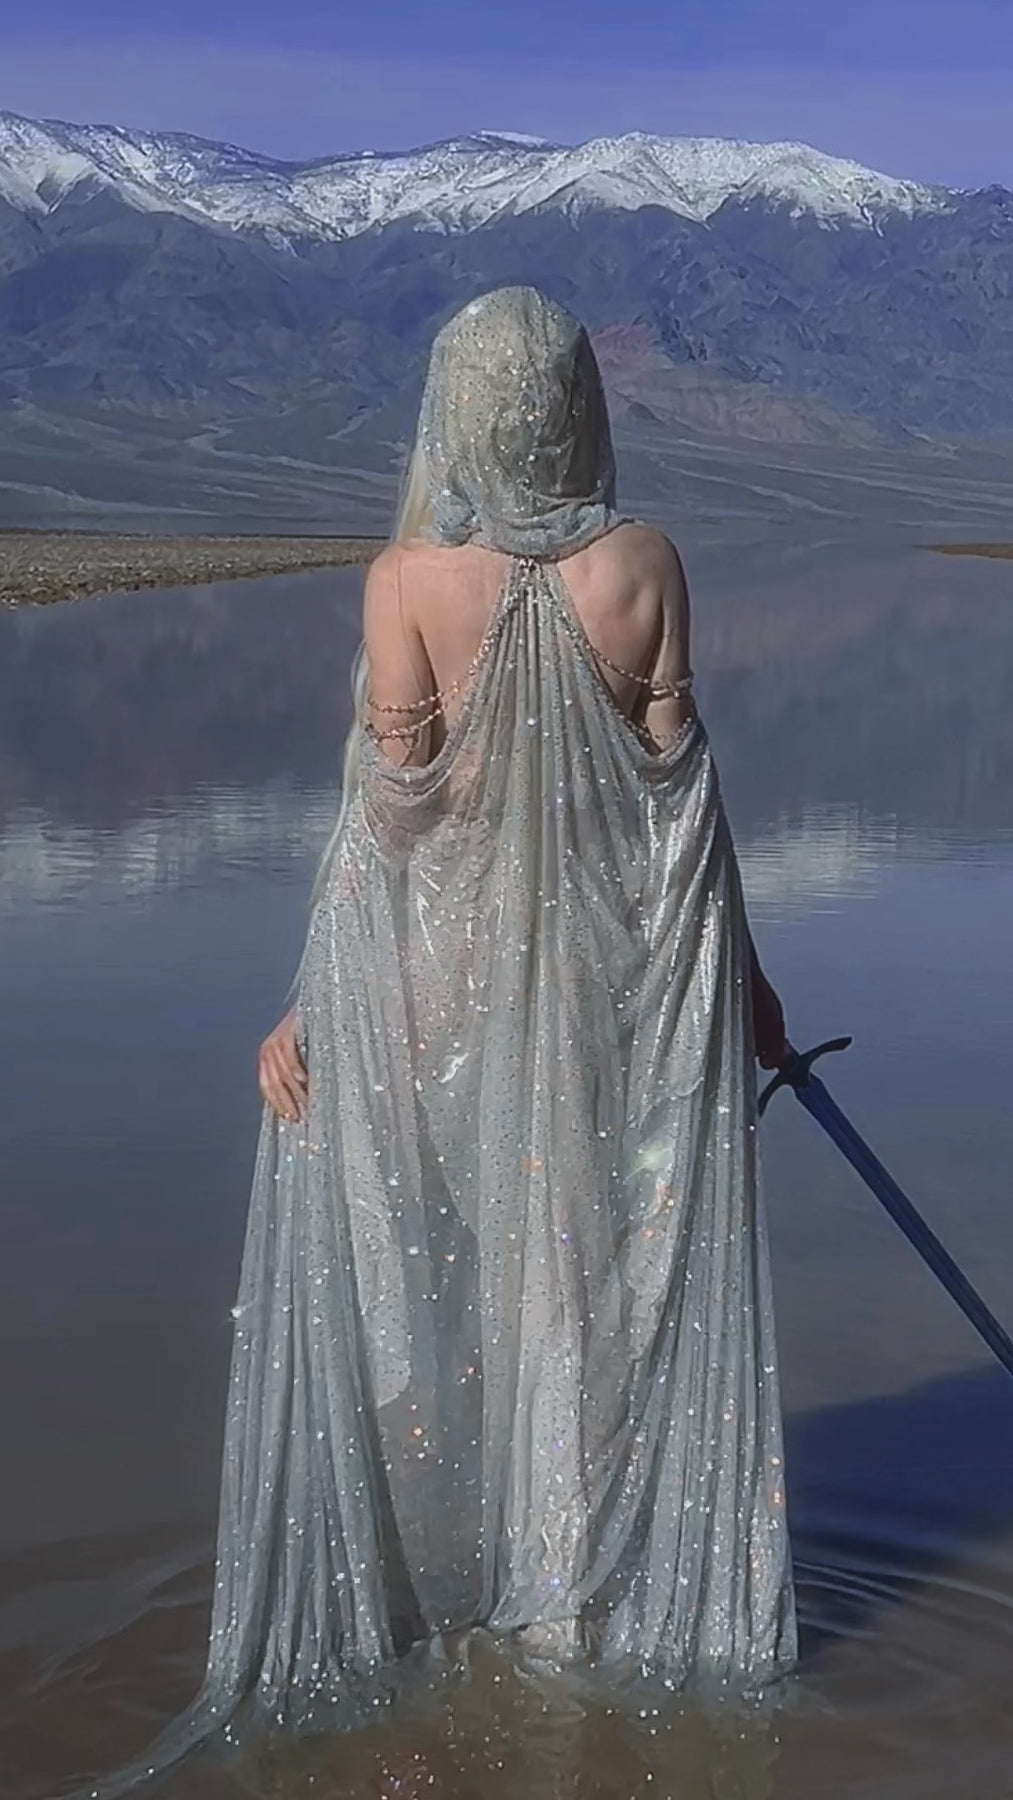
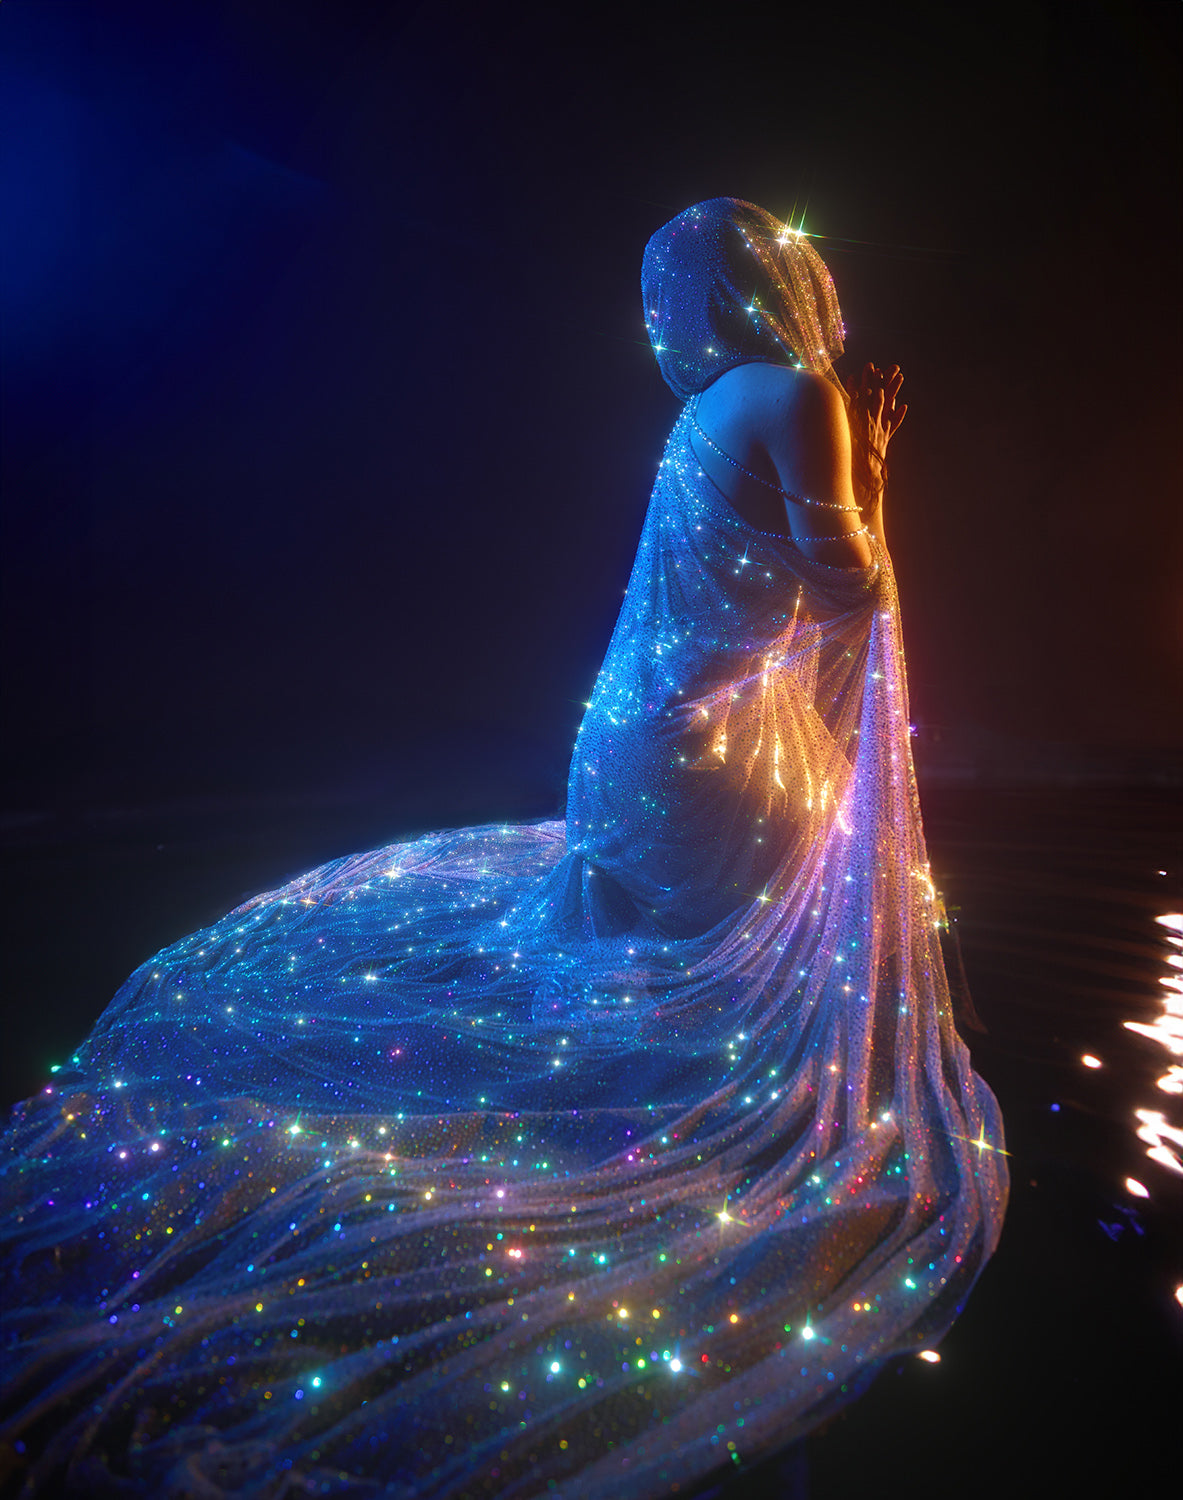
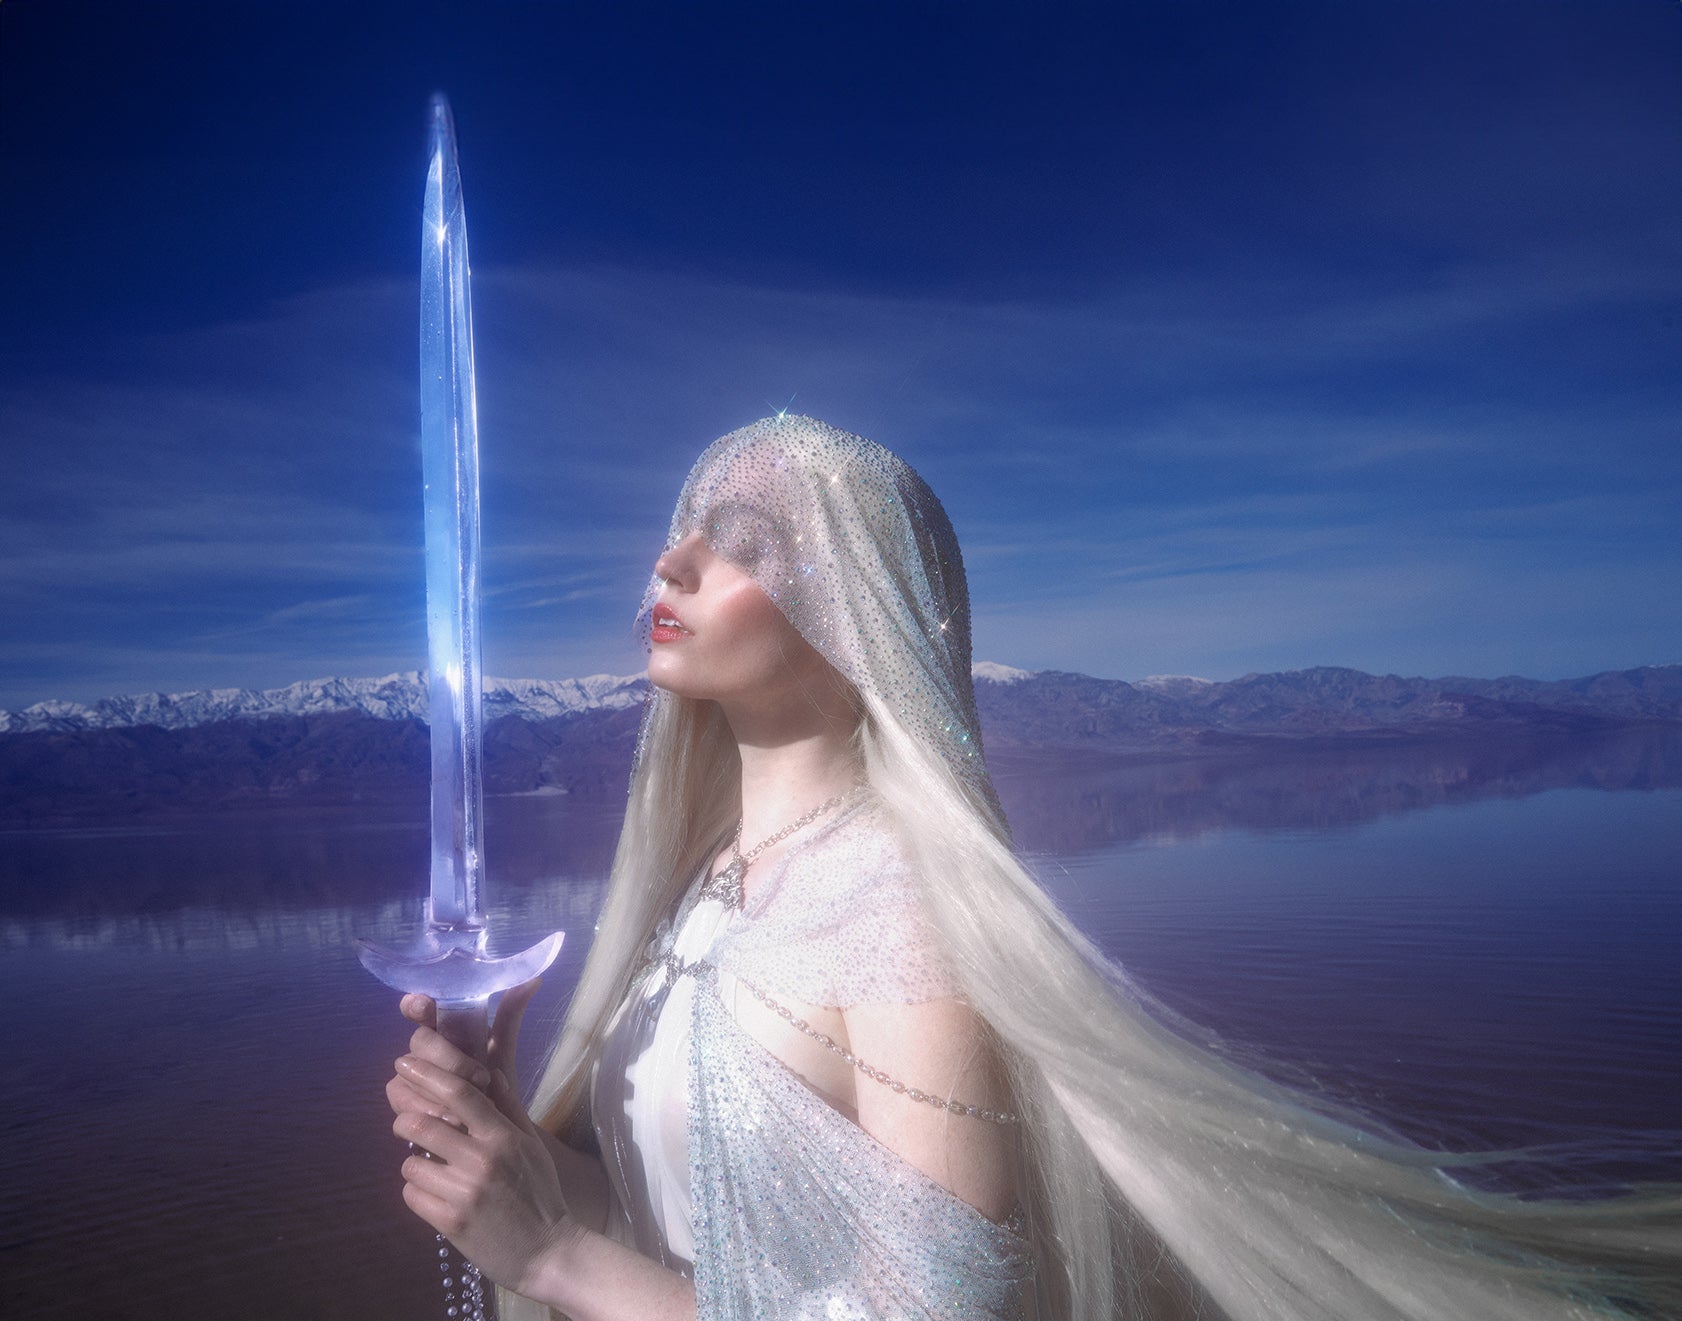
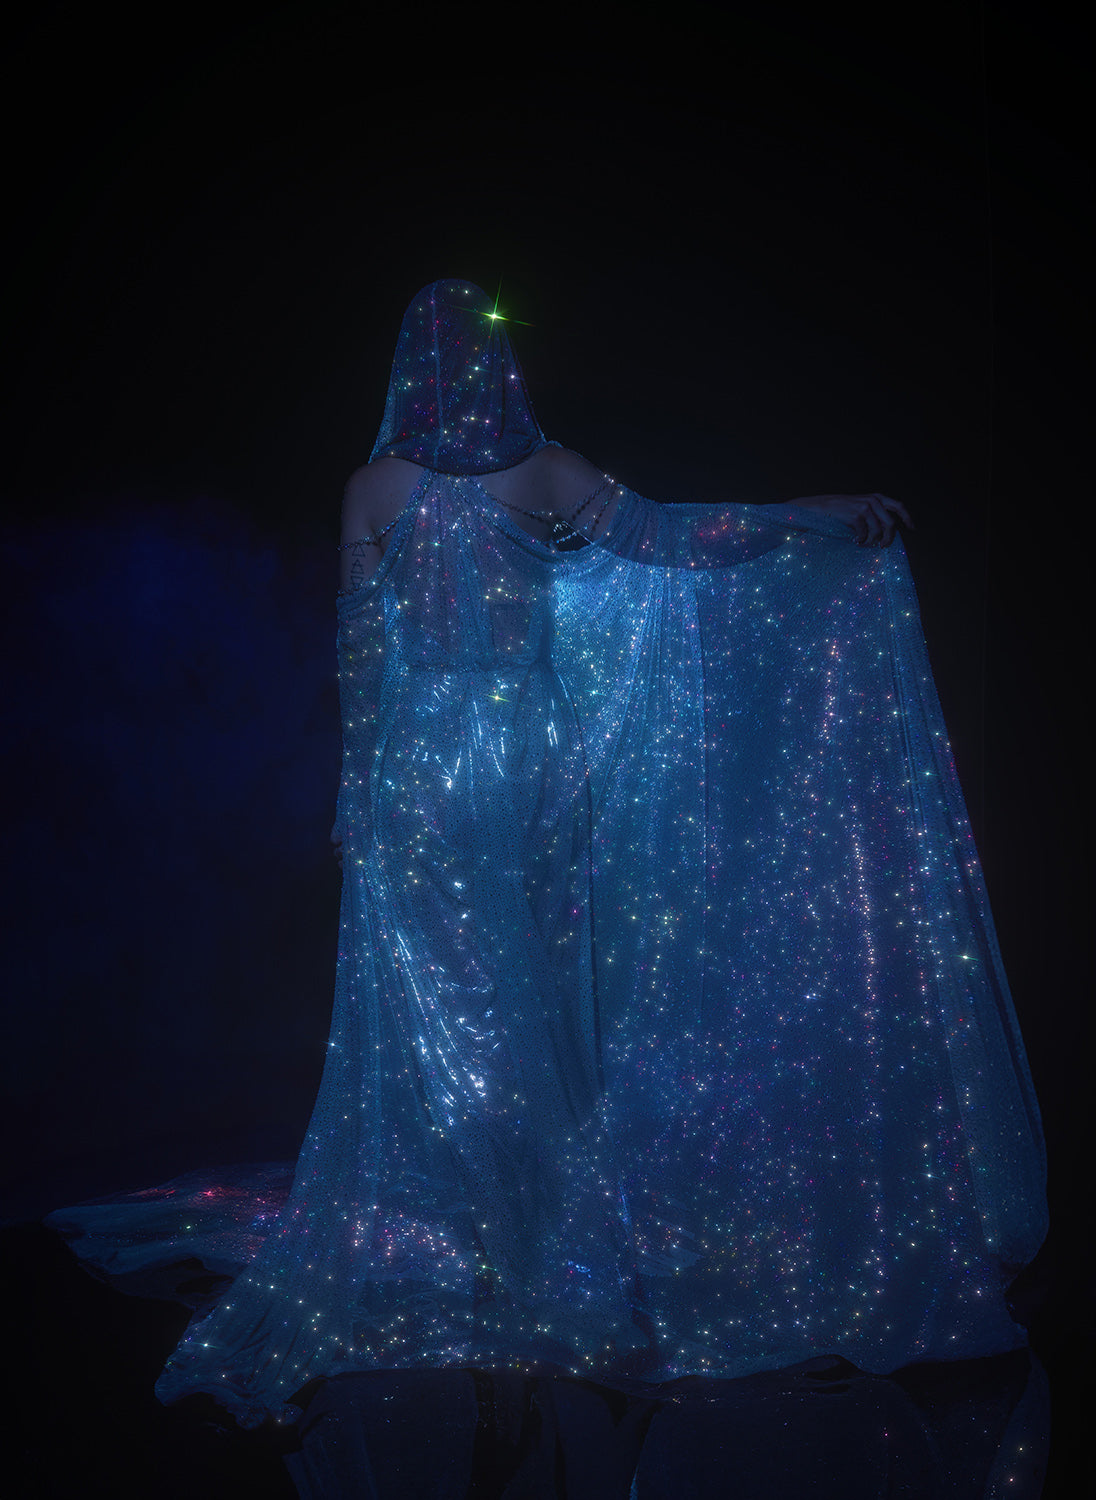
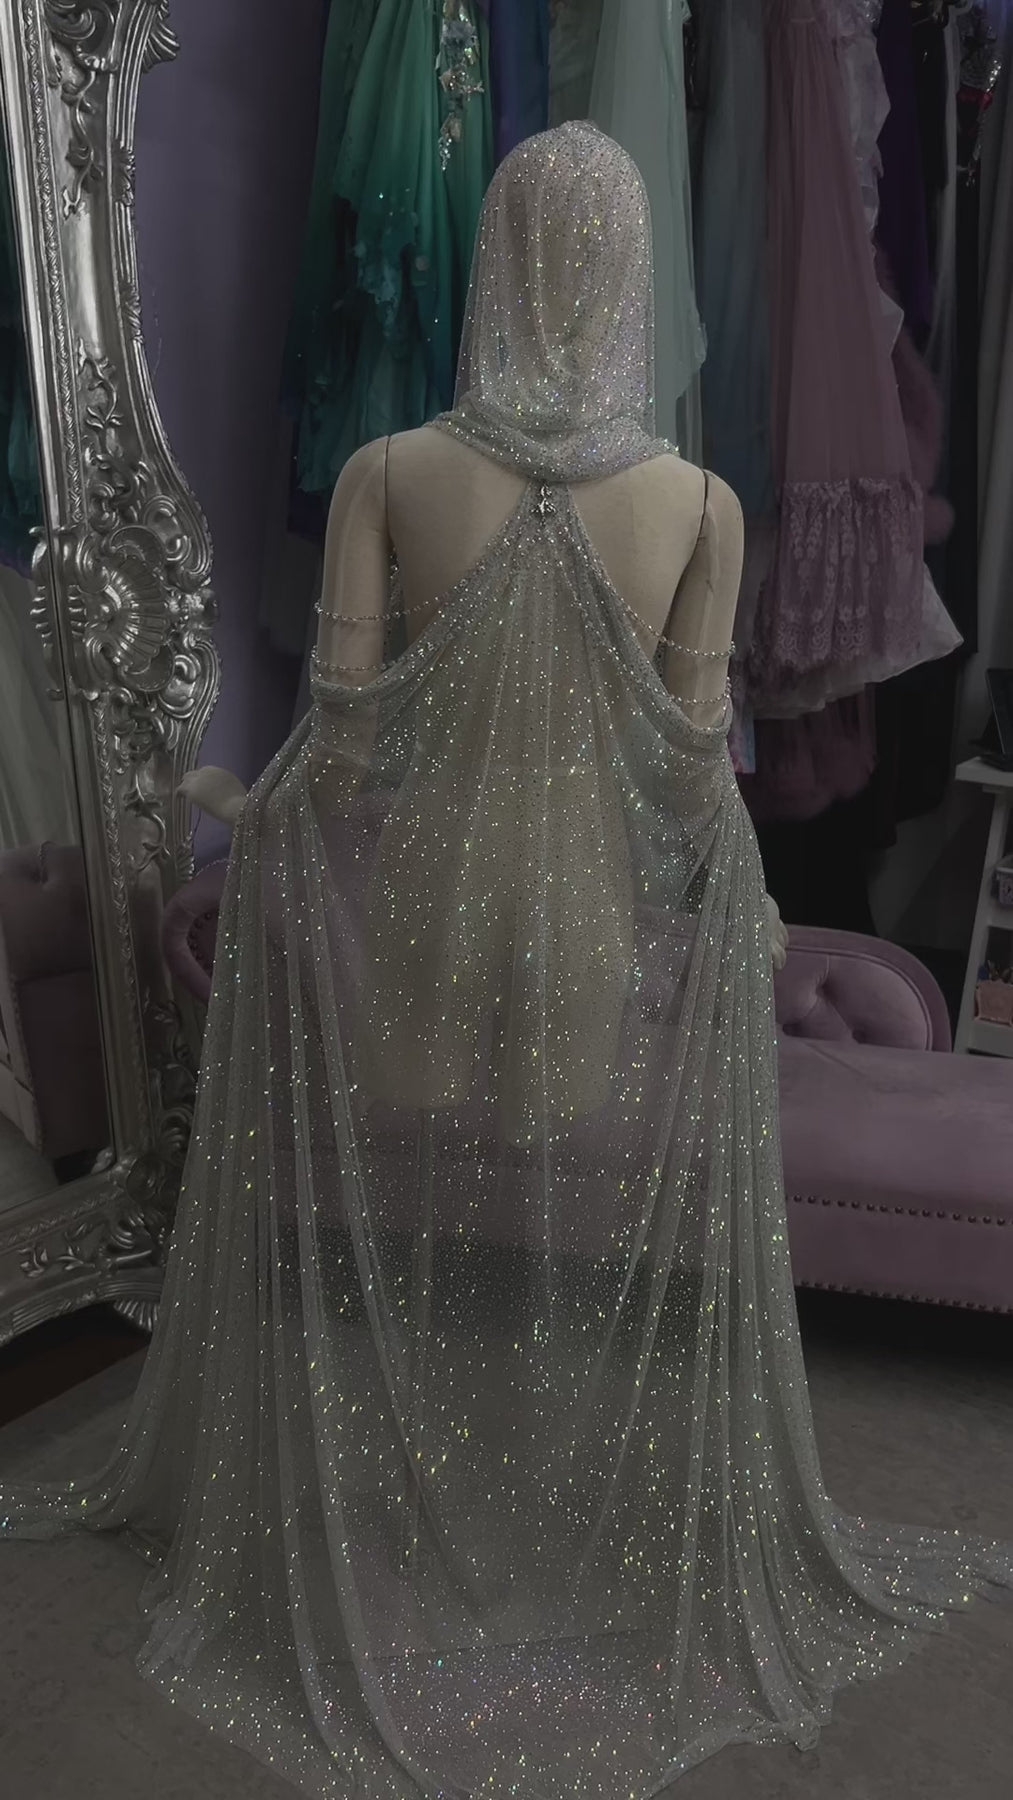
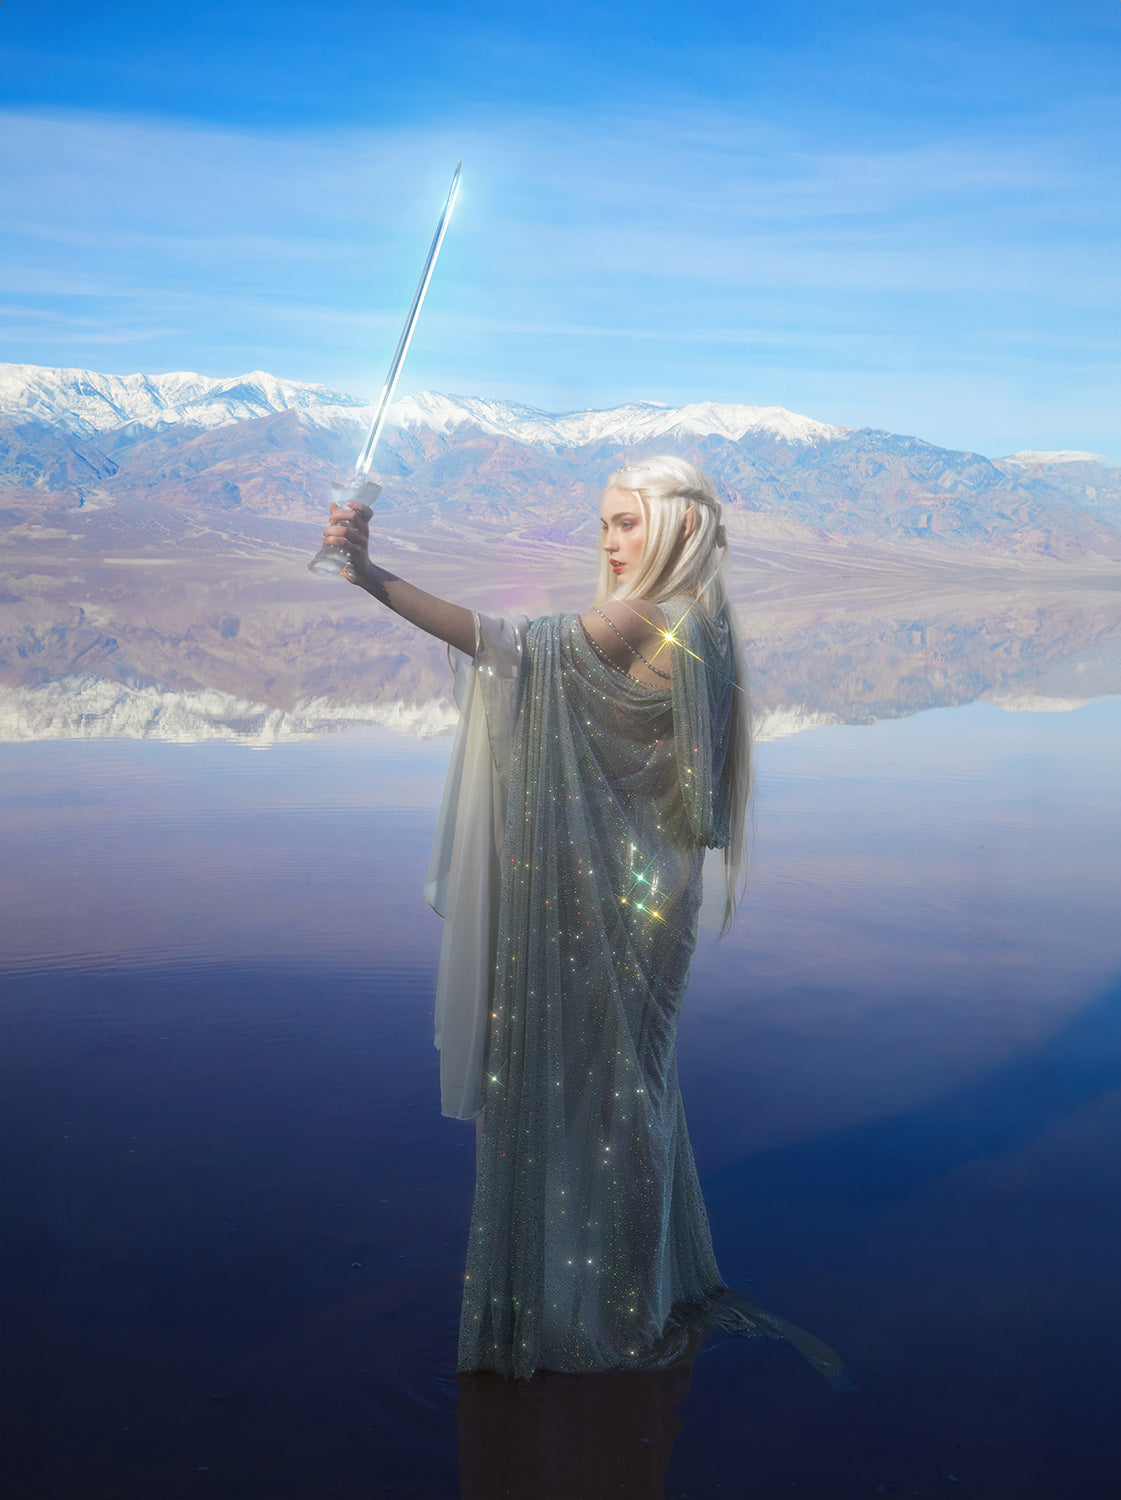
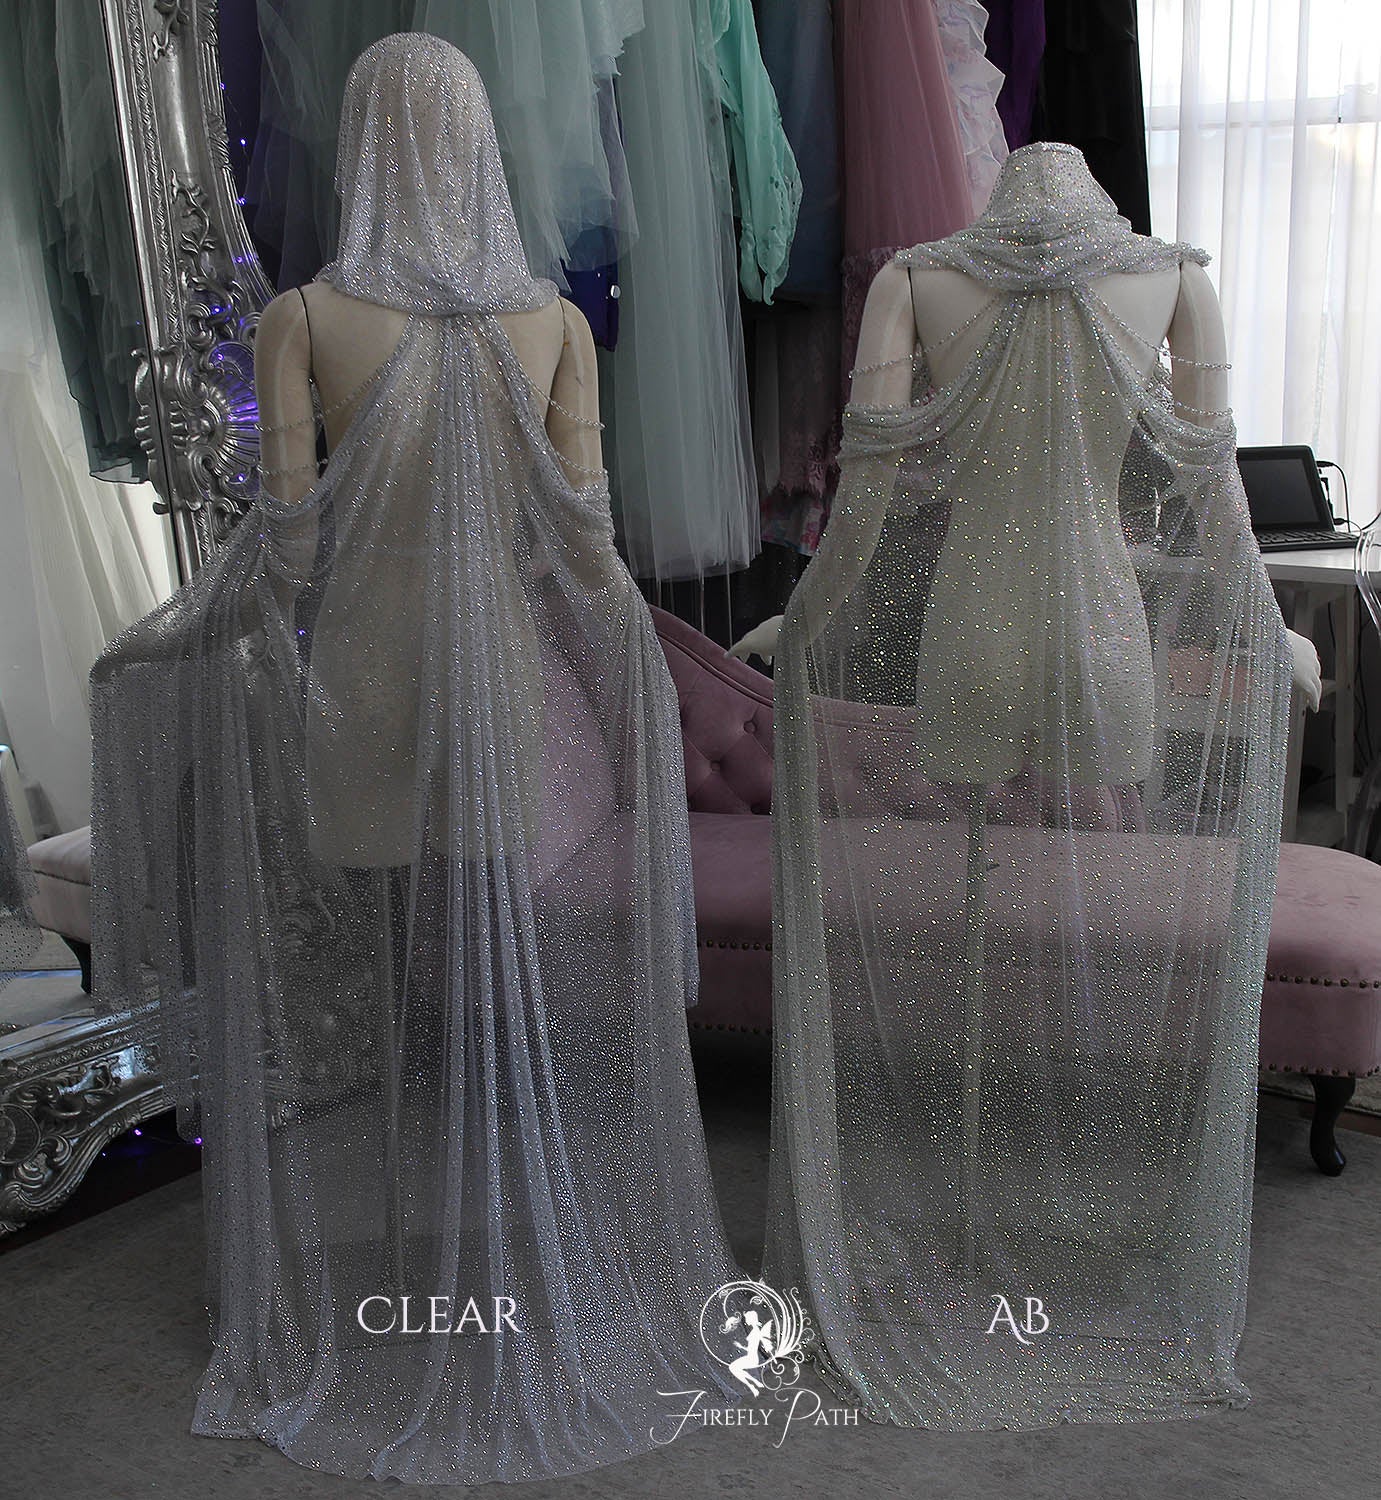
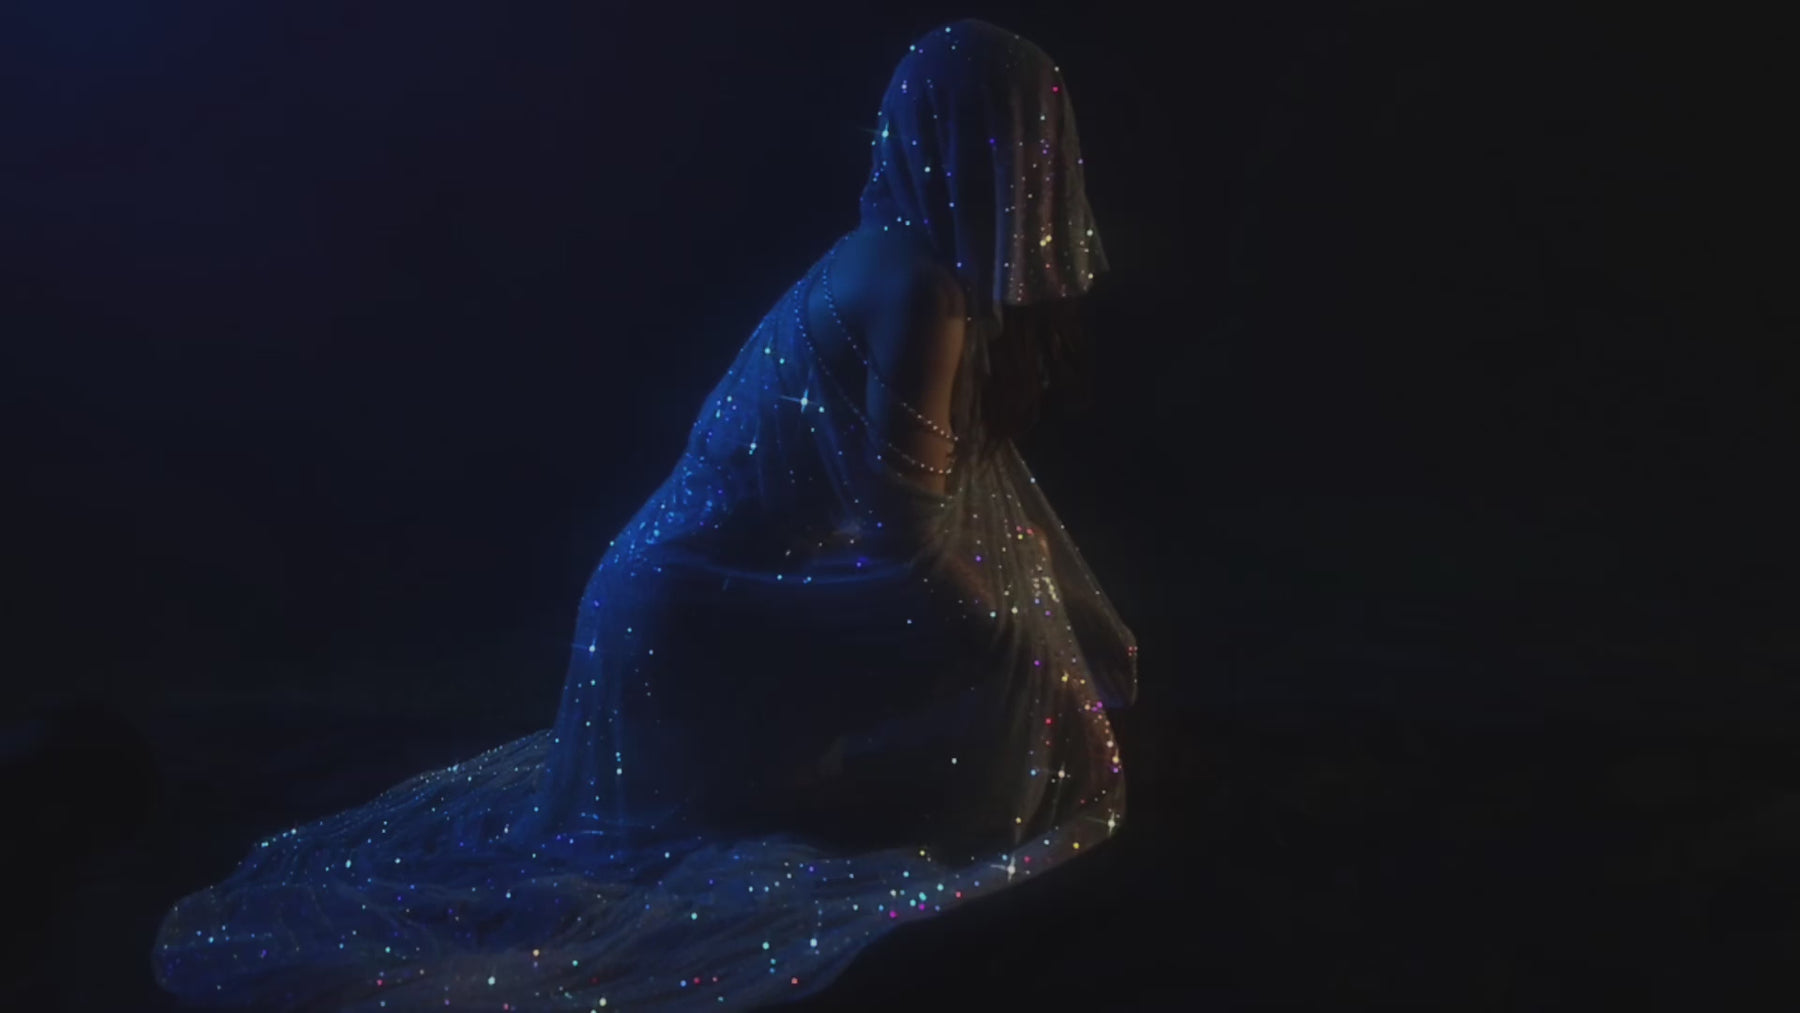
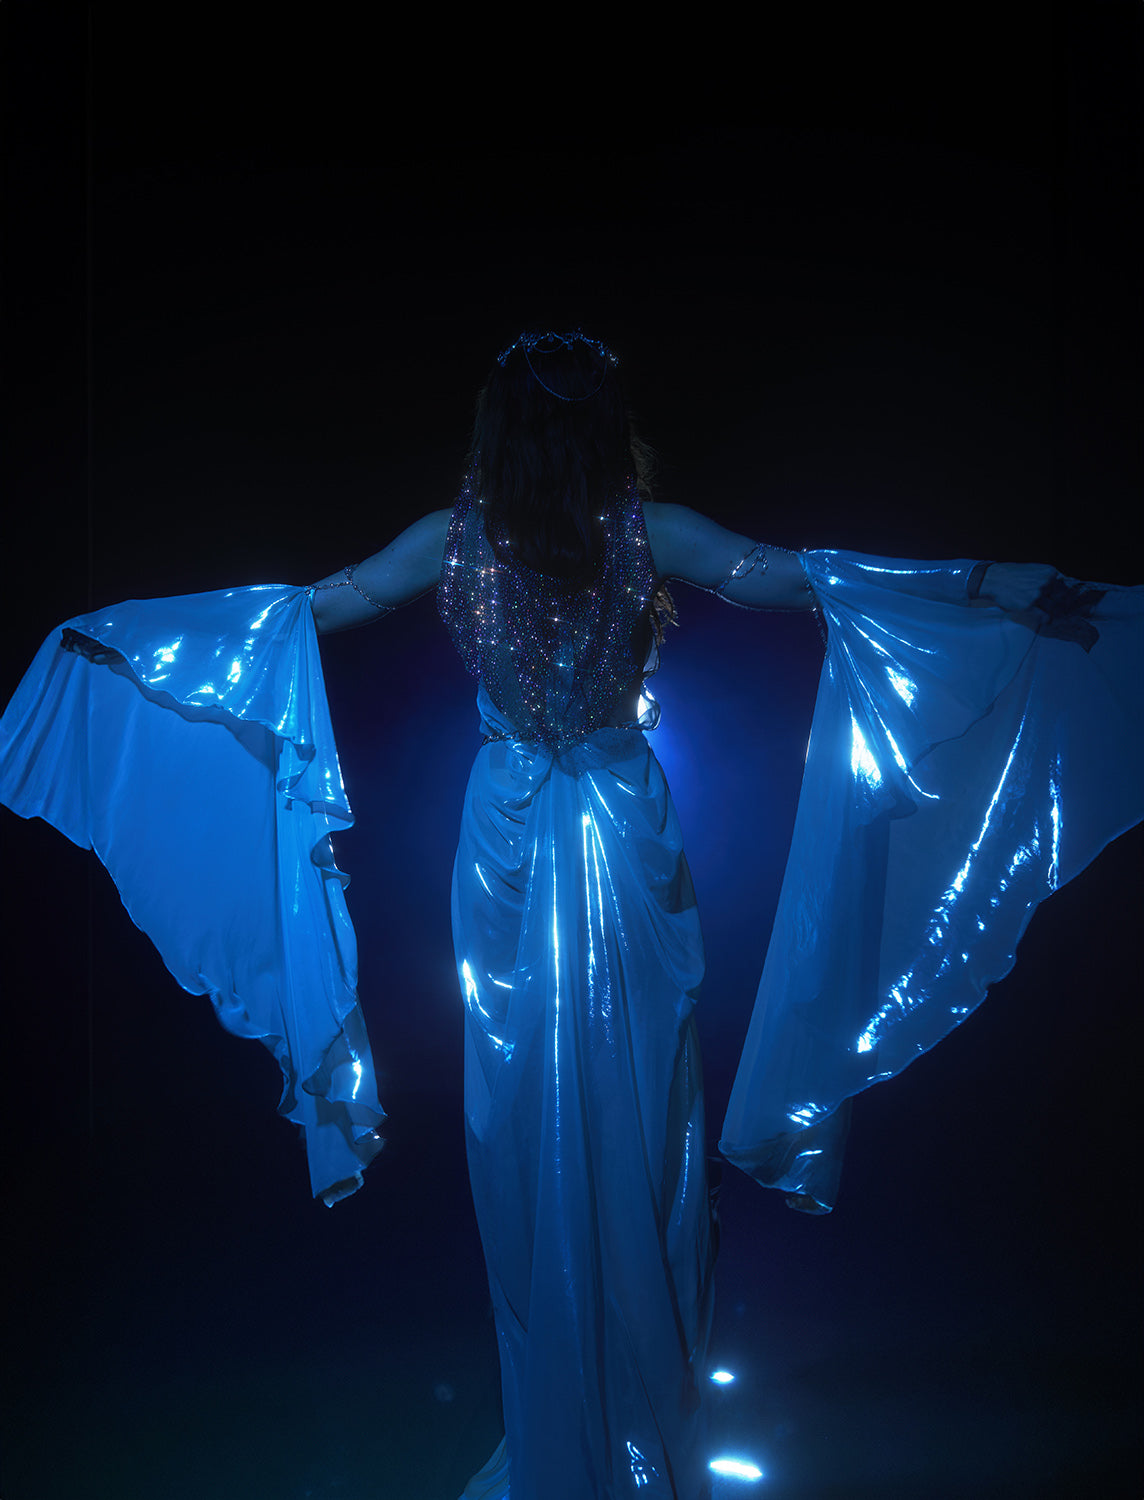
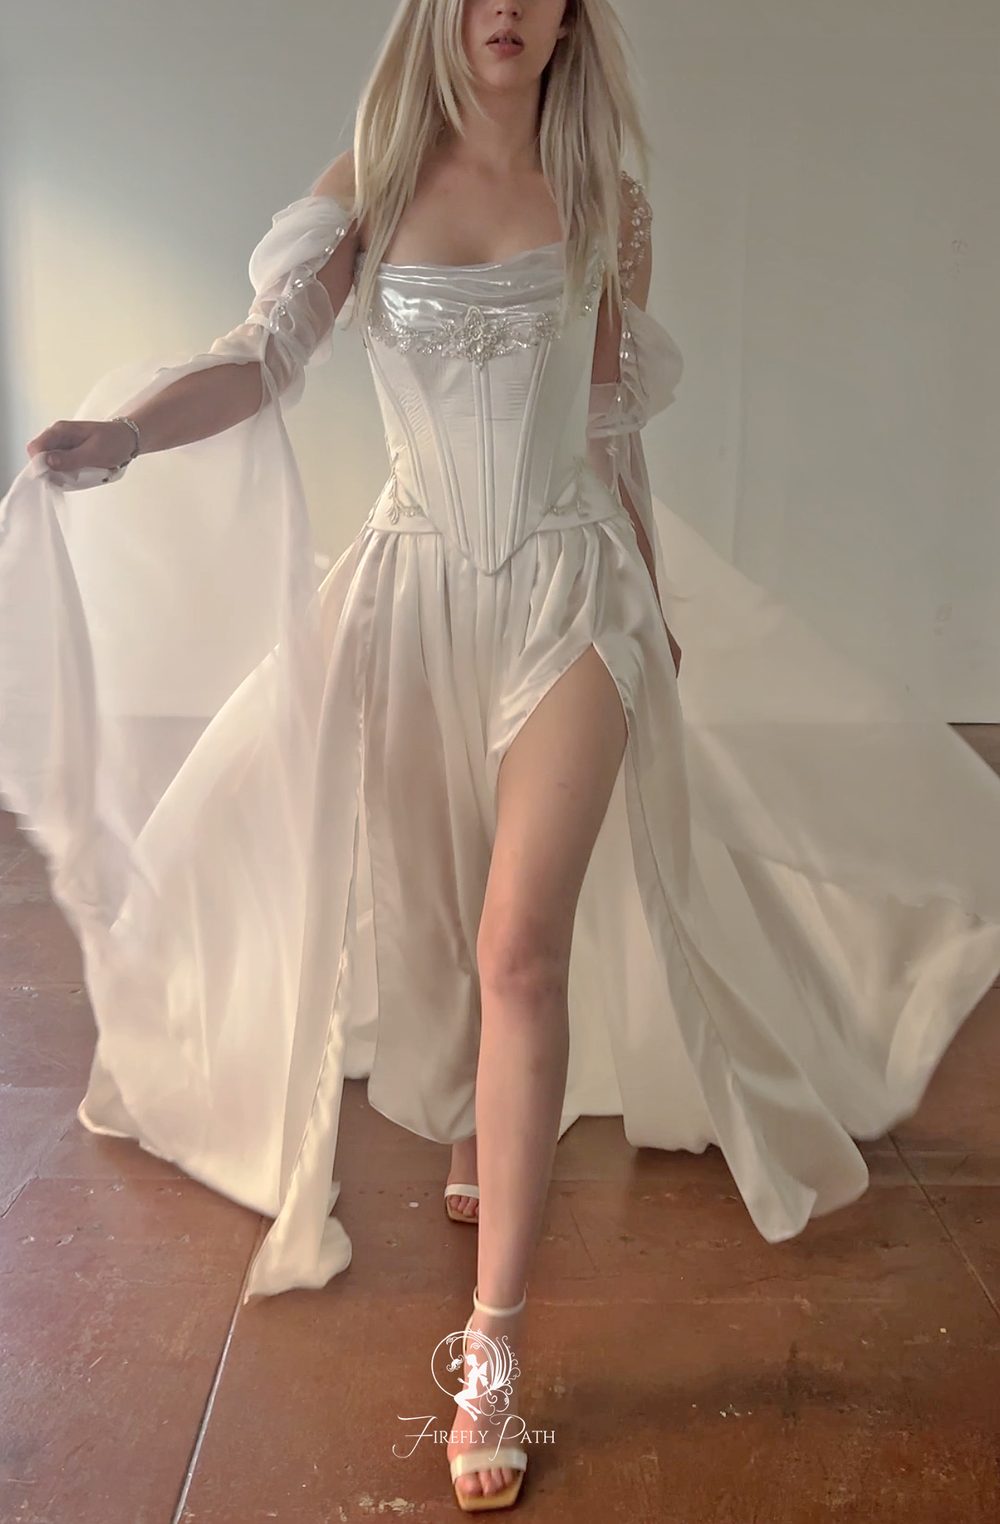
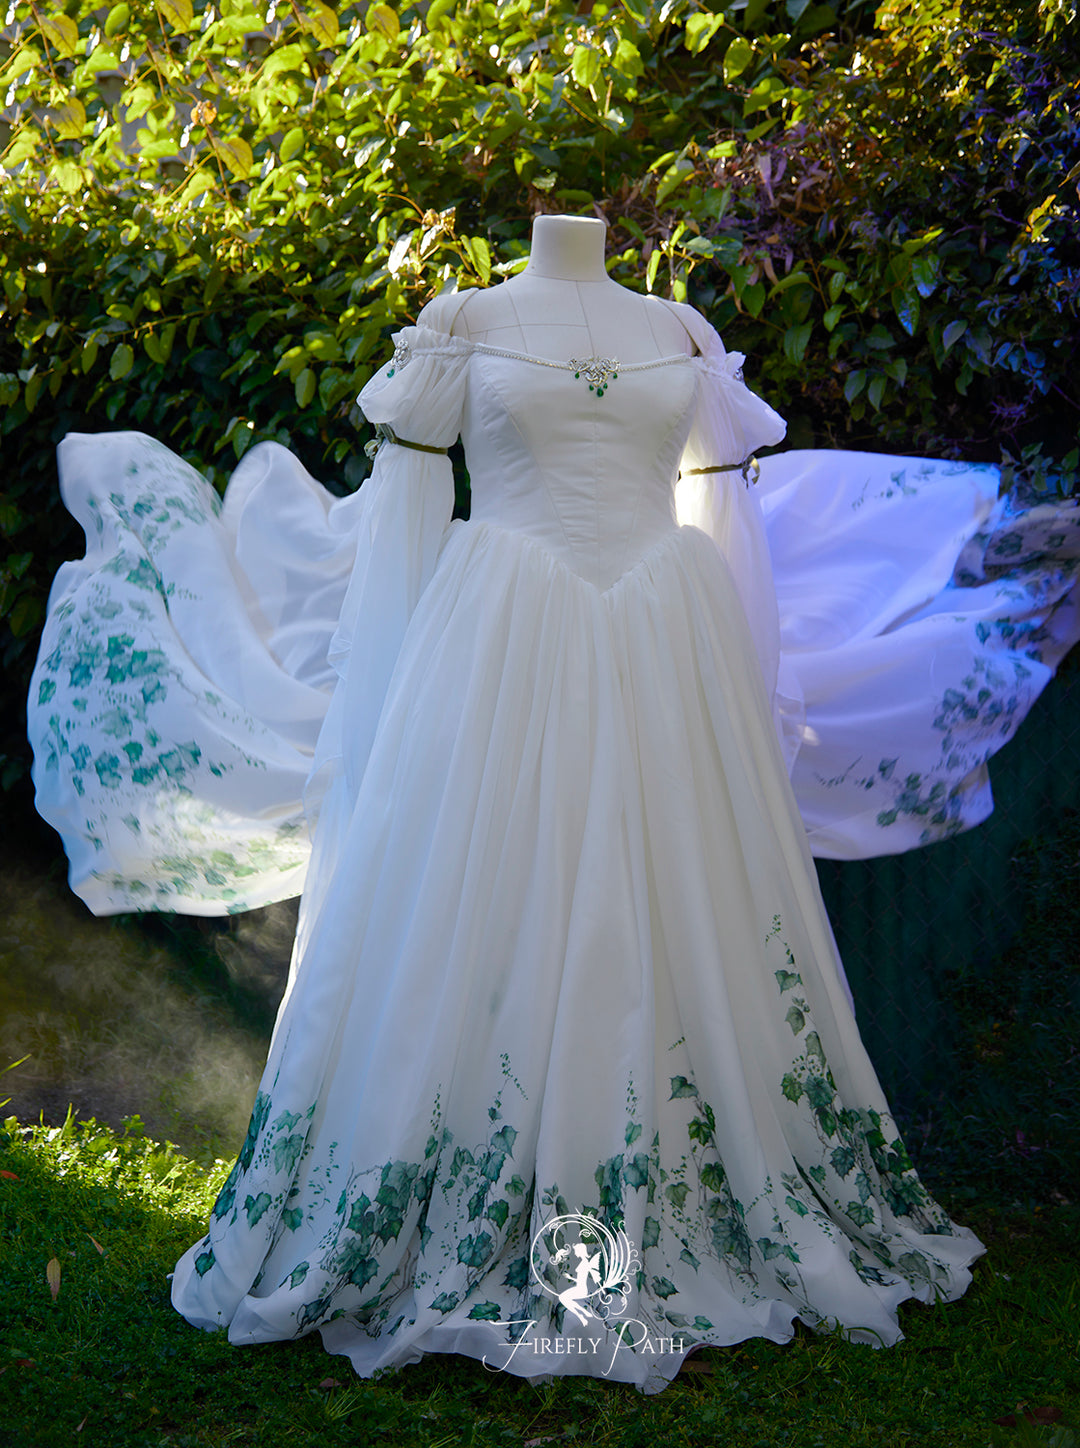
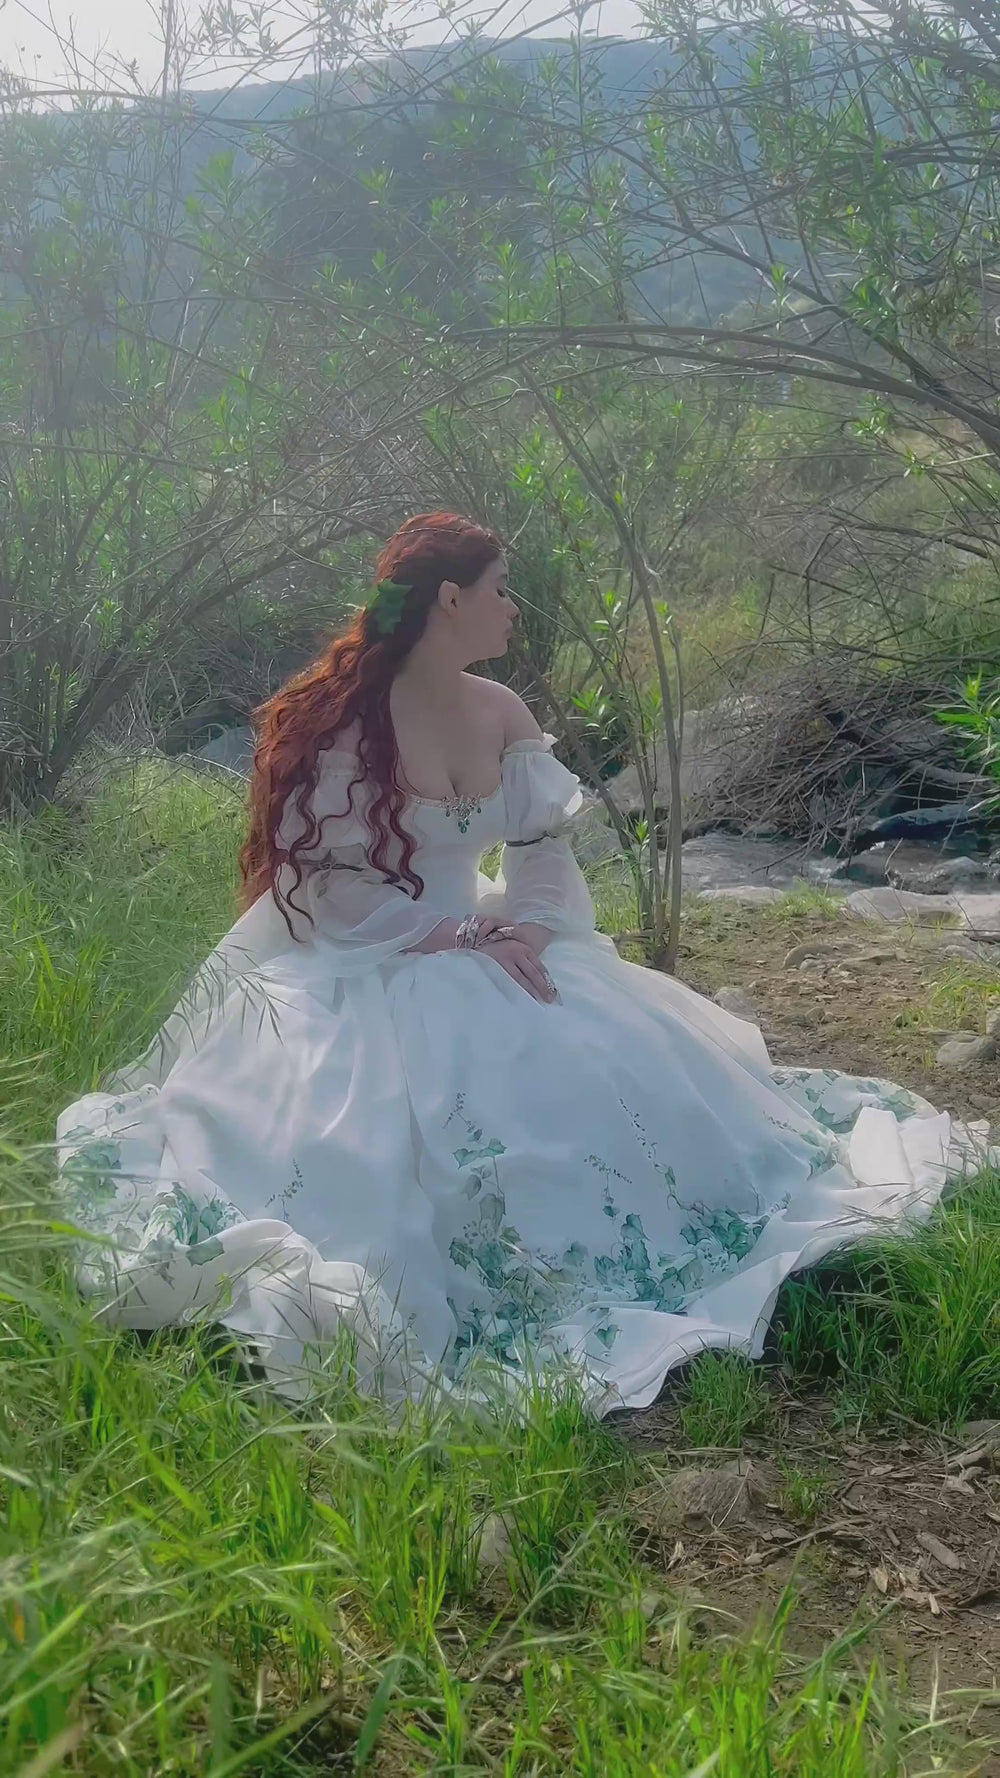
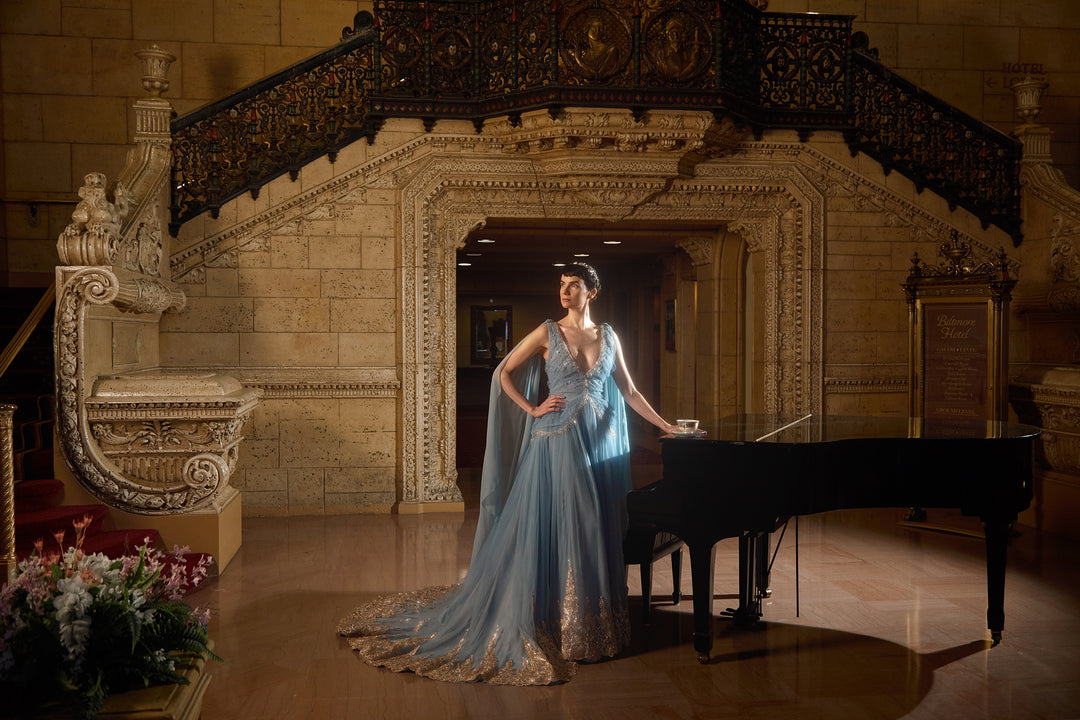
The Avalon Gown: Emerging from the mists of Avalon, this radiant dress glimmers like an ethereal apparition in the light.
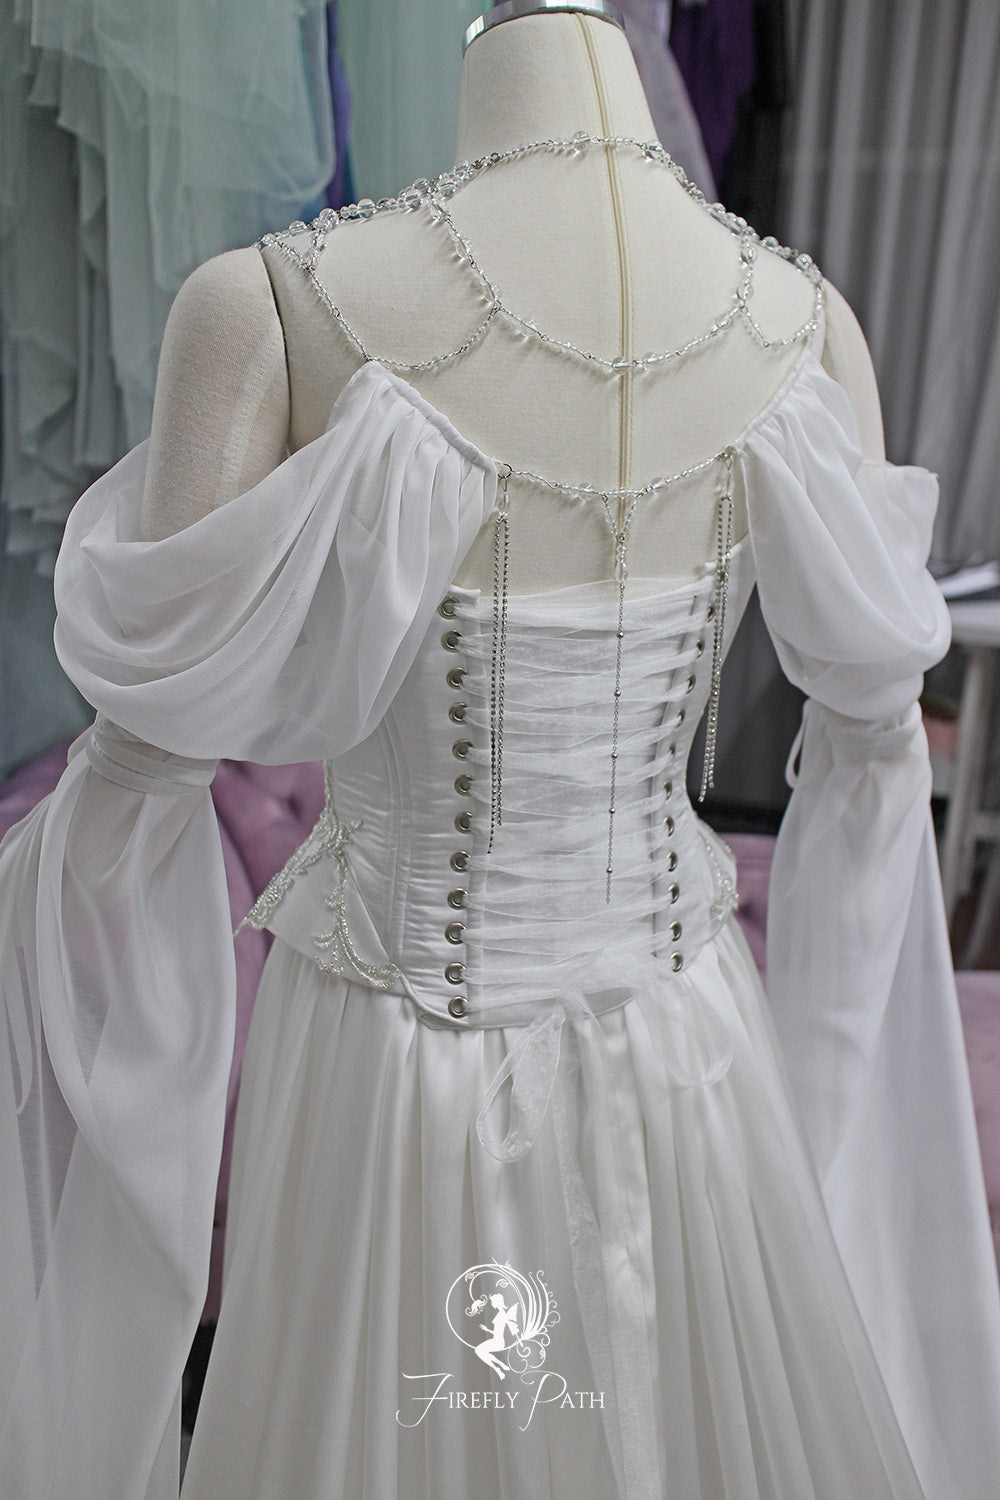
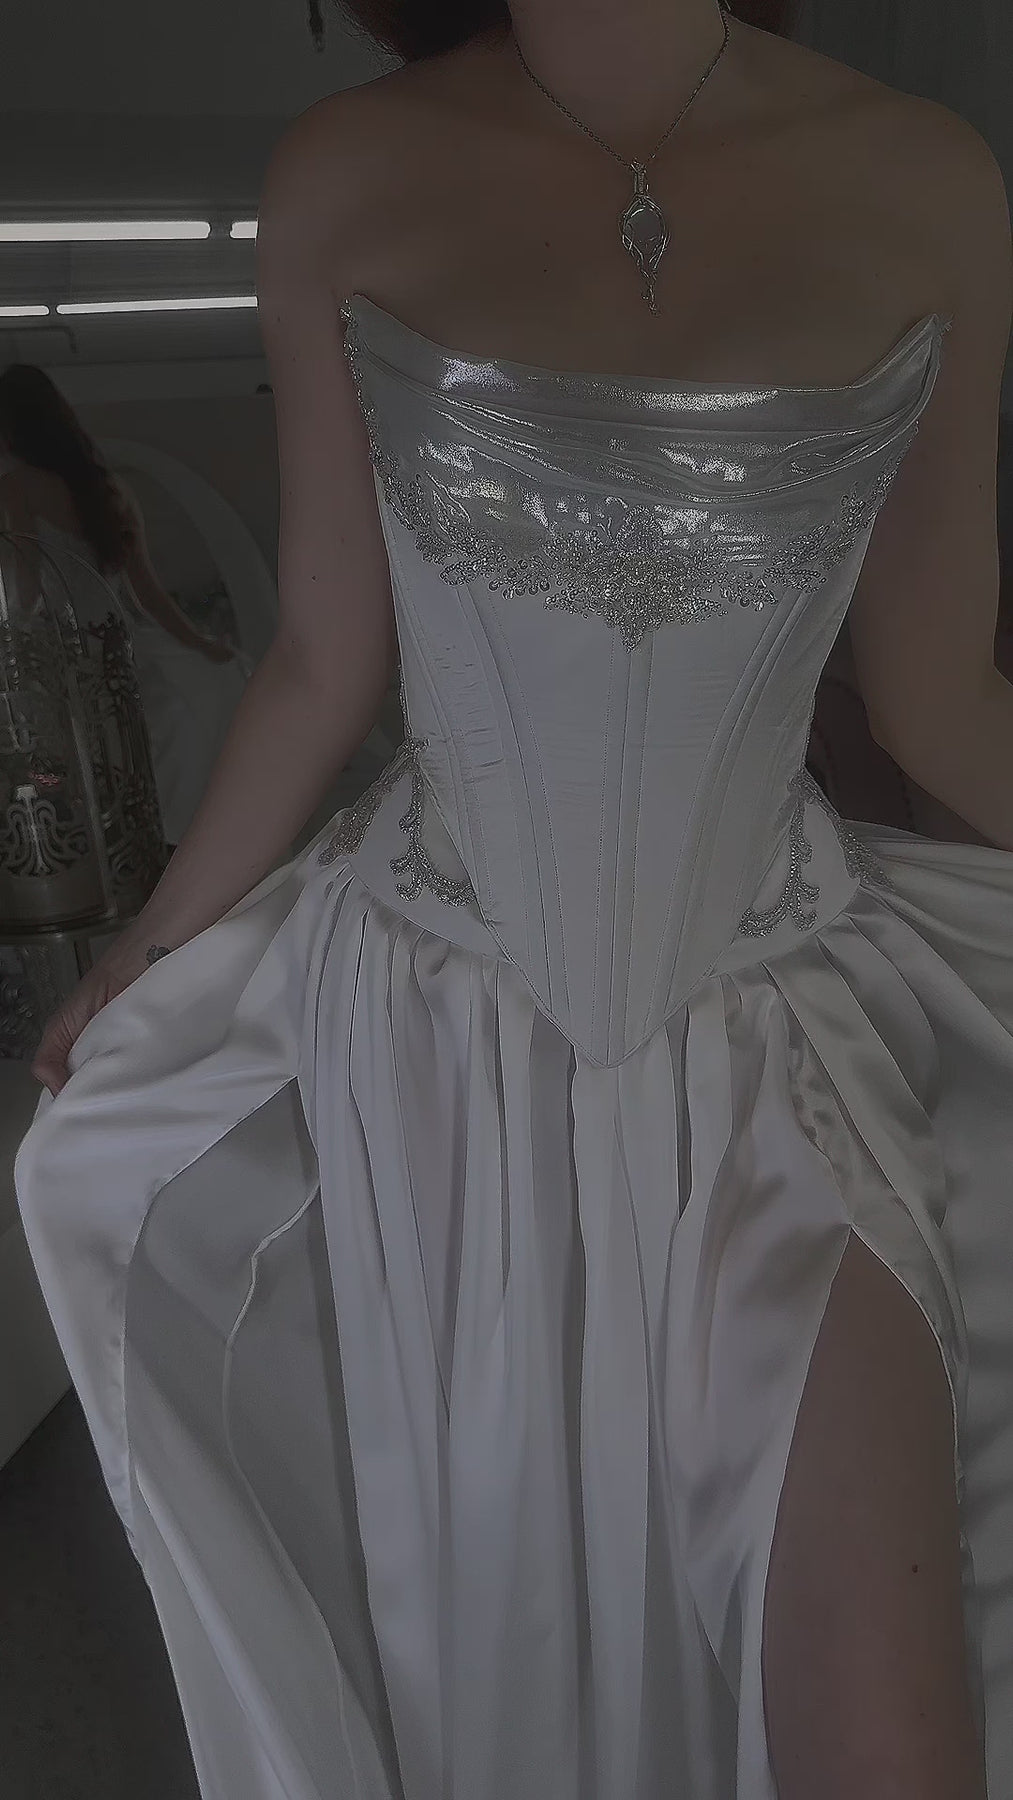
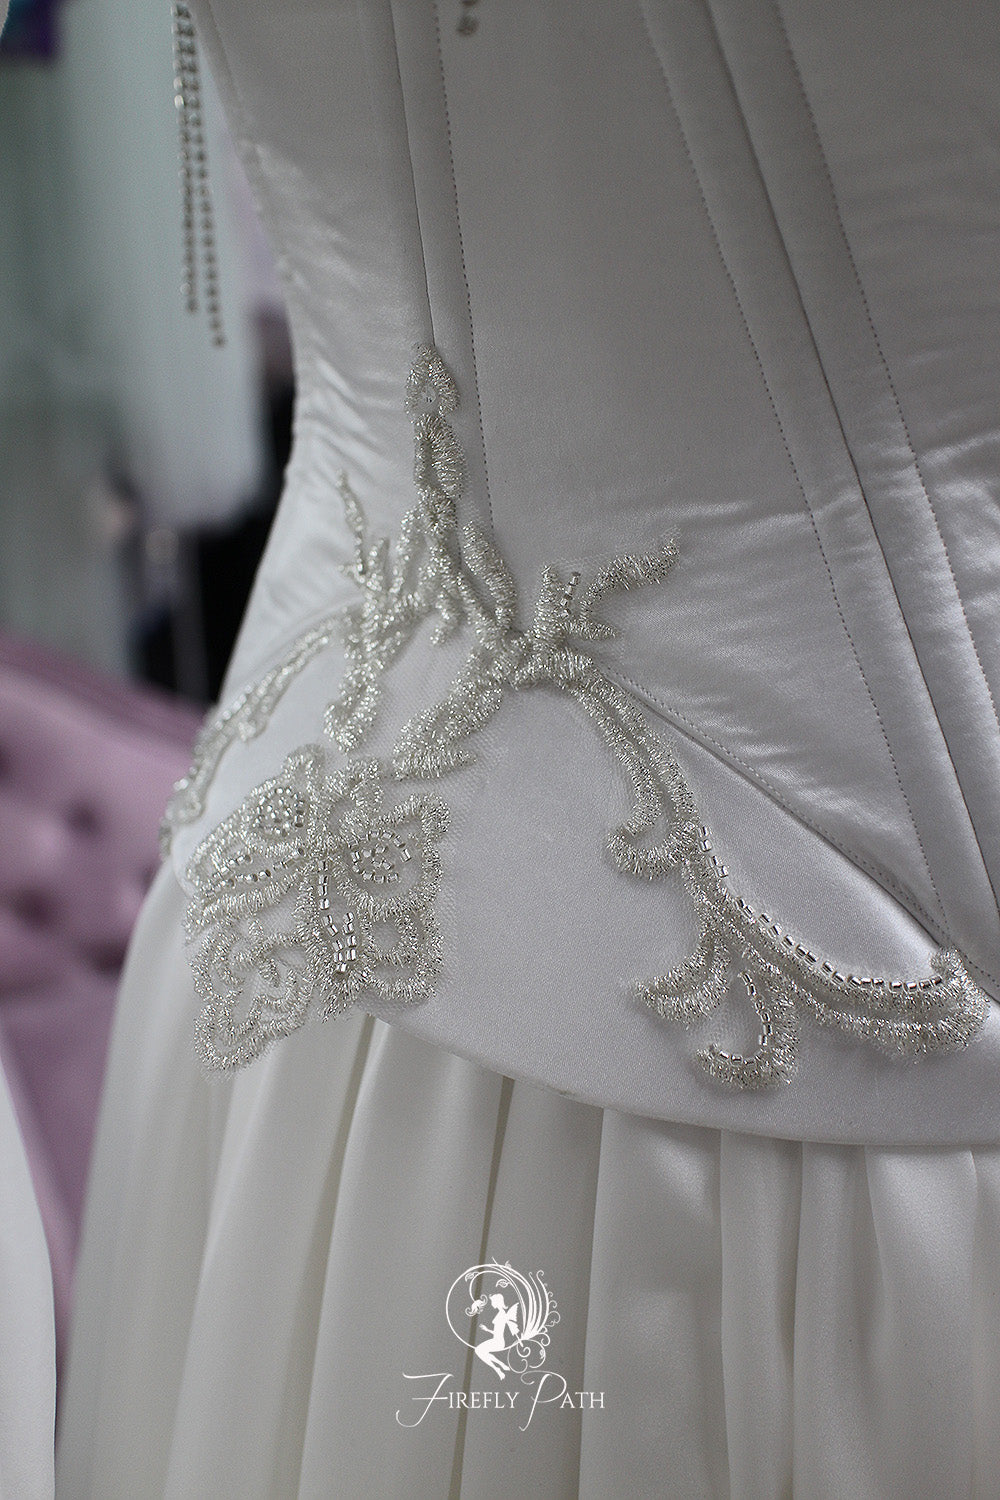
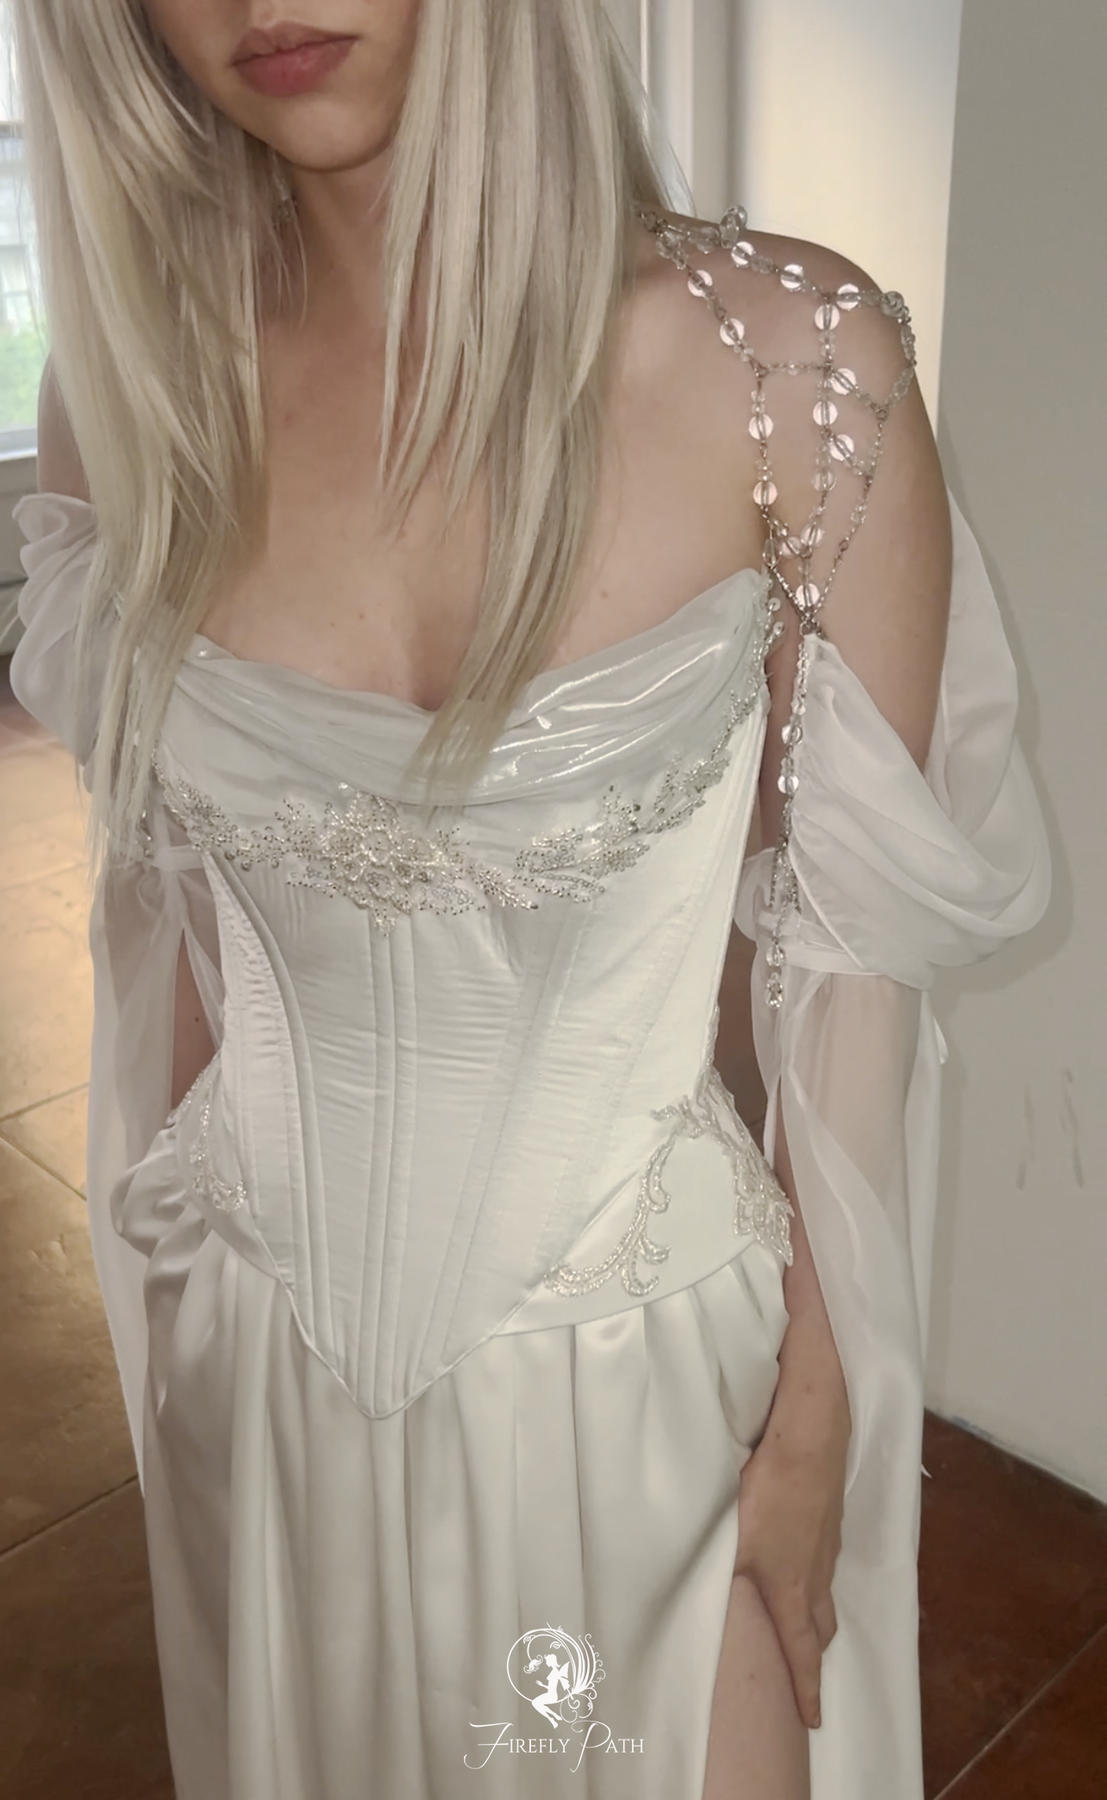
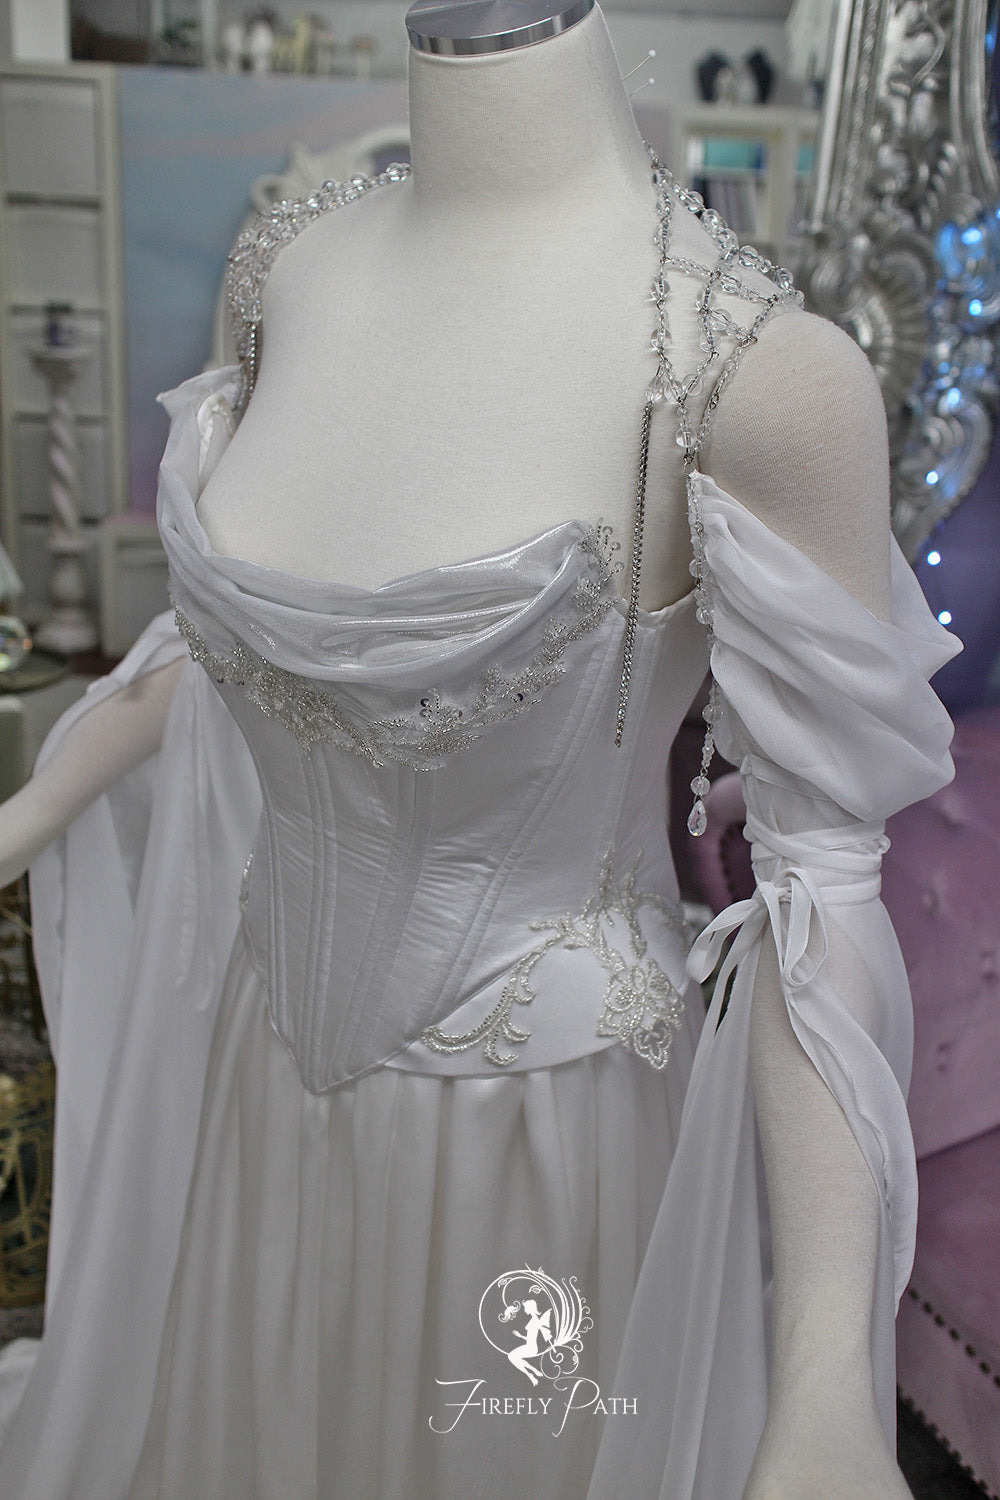
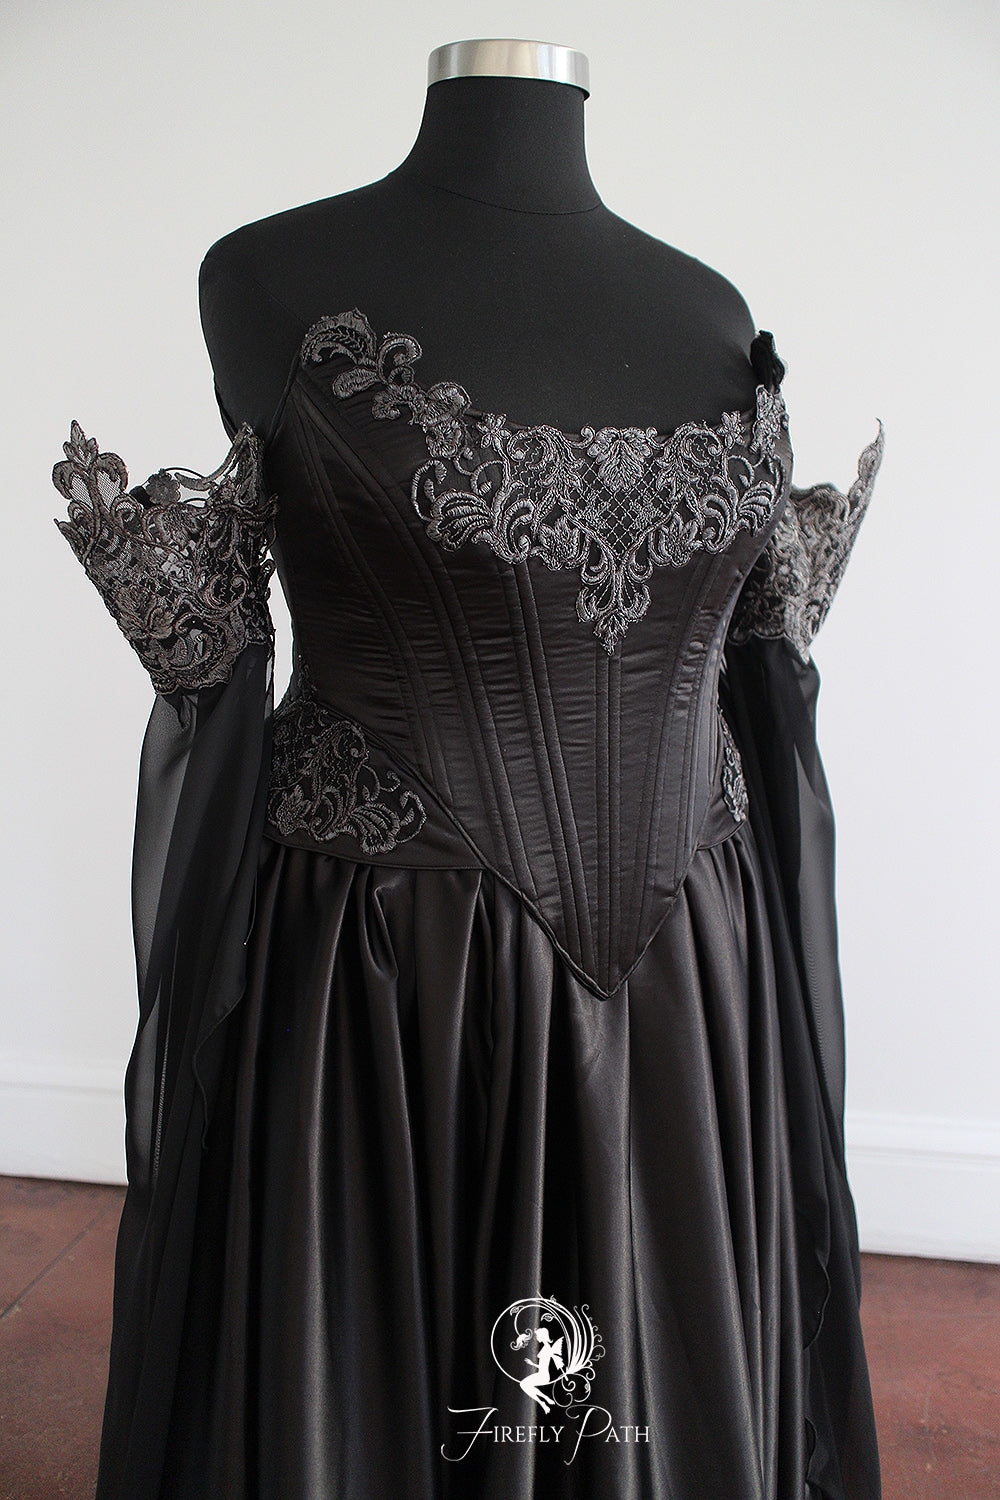
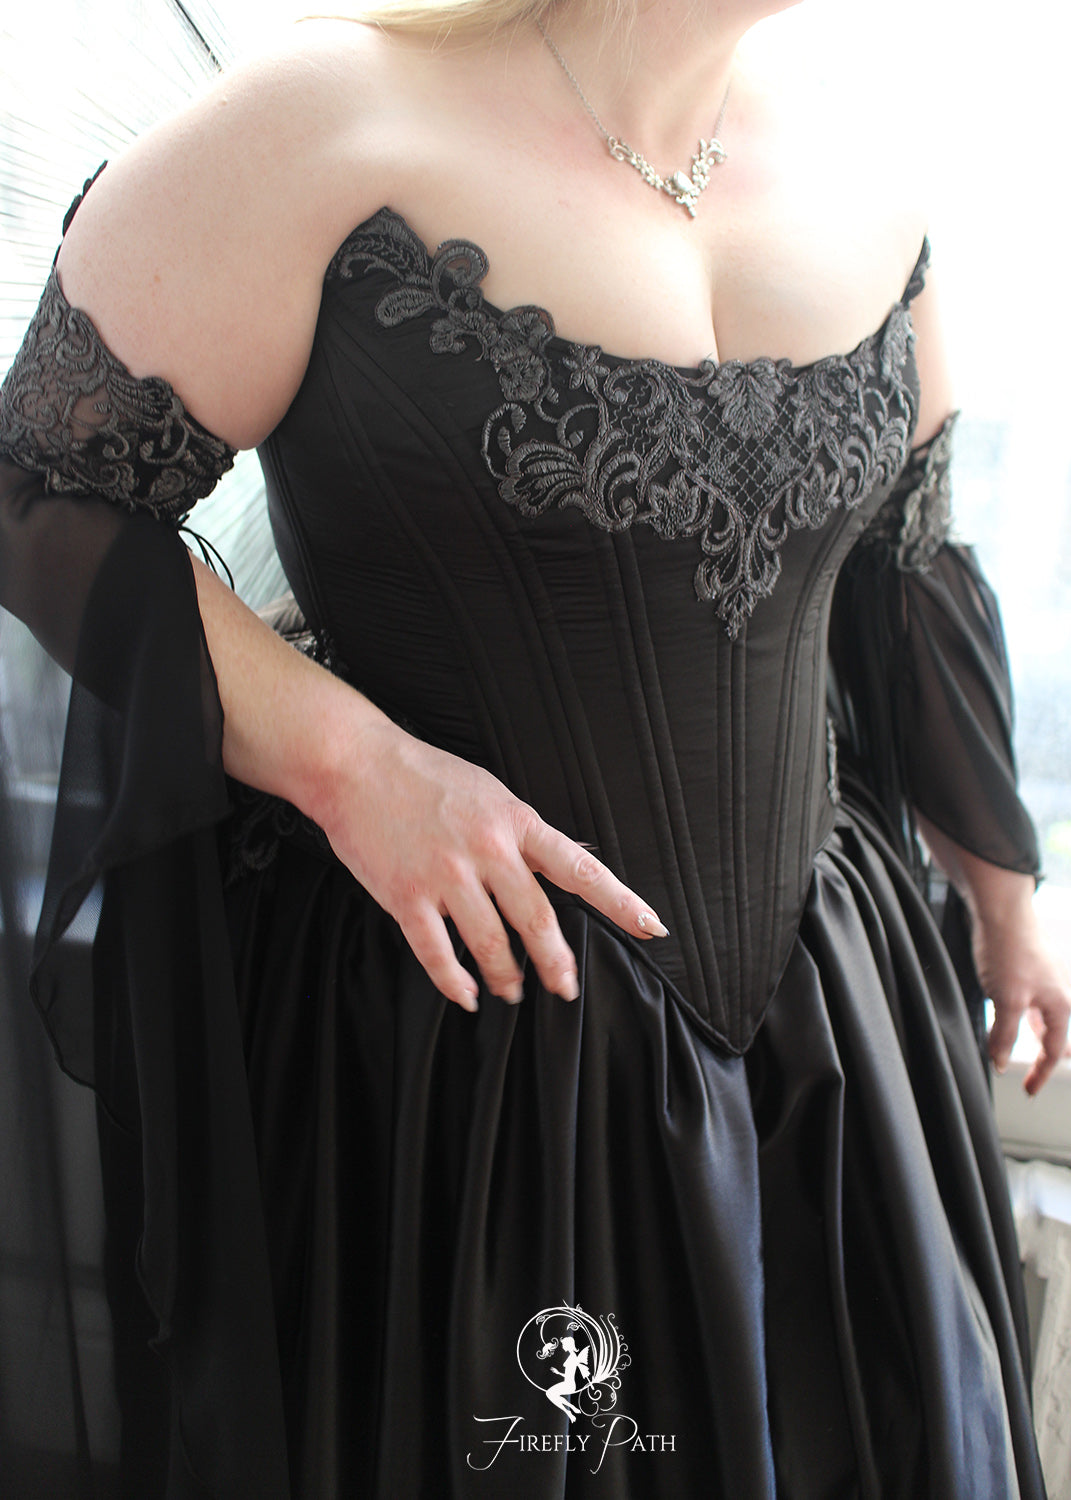
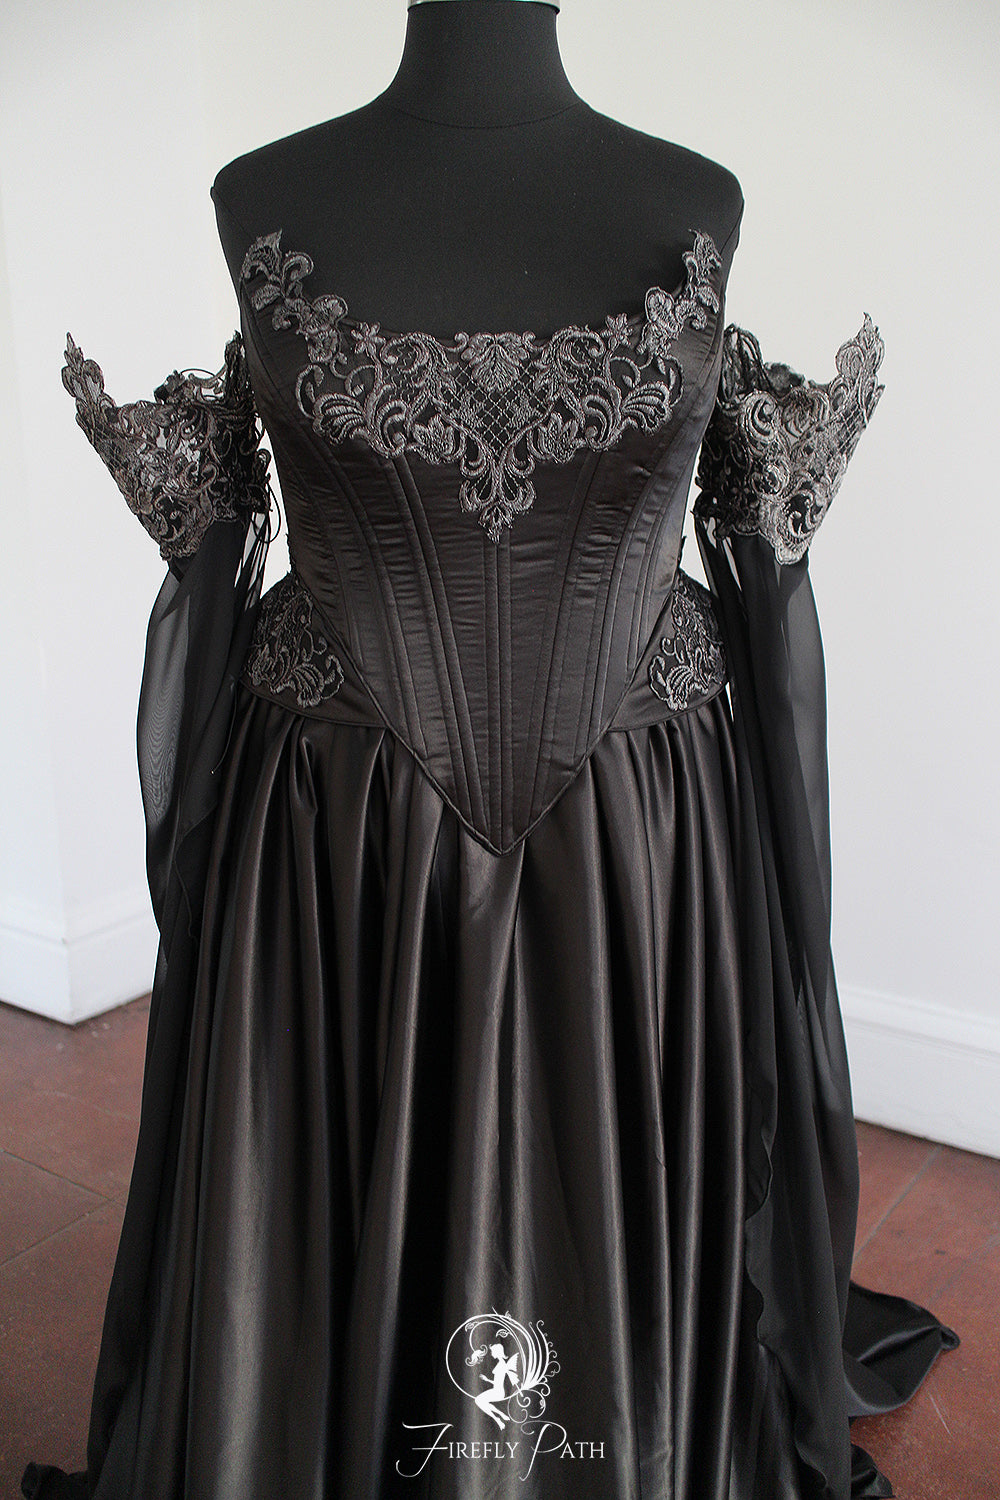
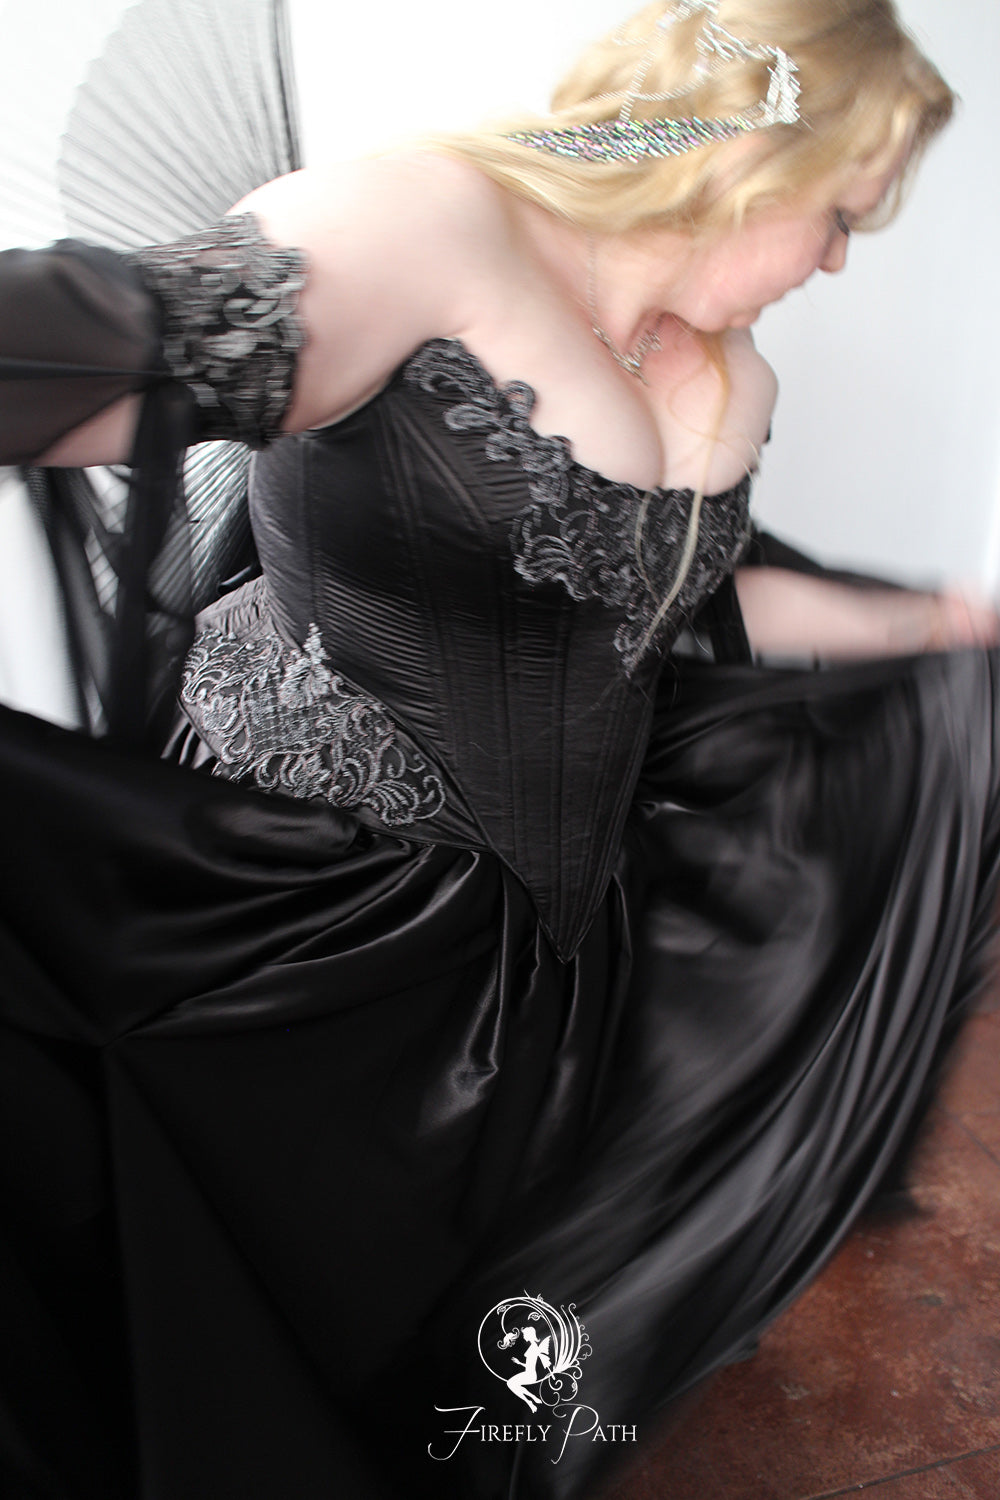
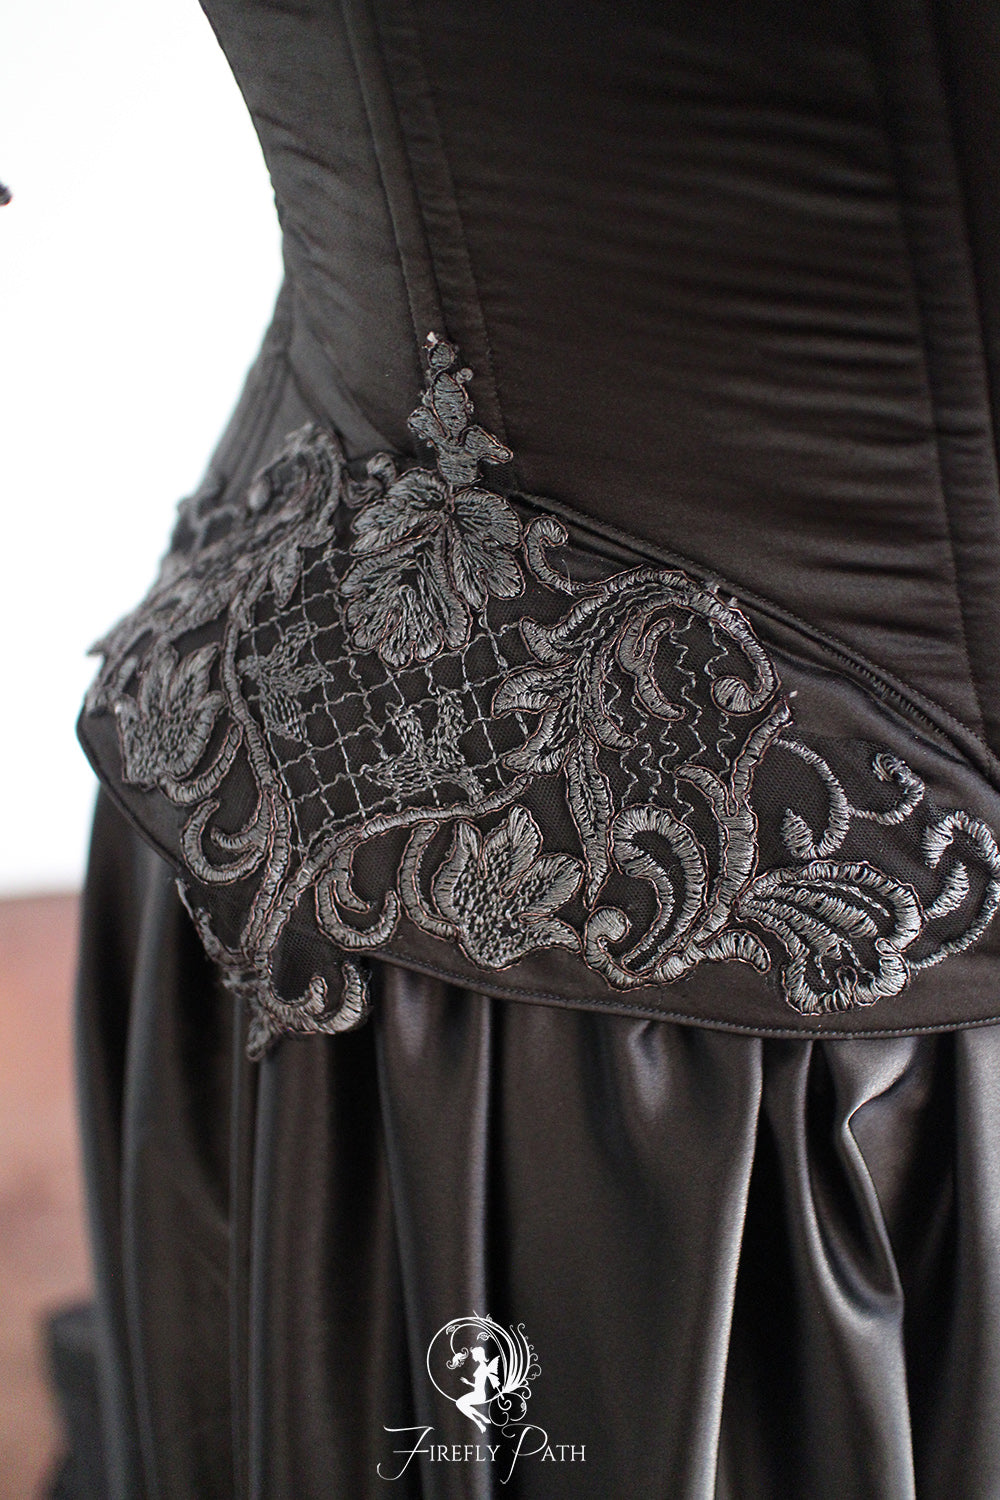
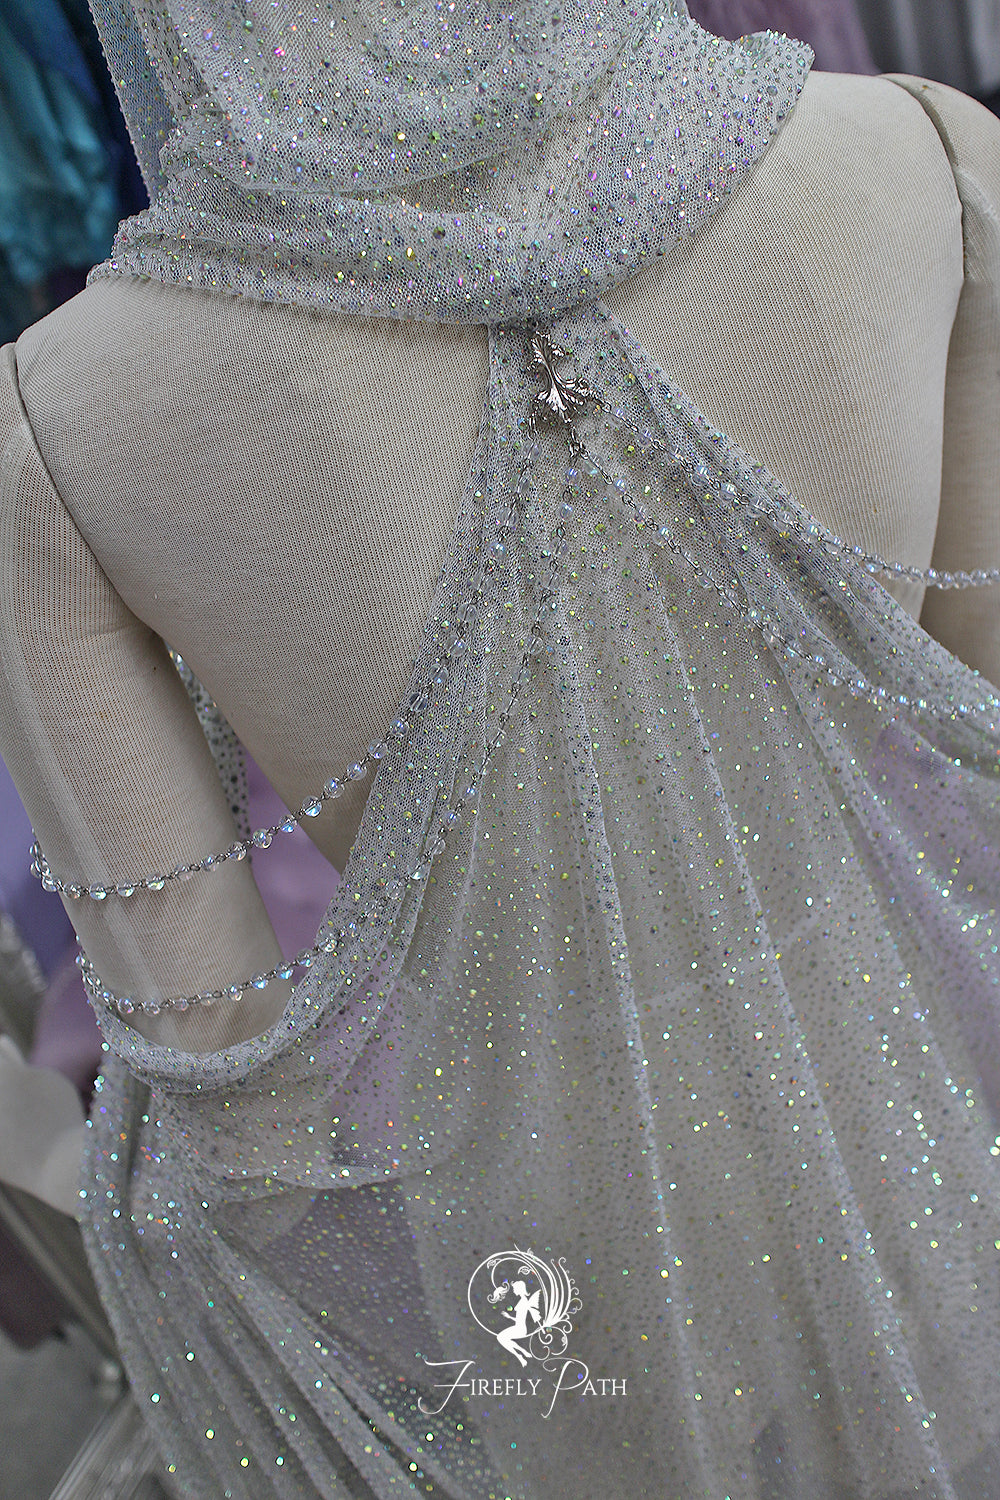
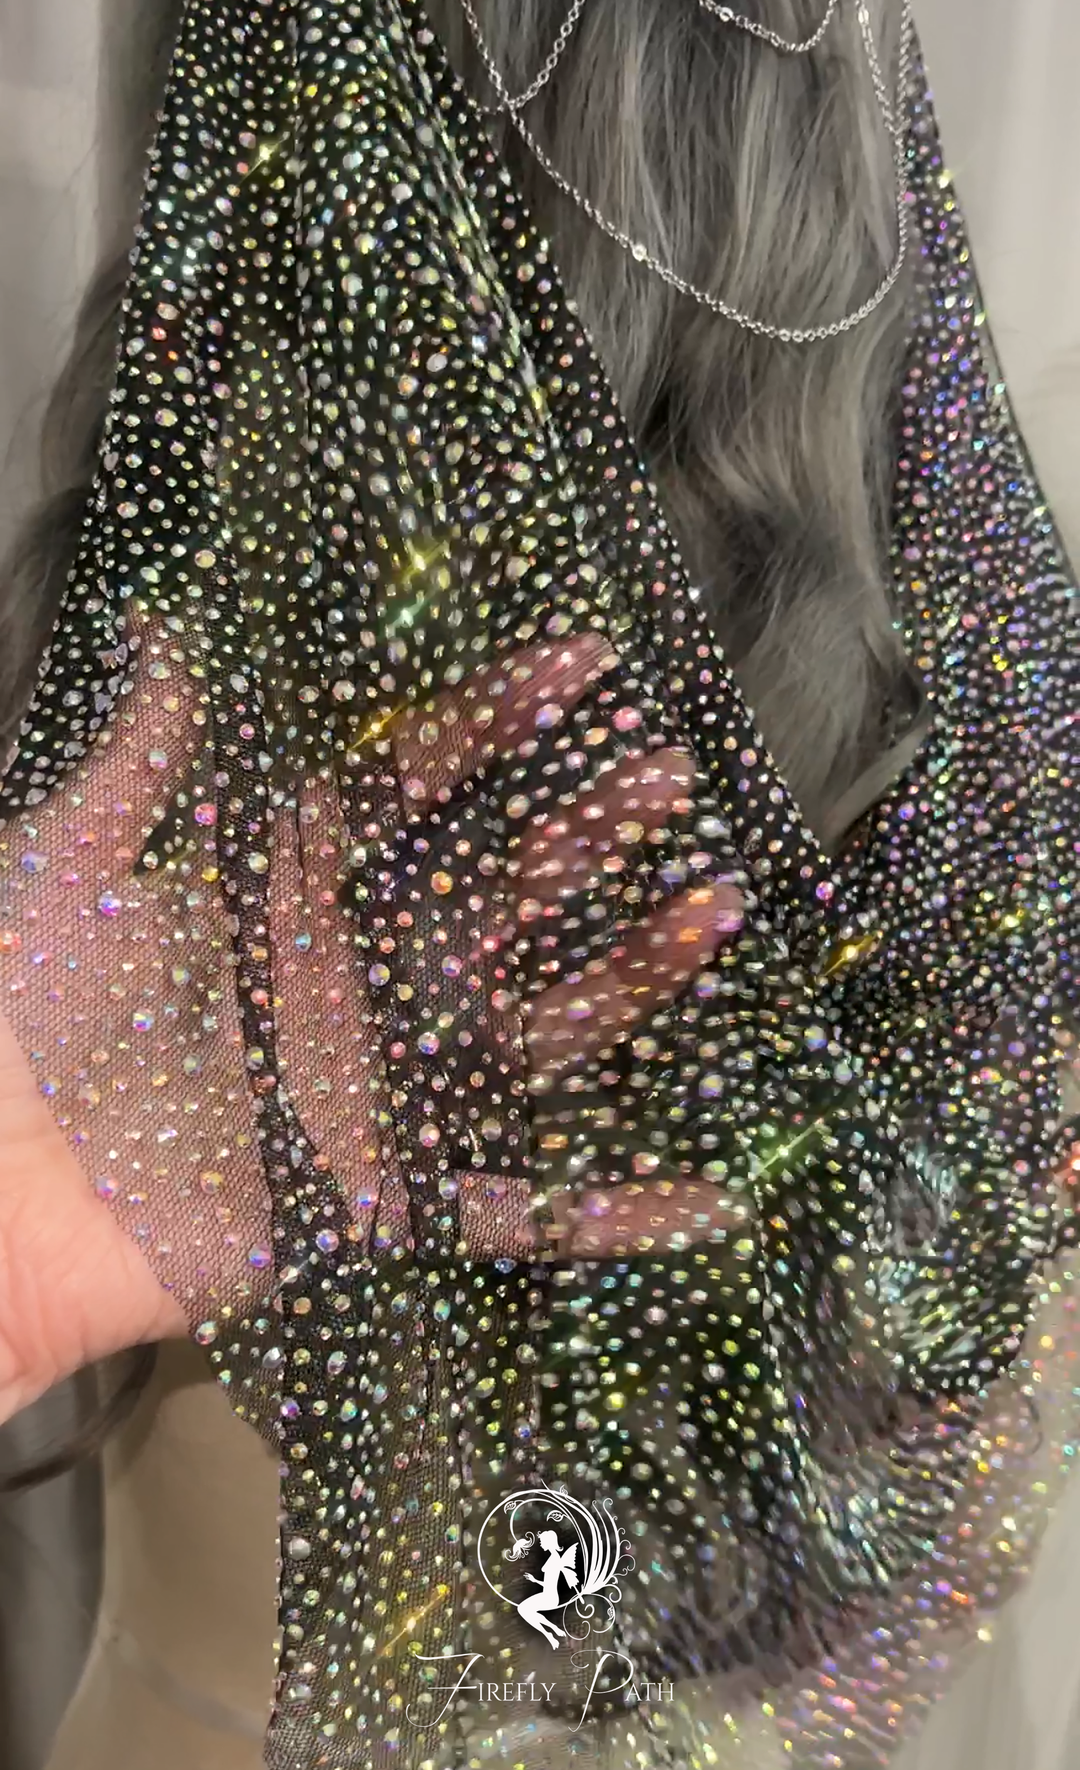
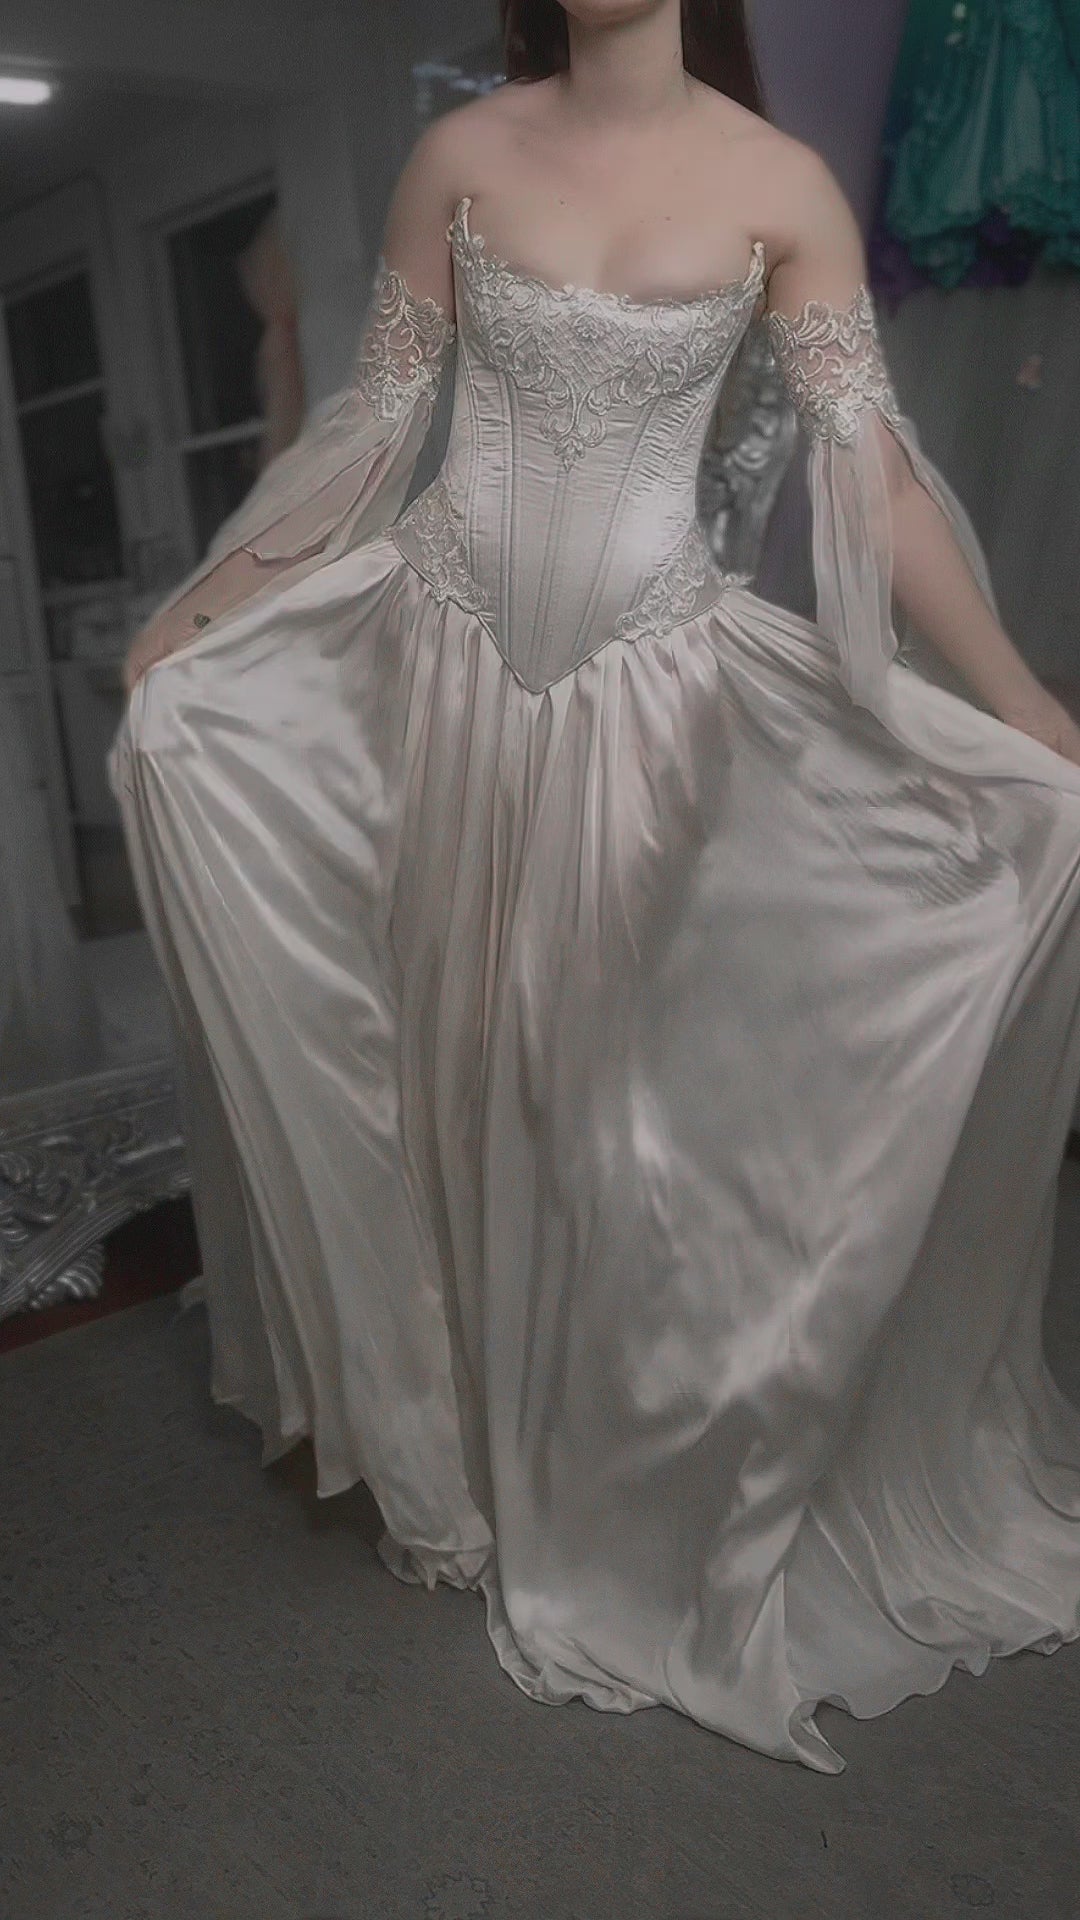
Corset - Crafted from opulent 100% silk charmeuse, this corset exudes pure luxury. Its design showcases a deep sweeping neckline draped with liquid silver chiffon, skillfully sculpted to create a captivating and flattering silhouette. Structurally, the corset boasts an inner foundation of spiral steel boning for support and is lined throughout. It has a sewn-in modesty panel to ensure maximum coverage. The delicate lace detailing that graces the neckline and adorns the hip peplums adds a glimmering touch.
Skirt - The skirt is crafted from a single layer of 100% Silk Charmeuse, which lends it a graceful, fluid quality. For a subtle twist, the skirt features a high slit over the both legs, offering a touch of contemporary elegance. This design element adds a modern touch while allowing the bride to move comfortably.
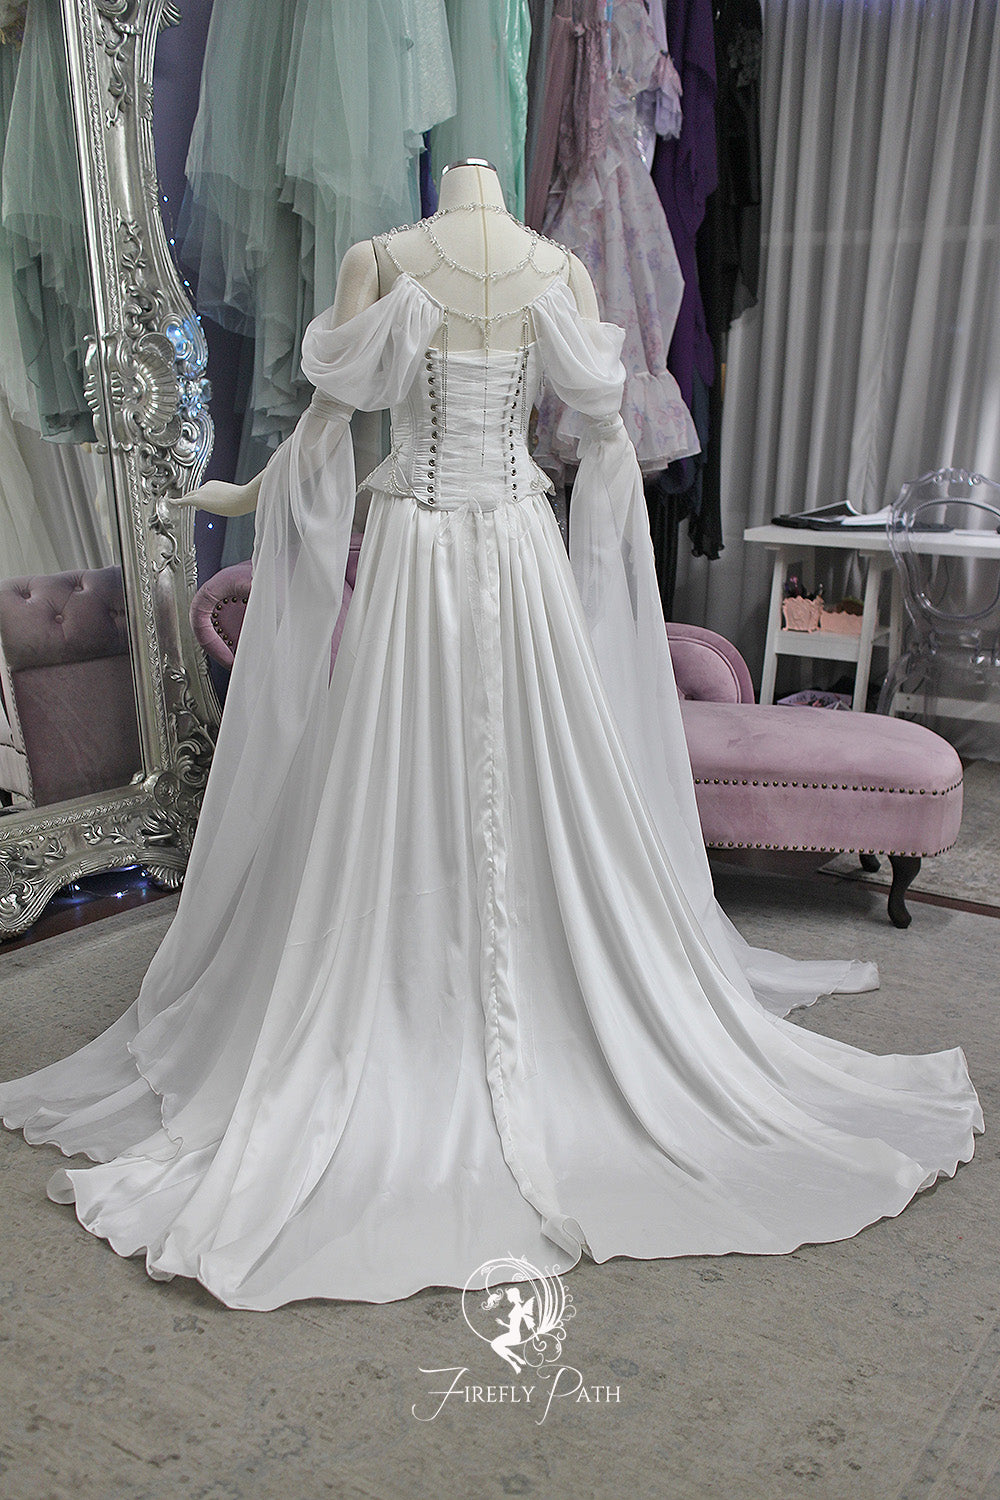
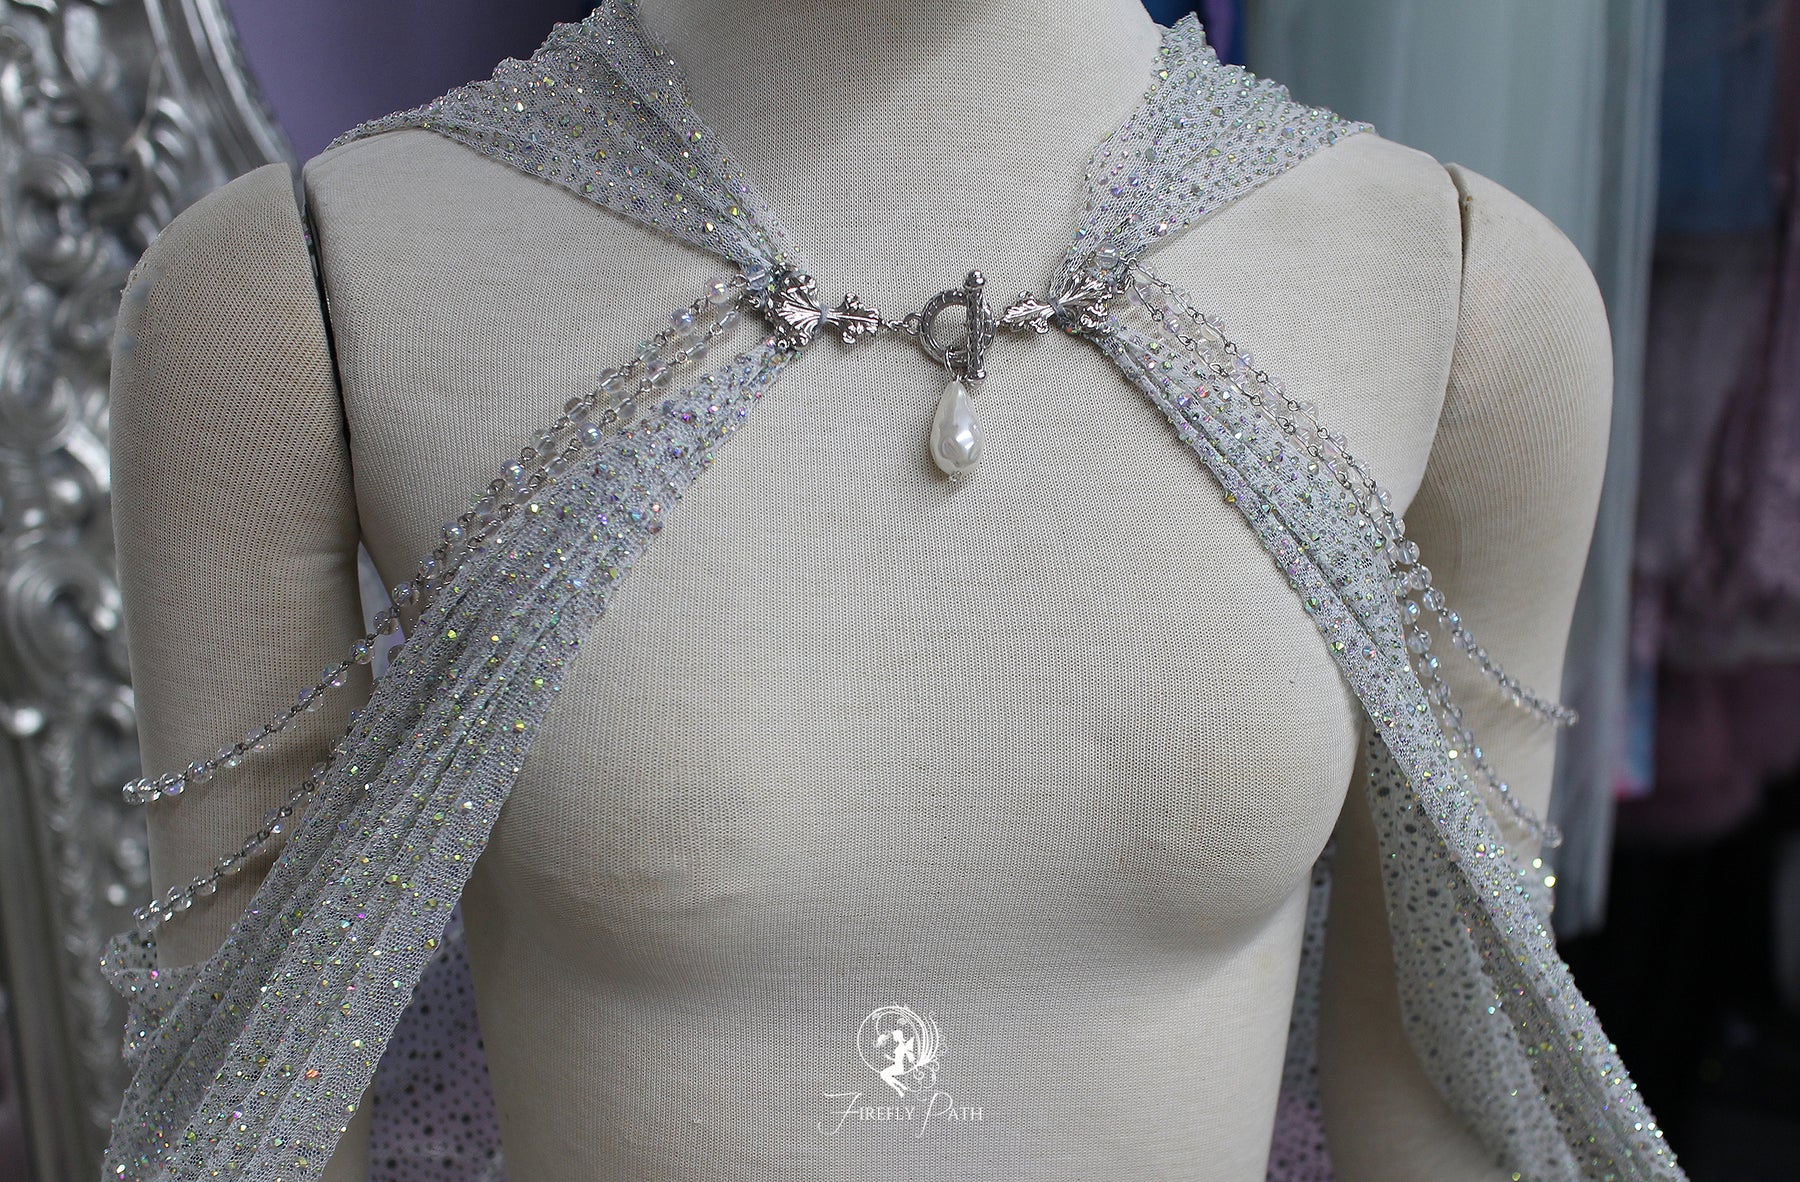
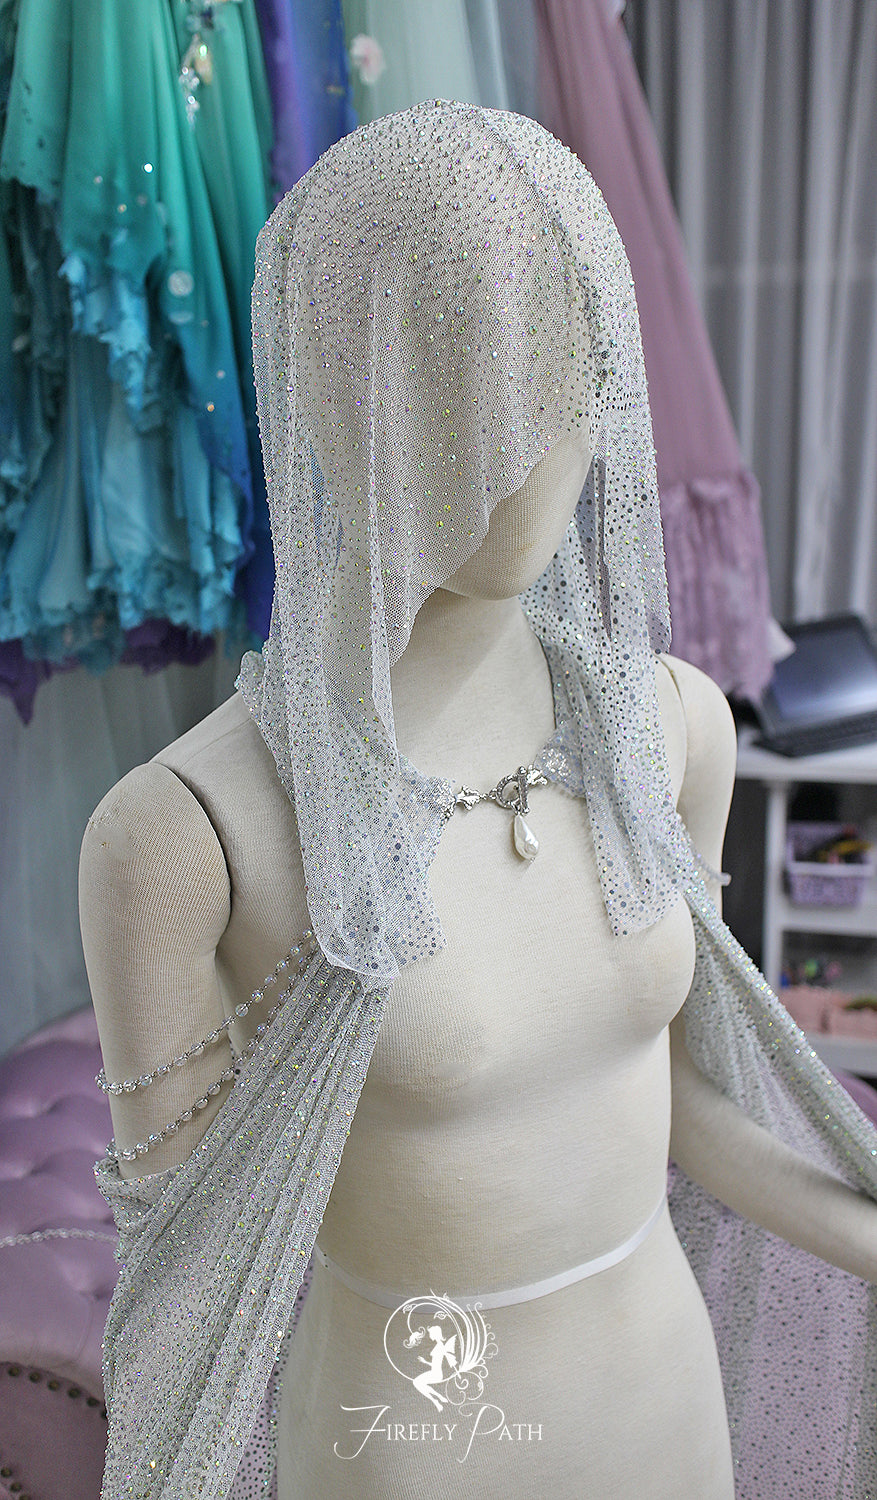
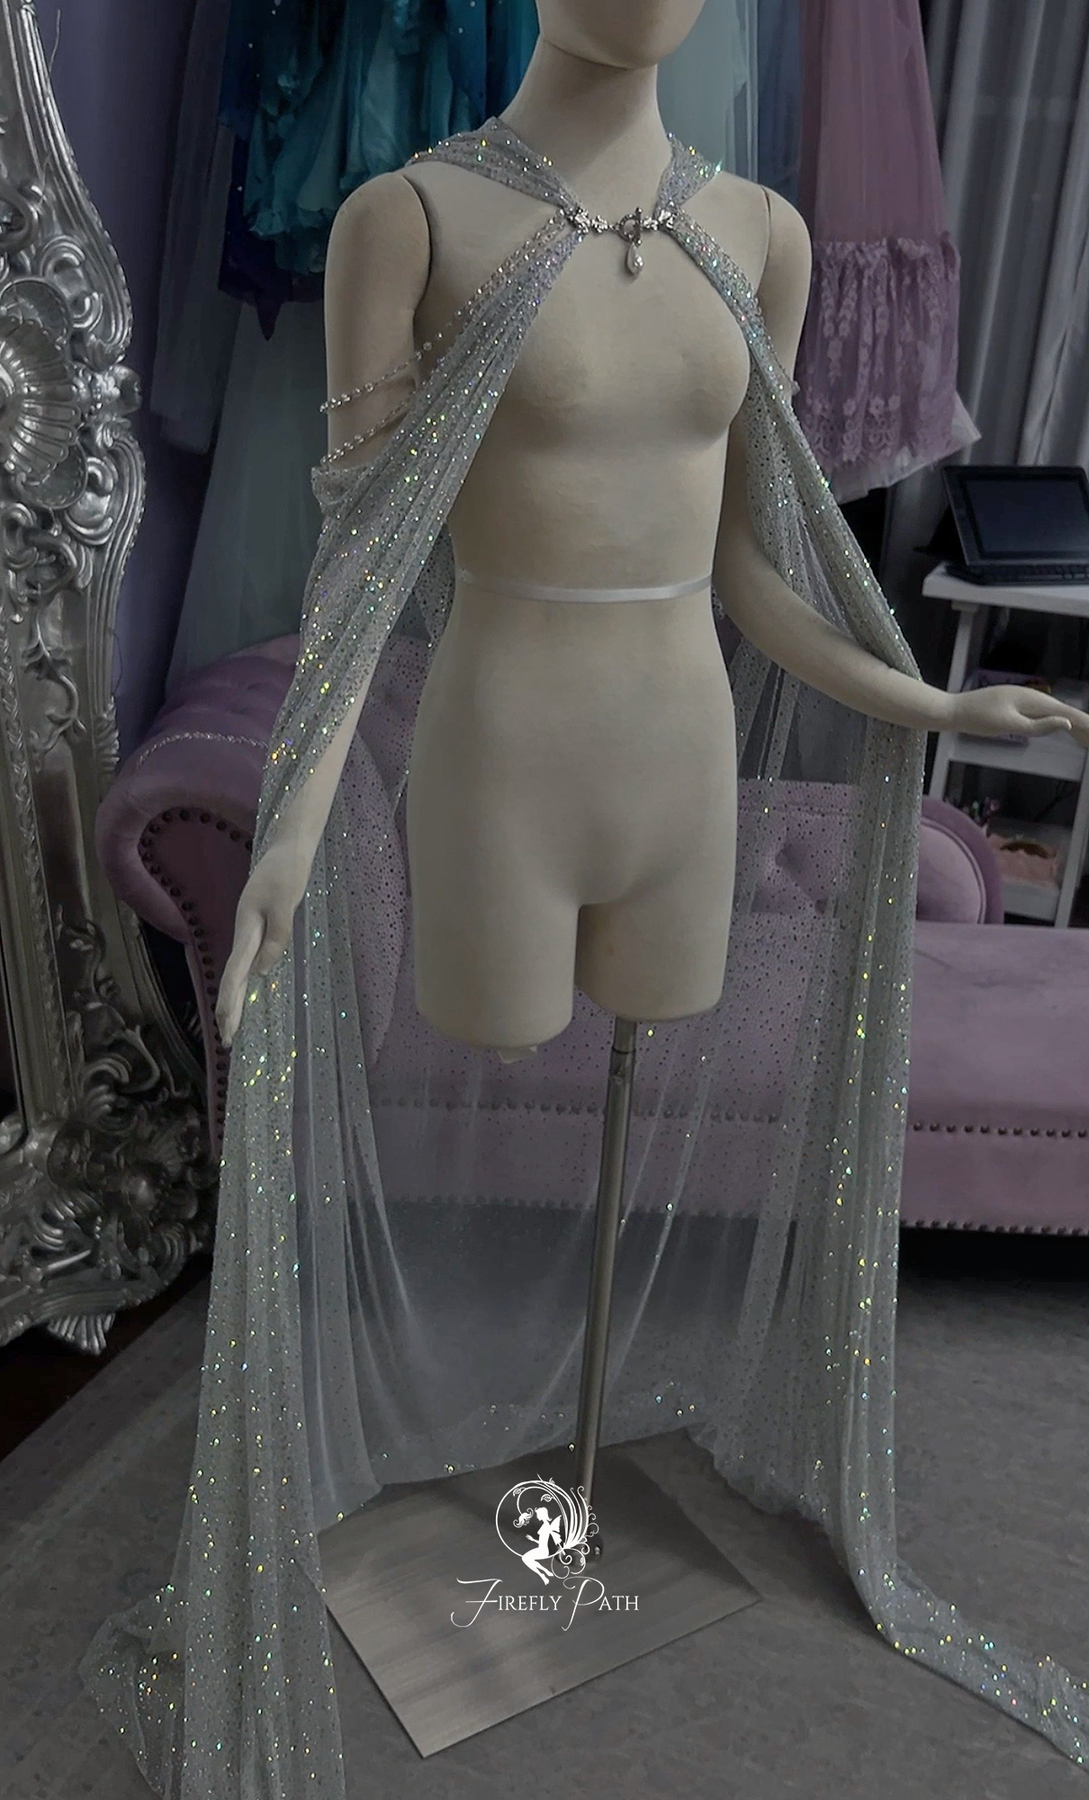
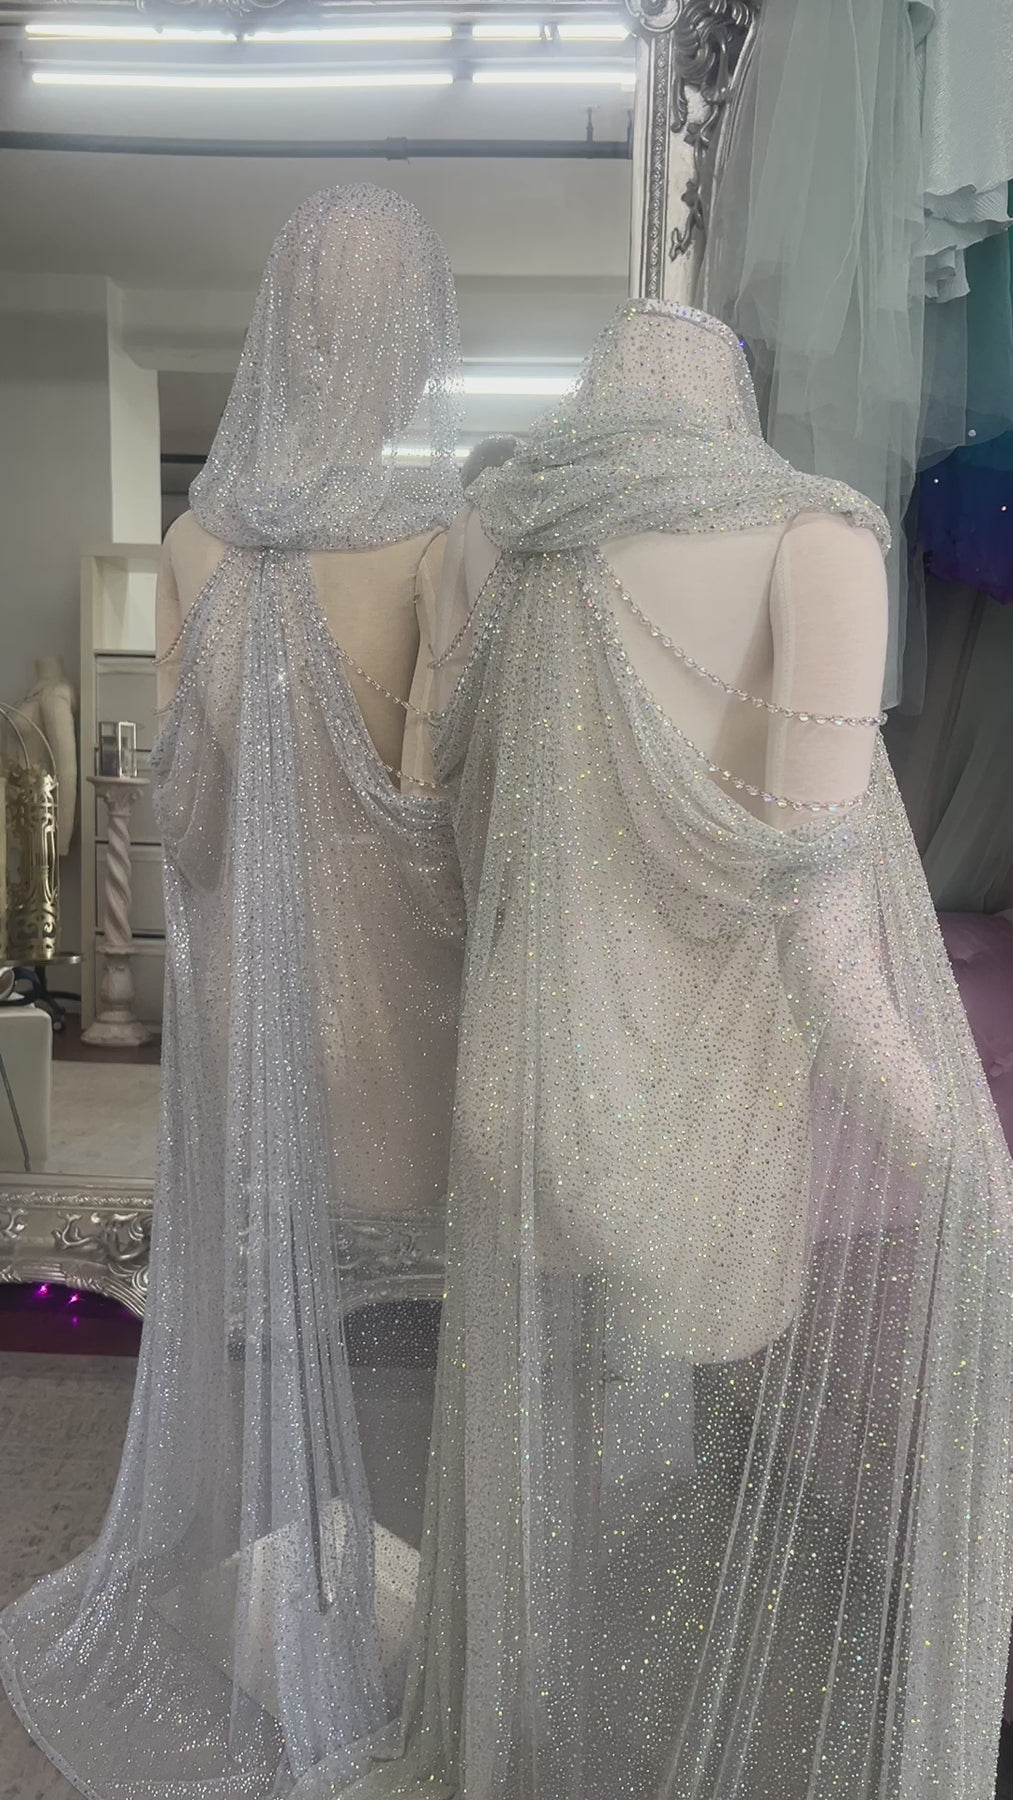
Beaded Bolero with attached Sleeves- Ploy Chiffon sleeves cascade to the floor suspended from a bubble bead bolero. Velvet ribbons wrap and tie around the upper arm.
. A-Line silhouette
. Low Sweeping neckline
. Beaded Bolero with attached Sleeves
. Lace-up back for adjustability
. In good condition, worn twice for photos, small smudges of dirt towards the hem of the skirt and sleeves that can be washed out
. hand wash in cold water, hang to dry
- S I Z I N G - This fits a size xs-s
Corset - Bust 30in- 27in Waist - 24in-30in
Skirt - Waist - Up to 28in
- S H I P P I N G - Ready to ship! For orders in the USA, we use USPS.com or UPS. For orders outside the US, we recommend UPS. (During checkout, you can choose your cost and speed of shipping) Firefly Path is not responsible for delayed, lost, stolen or damaged packages.
When you are notified that your order has been shipped, that message will include your tracking number.
Processing time does not include shipping time. Processing time + Shipping time = When you will receive your order.
- T A X E S / I M P O R T / C U S T O M S . F E E S - We do not offer refunds on custom pieces or pieces from our shop if you refuse customs causing your piece to be shipped back. Please be aware that we are not responsible for researching import costs for your item or any additional import fees incurred when accepting your package. Be sure to research all import fees associated with your location as these are charged separately through the carrier. And as such, are not included in your checkout price.
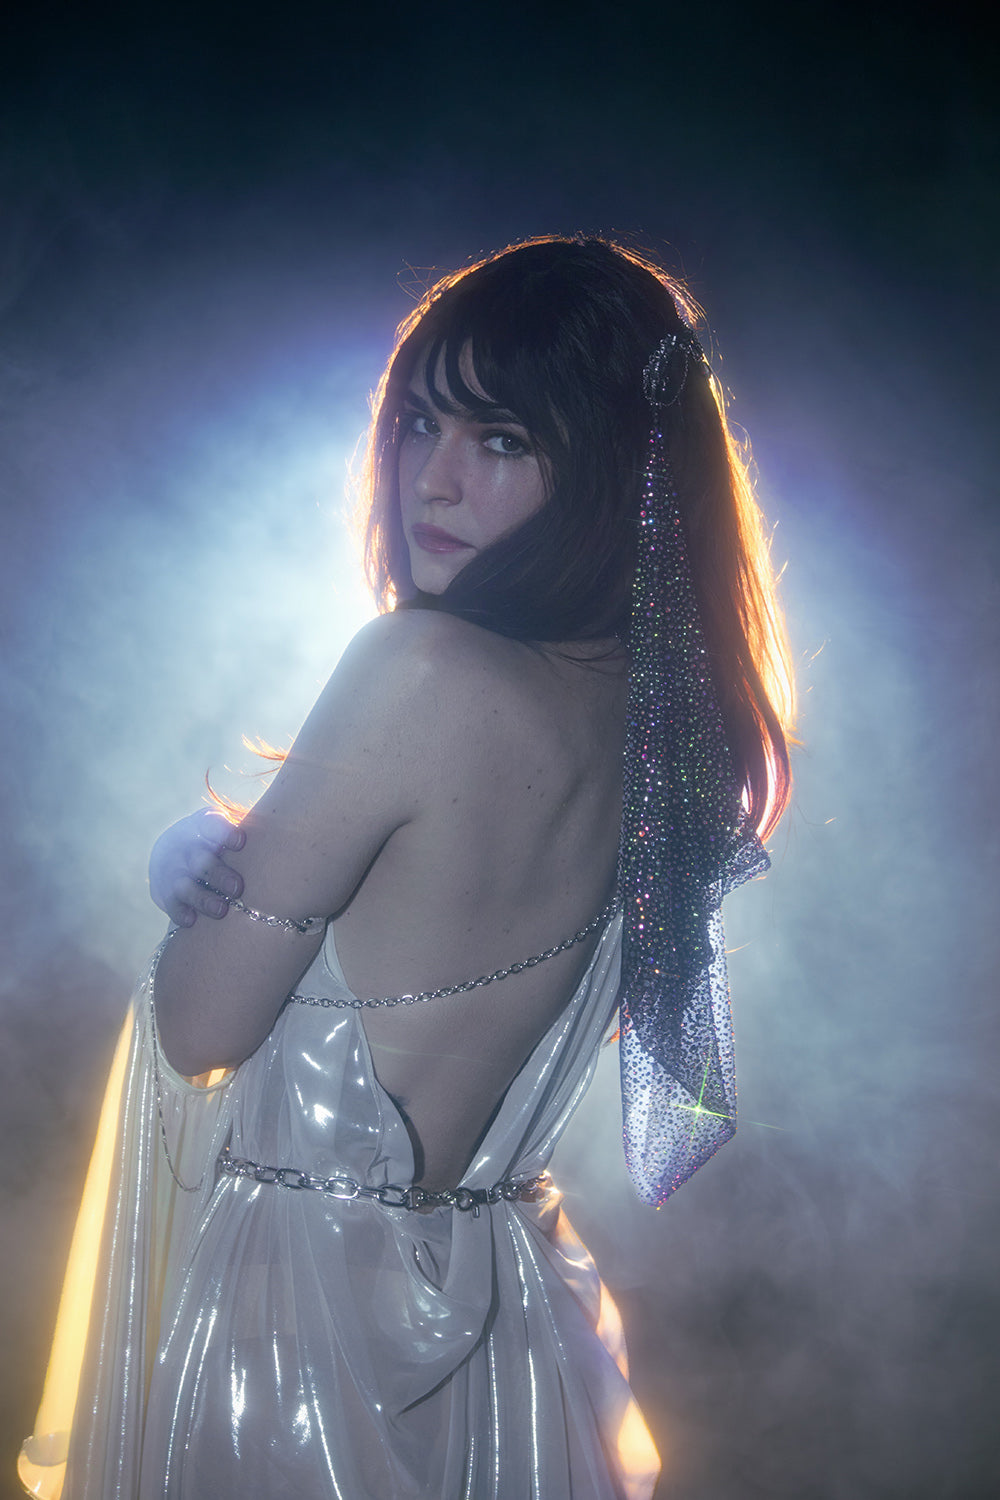
Model – Emma Karla Peet Photography | Model - Elizabeth Elder (https://elizabethelderphotography)
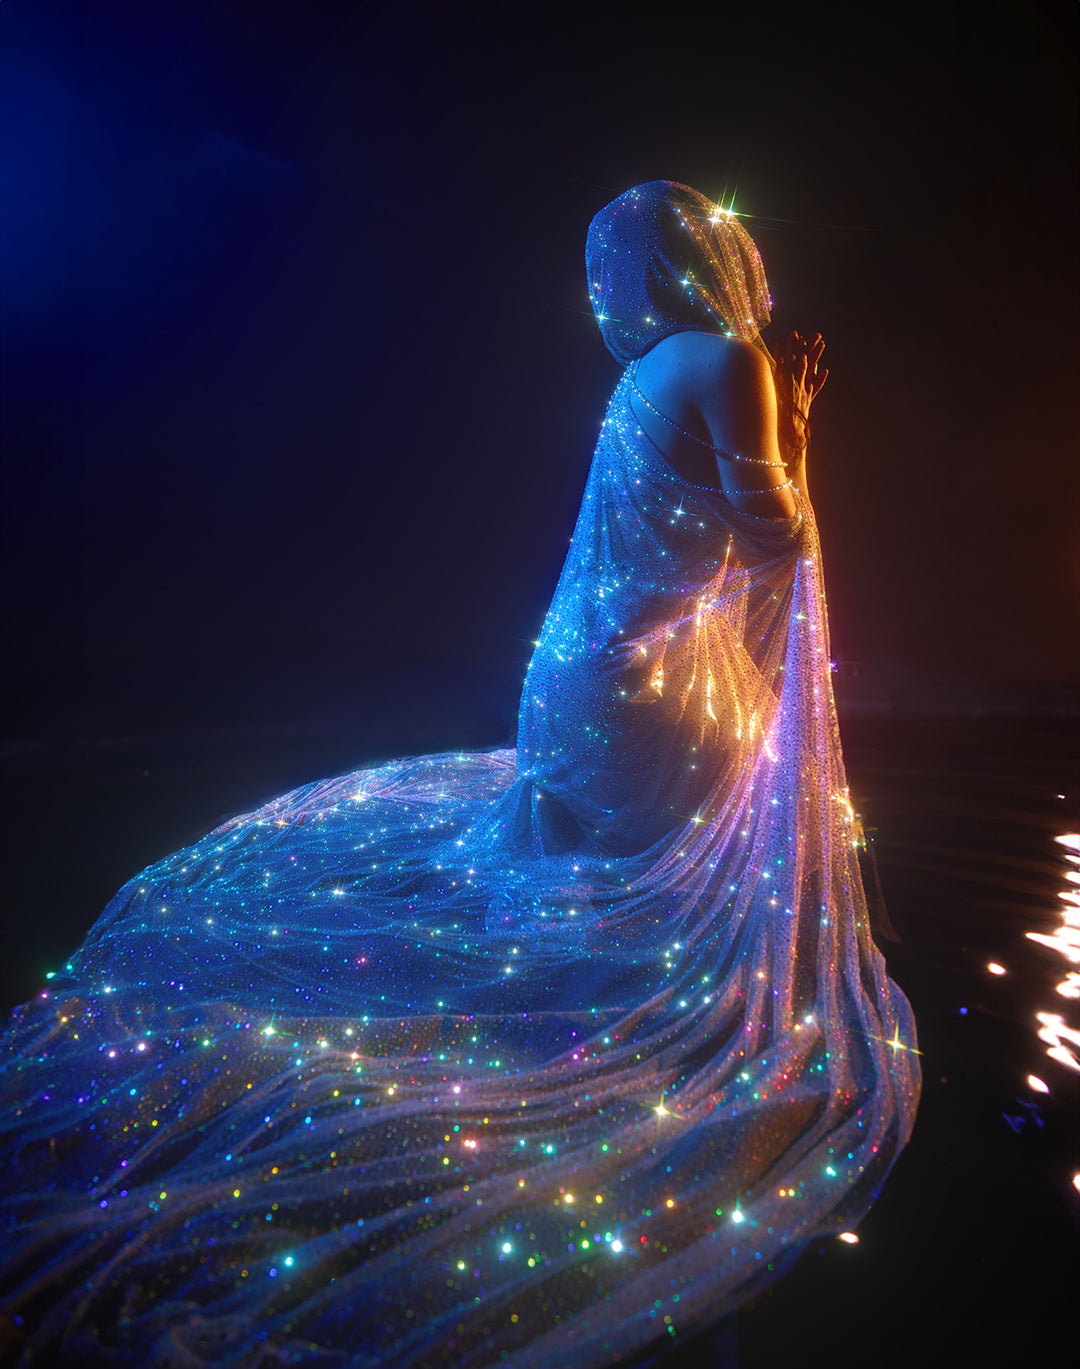
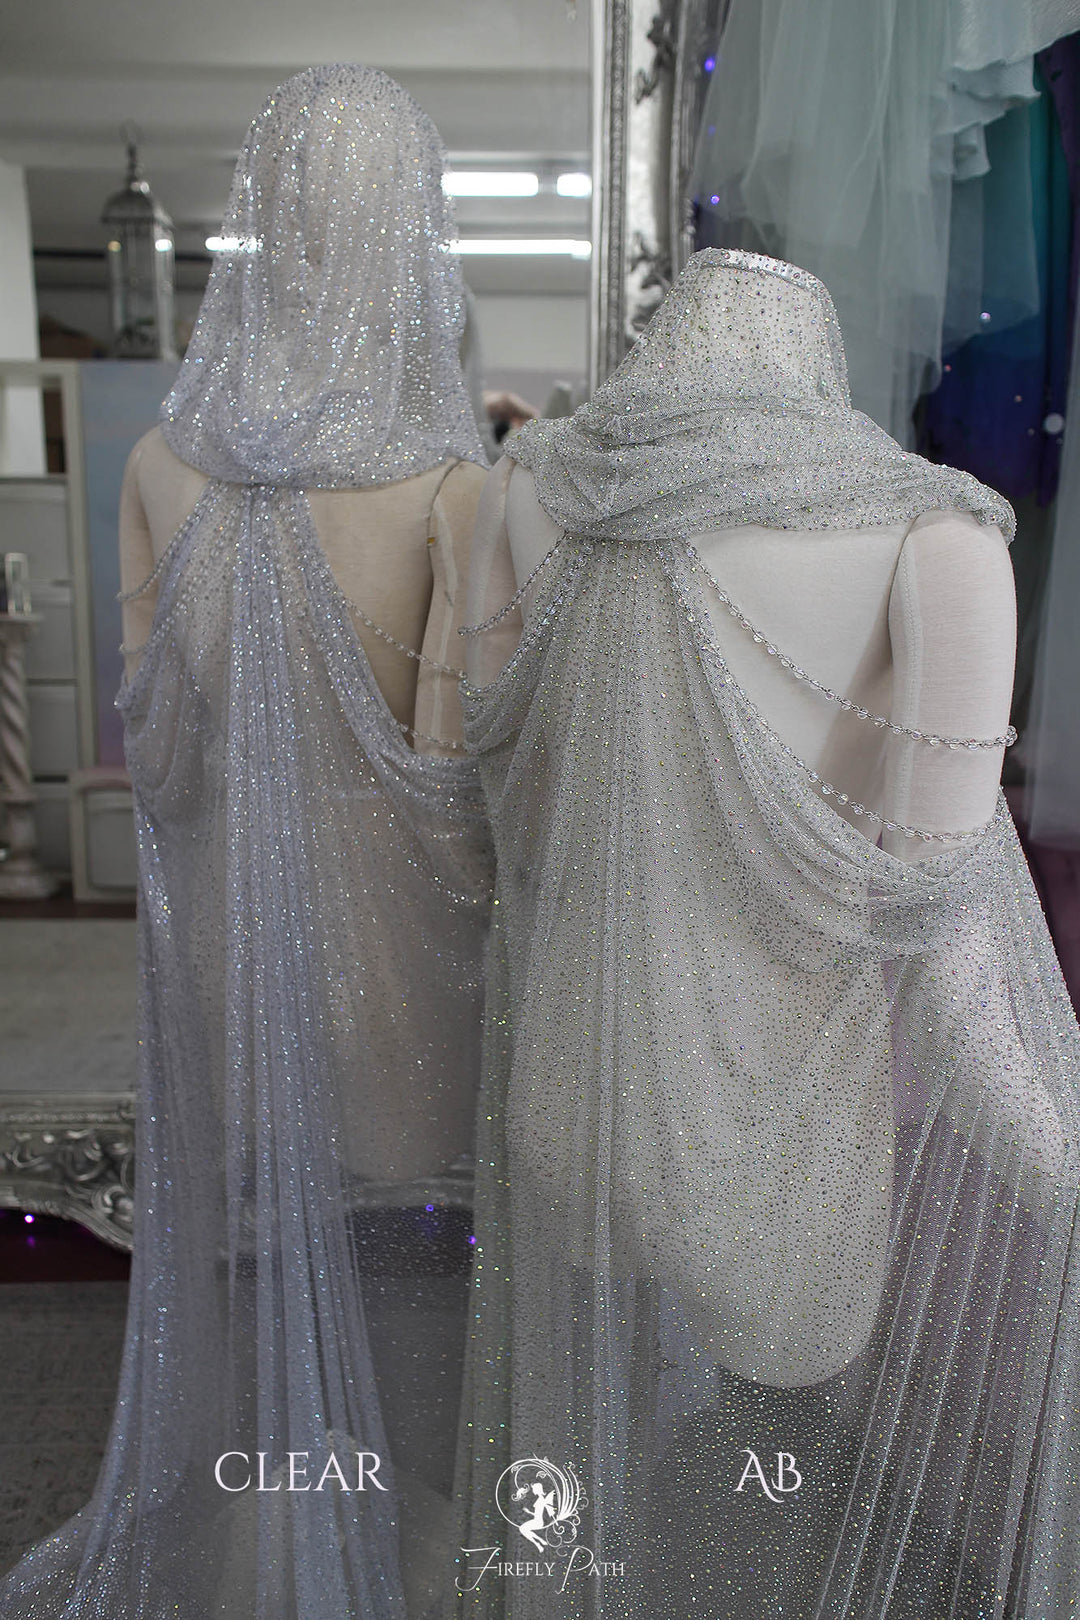
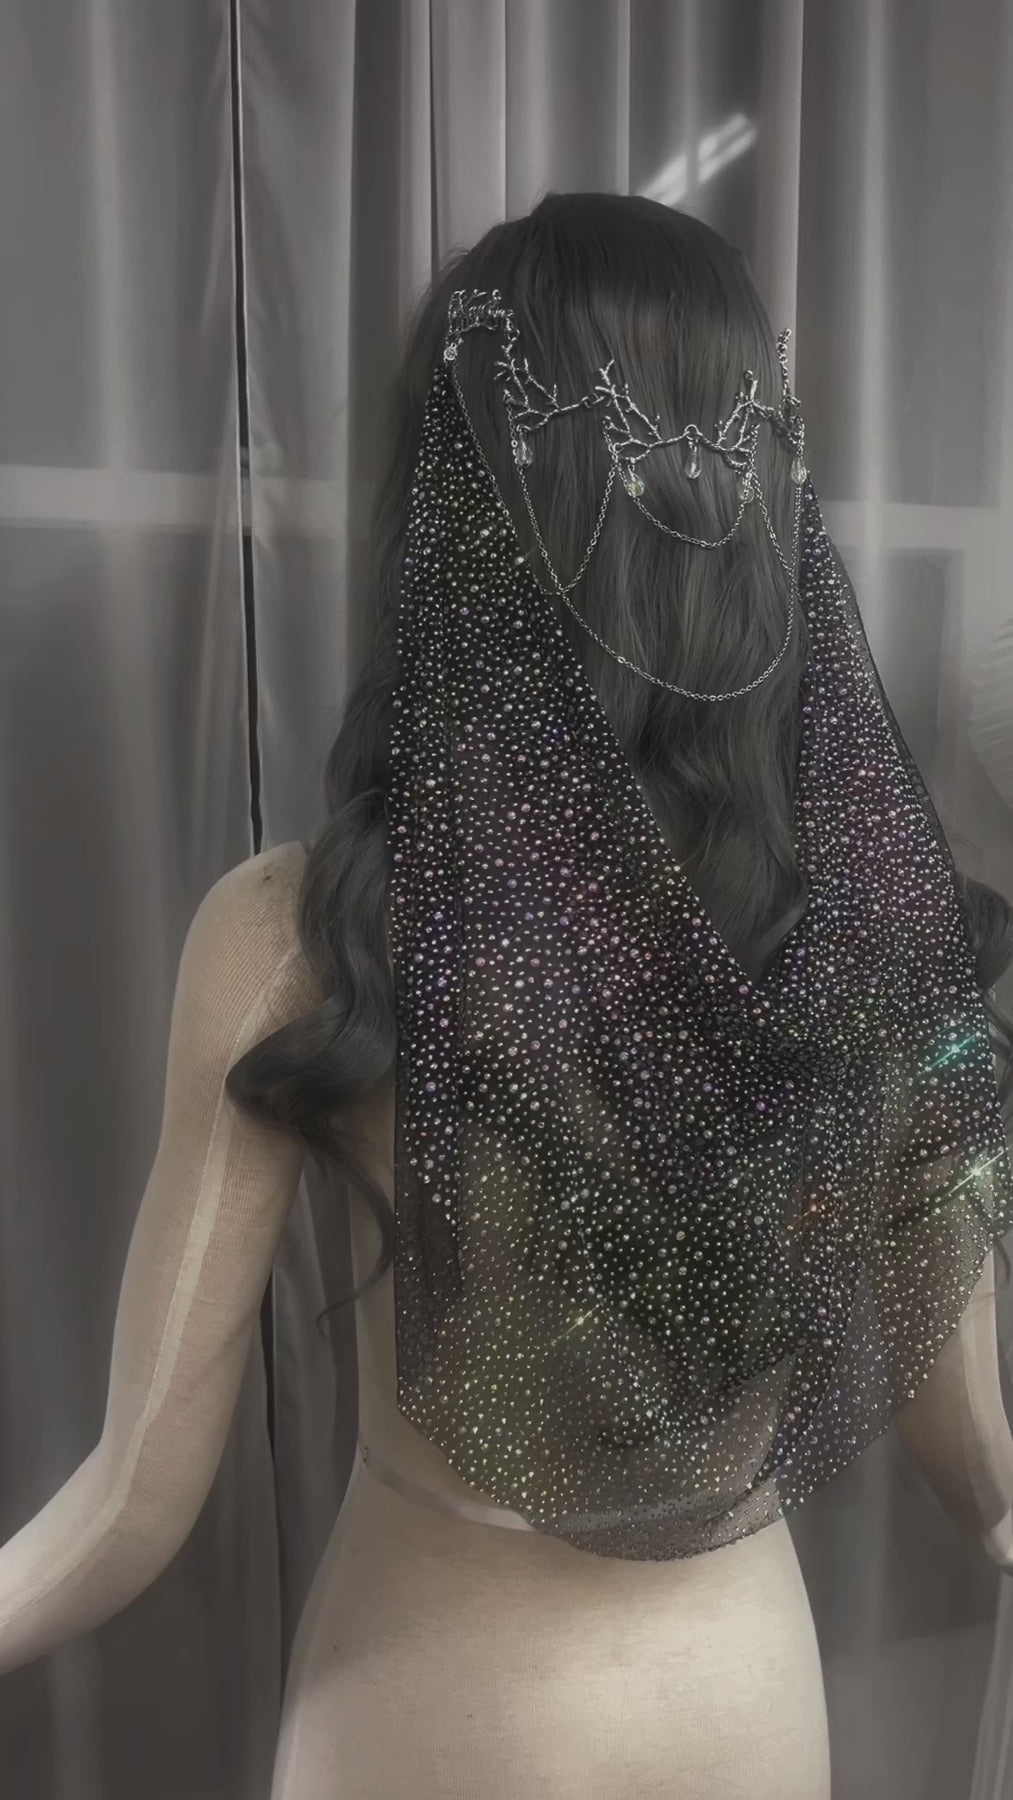
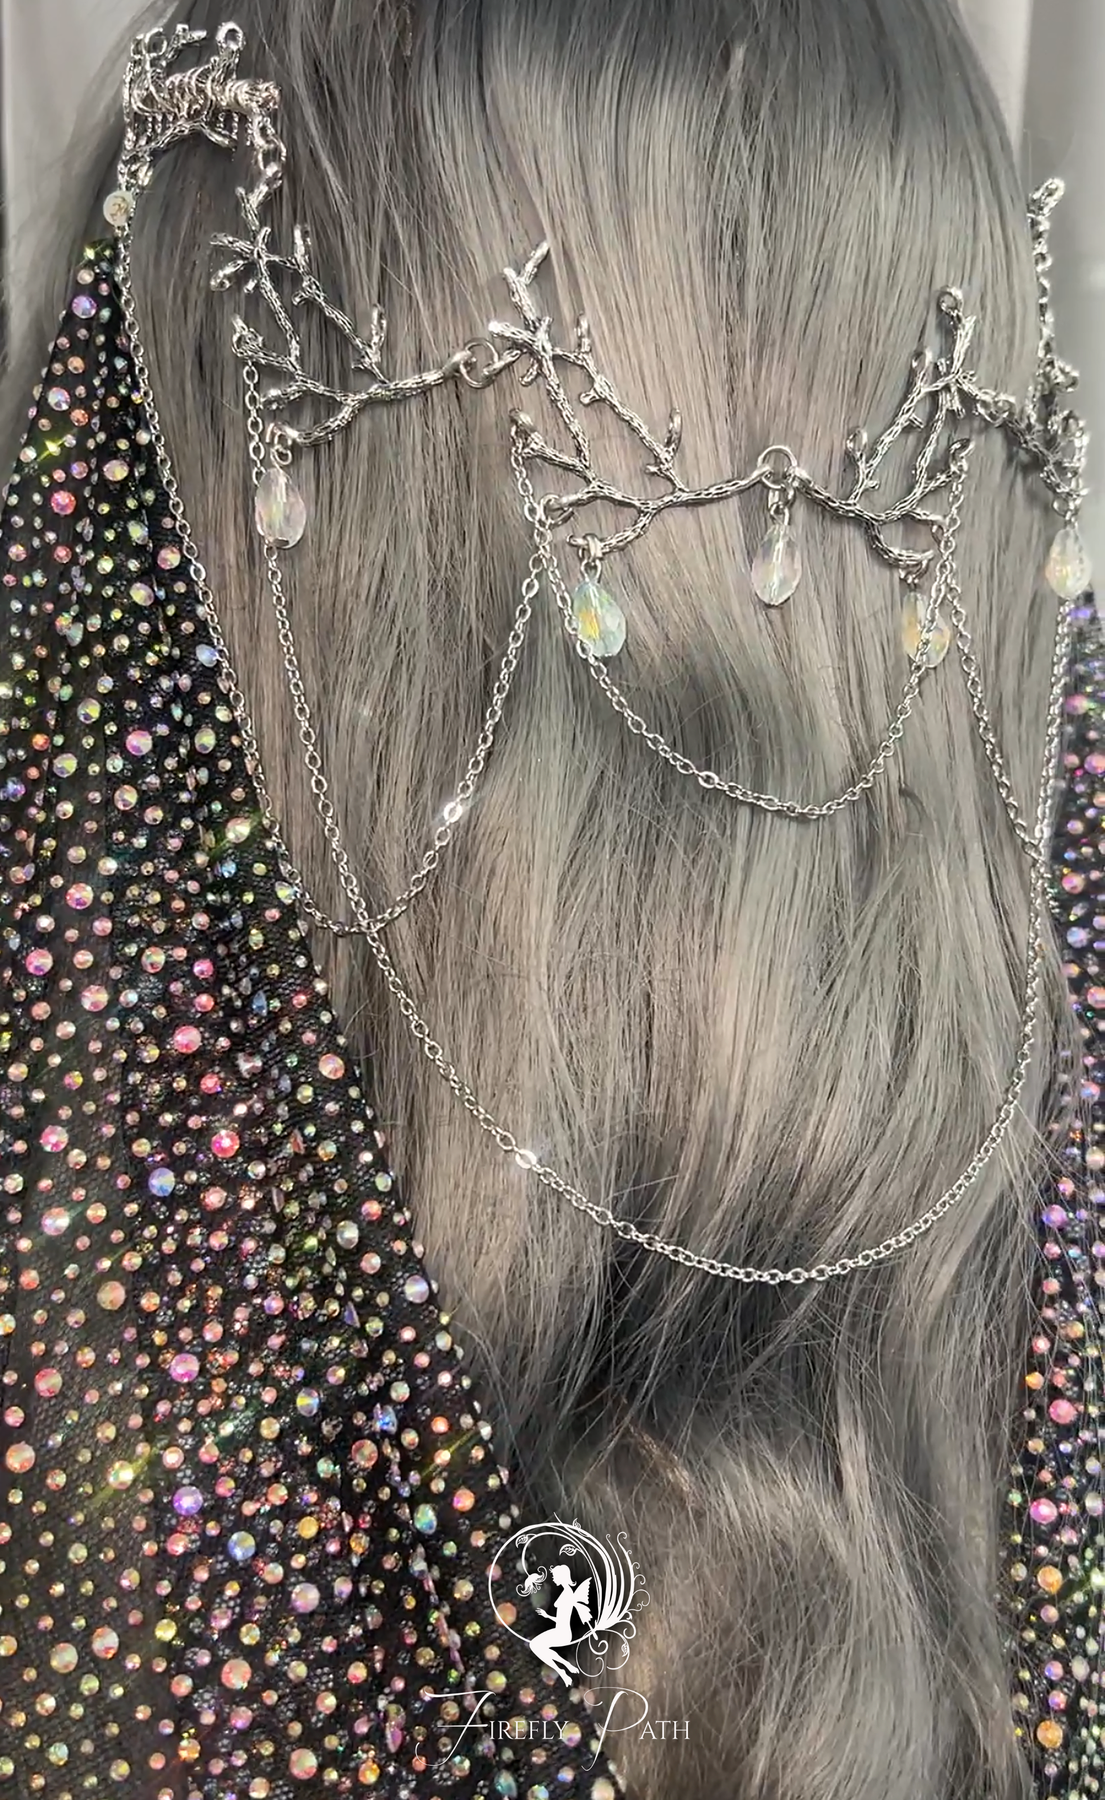
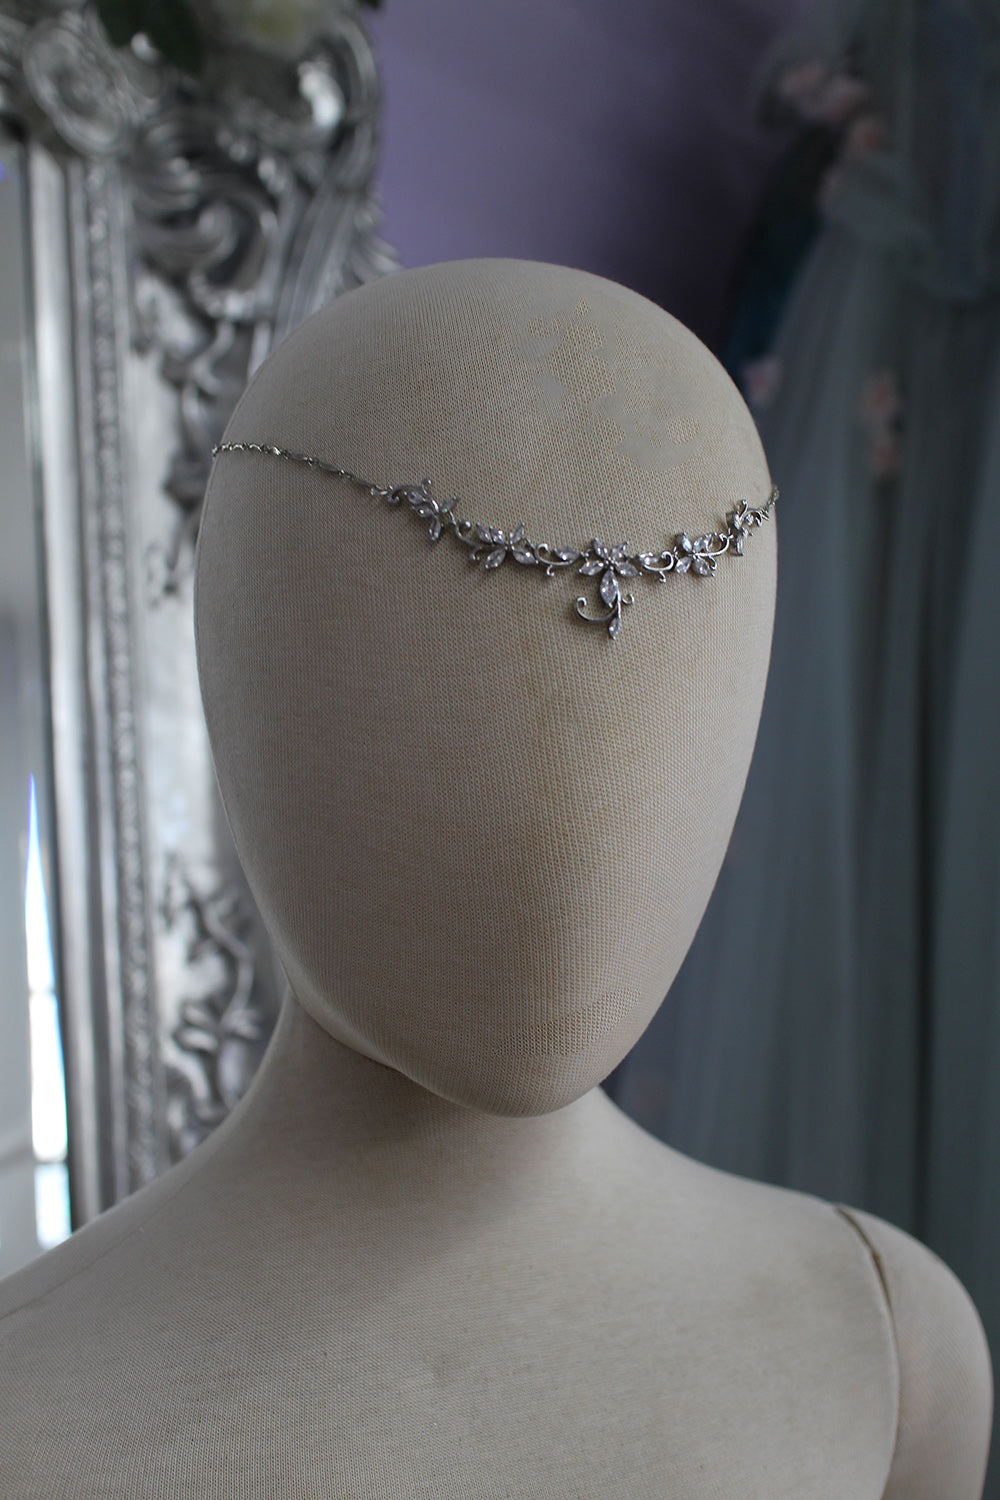
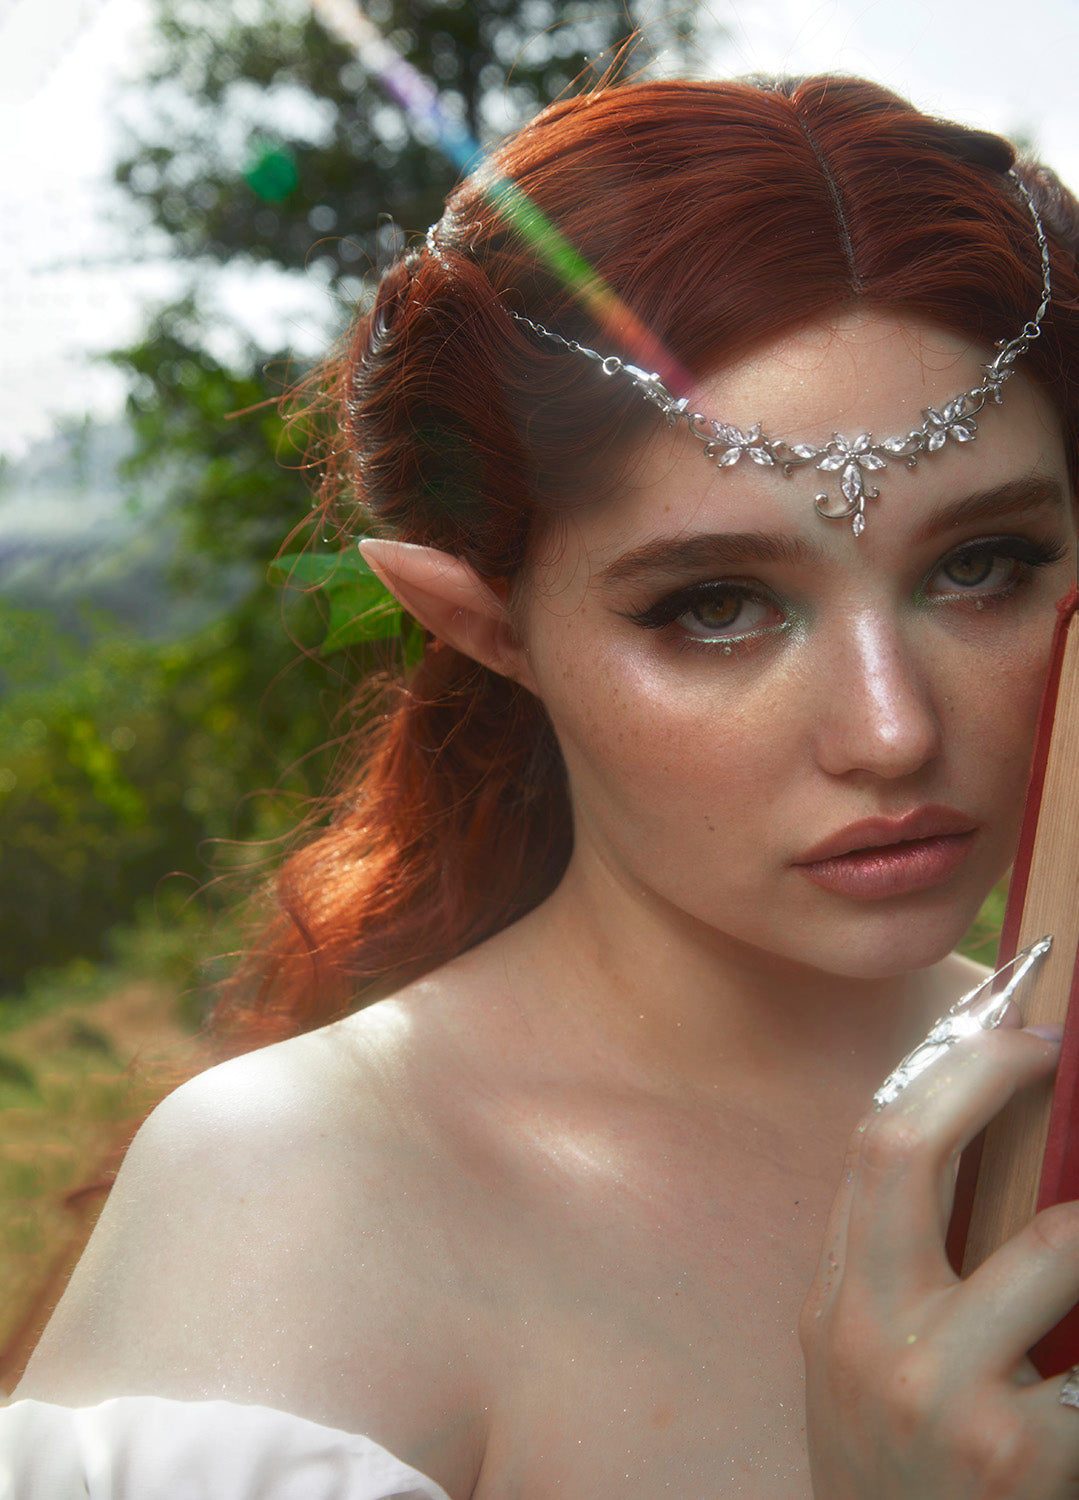
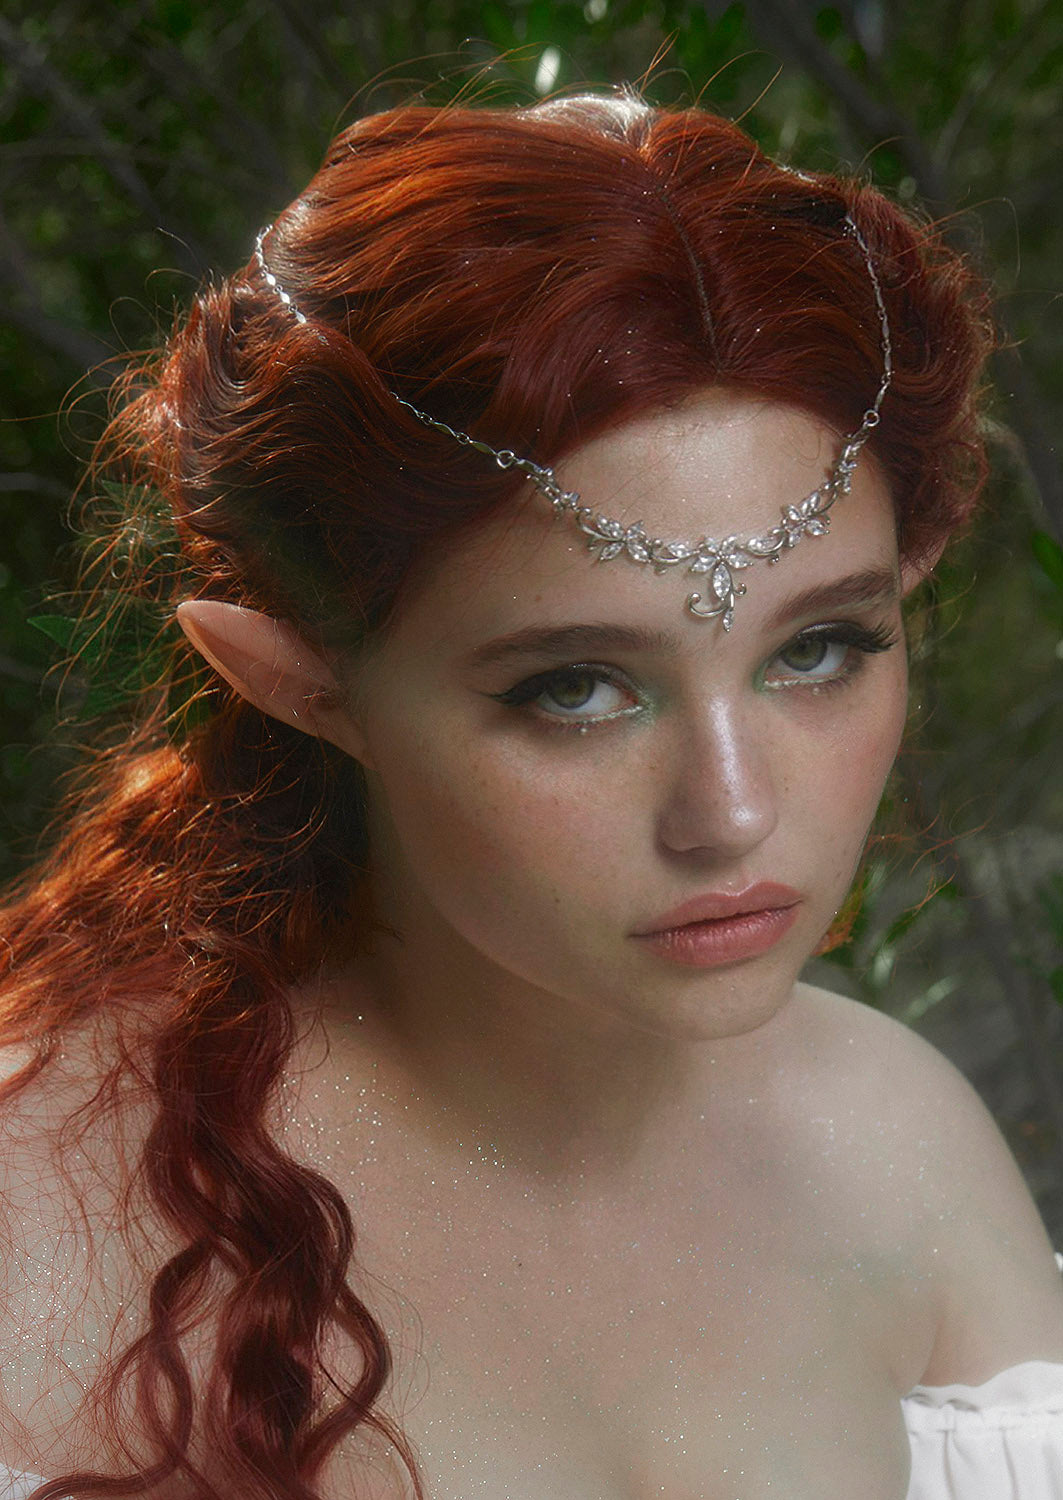
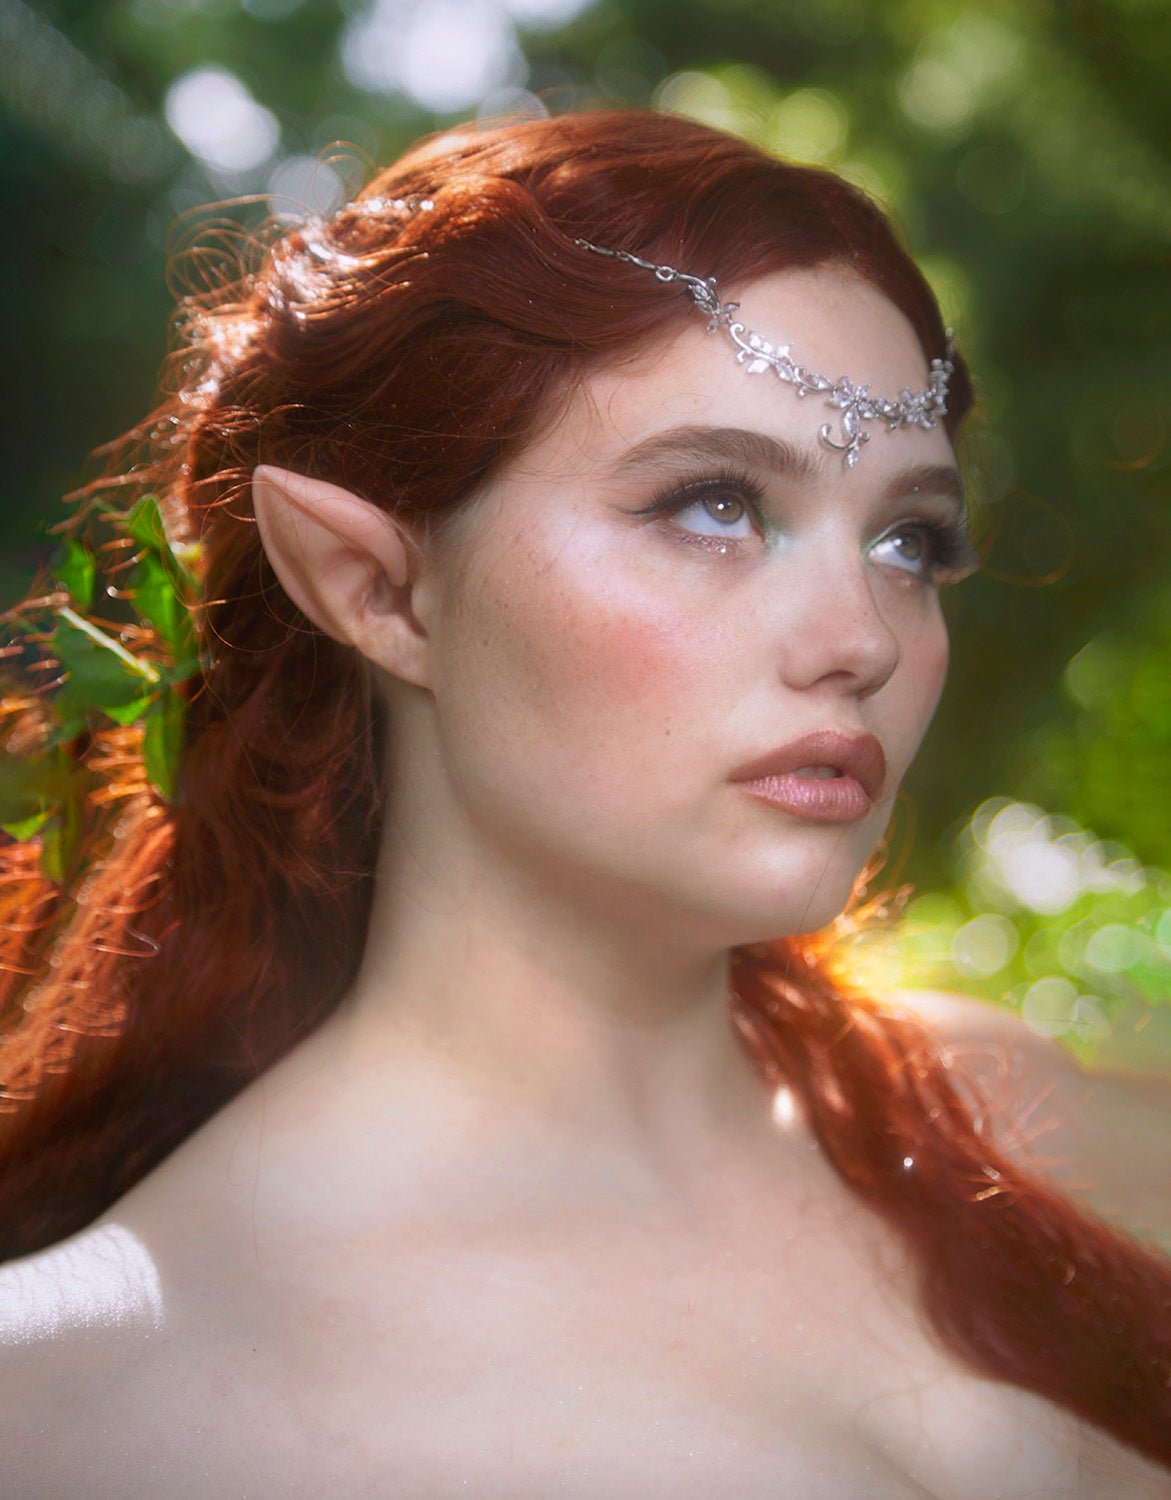
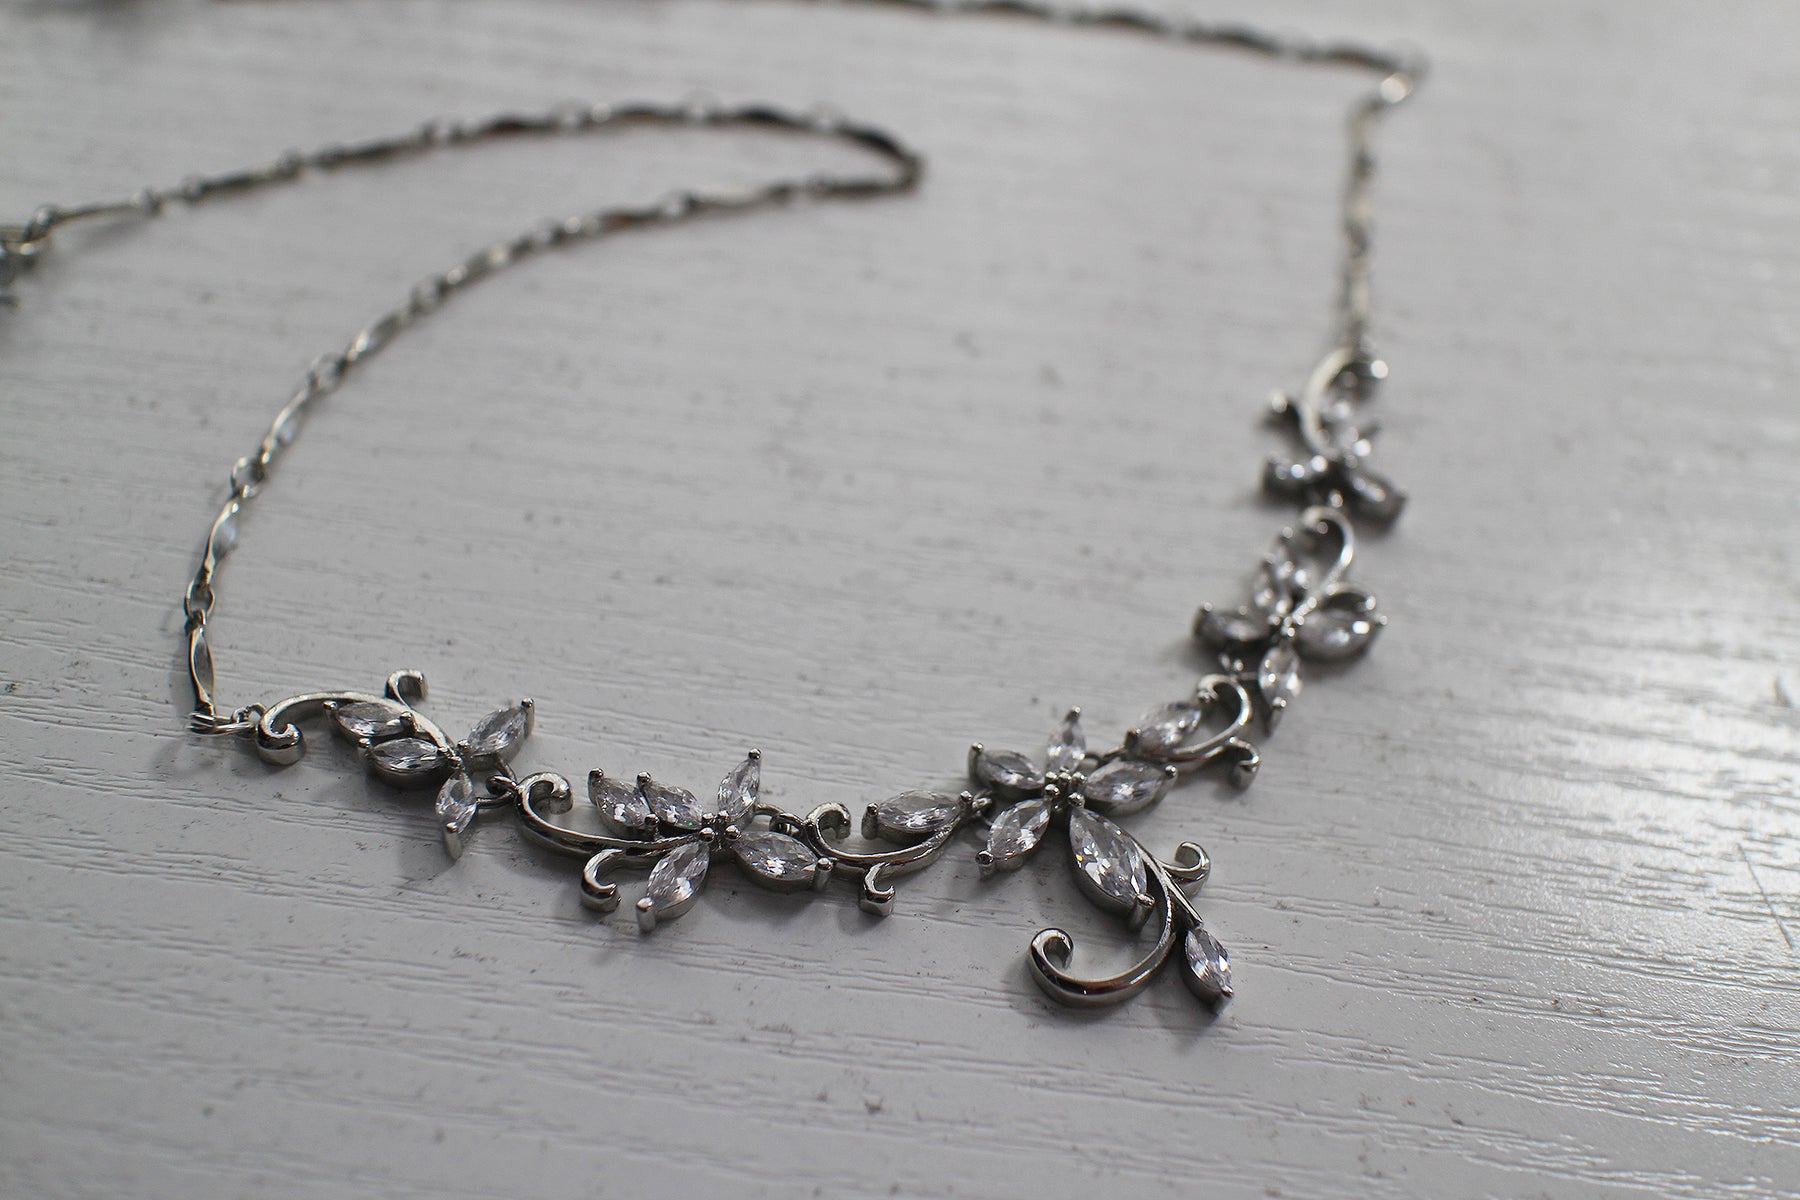
Whether you're attending a grand celebration, communing with nature, or simply seeking to enhance your everyday allure, the Crystal Vine Circlet is the perfect companion. Its adjustable elastic back design ensures a comfortable fit, while its versatility complements any elven ensemble, be it regal robes or ethereal gowns.
Model - Brynne Rosetta MUA: Emily Dimant Model - Emma Karla Peet Photo by - Elizabeth Elder